How to properly partition a hard drive. The best programs for partitioning (partitioning) a hard drive Partition the hdd into partitions windows 10
In this material, we will look in detail at how to partition a disk in Windows 10. But before we begin to study the main issue, I suggest that you first familiarize yourself with the reasons for partitioning, and with the preparation before partitioning an HDD or SSD.
General information and reasons for disk division
A hard drive, divided into partitions, is one physical disk, but in Explorer the user sees divided areas called volumes. There are two types of hard drive partitioning:
- One section. Some PCs contain one partition, for example C, where Windows programs are installed, and user files are stored.
- Several sections. Some computers have two or more partitions, where the OS and applications are stored on one (C), and personal information of the user on the other (D, E and others).
Reasons why you may need to partition a disk:
- There is one partition on the hard drive. Some laptops from the store come with one partition. In this situation, you will probably want to split the disk into several disks to separate Windows from other files.
- Organizing data. For many users, placing information on different volumes is a better way to organize data than on a single partition.
- Data backup and recovery. It takes less time and effort to back up specific information on one partition than to back up the entire disk.
- Multiple OS. Some users have several operating systems on their computer (Windows, Linux), for each of which the user must create its own partition.
- Protection against software failures. If the OS is installed on a separate volume and a serious failure occurs, you may need to reformat the volume. At the same time, your data will remain safe on other sections.
- New HDD, SSD. It is more priority to divide the volume of the new disk into partitions while there is no information on it yet.
Preparations before partitioning a disk
If you have finally decided that you will partition the disk, you need to make some preparations before this procedure. Use these tips:
- Create a backup before partitioning your hard drive. Power failures or volume sector errors may occur, causing data loss.
- Create a bootable USB flash drive.
- Download software and drivers. If you plan to reinstall the OS after dividing it into volumes, then prepare a set of programs and drivers for the correct operation of the PC.
- Download a disk management program. Applications of this type are much more functional than standard tools. There are many such programs on the Internet; below we will consider them in more detail.
Now that you have read the preparatory information, you can start partitioning the disk in Windows 10. Let's look at methods using OS tools and special software.
Disk partitioning using standard tools in the OS itself
The division procedure is done in two ways: through the Disk Management component and Cmd. Let's take a closer look at them.
Method 1: In Run (Open Methods), enter diskmgmt.msc and click OK. As a result, the Disk Management window will open. In the example, partition D is about 265 GB. Let's try to make two volumes out of it. Right-click on the shared disk (D) and select “Shrink Volume” from the menu. Wait until the compression location request is processed.
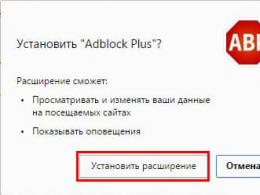
The second line shows how much space can be taken from partition D in MB. Let's assume you need a 30 GB volume. There are about 1024 MB in 1 GB, which means that in the third line we will enter the value 30720. At the same time, in the very last line you can see how many MB will remain for partition D. Having set your values, click “Compress”. ![]()
Now you need to wait until the compression process is completed. The more MB you specify, the longer you have to wait. Then a free area is formed, right-click on it and select “Create simple volume”. 
Next, set the partition size. If you want to use all the cut-off memory, leave the maximum value. Click "Next". 
In the next window, specify the drive letter, for example, G. Click “Next”. 
Now specify formatting options. We left it as is, we just changed the volume label by clicking “Next”. 
Look again at the list of selected parameters. If everything is ok, click “Finish”. 
As a result, the new partition you created will appear in the Disk Management window. Also, the new volume will be available for work in Explorer. 
Method 2. Open Cmd as an administrator (described). After entering each command (construct), press Enter. Enter the command diskpart. Then we print list volume. In Cmd you will see information on all volumes. Opposite the letter of each volume there is a number. Remember the number for the shared disk. For example, for volume C the number is 2.
Select a volume, use a command like select volume X, where X is the volume number. Next, write a volume size compression construct shrink desired=XXXX, where XXXX is the value in MB. Wait until you see a success message. 
Enter list disk, this will display a list of hard drives with numbers. Then enter select disk Y, where Y is the number of the hard drive whose volume was compressed. Use the create partition primary construct to create a volume from free space. Specify the format fs=ntfs quick construction, this will format the new partition in the NTFS file system. After formatting, you need to assign a letter to the partition; this is done with the command assign letter=G, where G is a free letter. Finally, use Exit, then you can close Cmd. By going to Explorer, you will see the created section. 
Disk partitioning when installing OS
You can divide your hard drive into partitions in Windows 10 (this also applies to SSDs) when installing it, but this will lead to data loss. This method is suitable if you have a new PC without information or you have made a full copy of the disk and do not mind losing this data.
Let's assume that you have reached the stage of choosing where to install the OS. Select each partition and click Remove. As a result, you will end up with unallocated space and your data will be deleted. Select an unallocated space by clicking Create. Specify the volume for the system disk in MB (I recommend setting it to more than 70 GB) by clicking “Apply”. 
The installer will ask for permission to create an additional partition for system files. Click OK. As a result, partitions are formed: additional about 500 MB, the main one of your size, unallocated space (remaining space). If you wish, you can continue to divide the unallocated space or create a second partition by specifying the entire remaining size and clicking “Create”.
Format the created partitions. Select each partition and click “Format”; when a warning appears, click OK. Specify the drive where the OS will be located and click “Next” to continue the installation.
Programs for partitioning disks
Specialized software performs not only the partitioning function, but also many other operations on disks that are inaccessible to standard tools. If possible, use these programs. There are even situations when standard tools do not work correctly, then third-party applications come to the rescue. Such programs include:
- Acronis Disk Director;
- Aomei Partition Assistant;
- EaseUS Partition Master;
- MiniTool Partition Wizard;
- Other.
For example, let's partition the disk using Aomei Partition Assistant. This is a free product with wide functionality and Russian language. Do the following:

These are the ways you can partition your hard drive into partitions in Windows 10 (and SSD). The markup is especially relevant for a disk with one volume. We advise you to carry out the procedure with special programs, it is more functional and safer.
Creating, deleting and formatting computer disk partitions is only part of the possibilities hard drive management applications. Today, they make it possible to securely perform operations that previously required data deletion or other mind-boggling combinations.
Many of the tasks performed through the Partition Manager can, in theory, be accomplished using Windows' built-in Disk Management tool. However, it is not as intuitive as the programs discussed here.
A good disk management application consists of several modules. They are used to create, delete and format partitions. Apart from these functions, they also have functions for copying and moving partitions, creating images and backups.
Additional modules support system migration, merging and splitting partitions. Supports various partition schemes, dynamic disks, RAID configurations, various file systems and boot records.
Attention! Whenever you work with hard drive partitions, you need to plan everything carefully, back up your data, and make sure you select the correct hard drive or partition before pressing Enter.
Attention! All operations carried out on partitions are fraught with risks. The editors recommend extreme caution and are not responsible for possible loss of data or other damage incurred by readers.
EaseUS Partition Master Disk Management
One of the most popular programs for managing hard drive partitions in Windows. Ensures the allocation of new partitions without data loss.
Benefits of EaseUS Partition Master
- Easy conversion of partition type, primary to logical and vice versa
- Recovers deleted or non-existent partitions
- Supported hard drive capacity up to 8 TB
Flaws
- Inability to transfer data from HDD to SSD in the free version
License: freeware
Price: free
AOMEI Partition Assistant Disk Management
Also popular. Creates, divides, connects, copies hard drive partitions, changing their size, while saving files. System transfer is possible.
Benefits of AOMEI Partition Assistant
- Convenient wizards for every operation
- Supports all the most popular file systems
- Displays accurate information about supported media
- Allows you to create a bootable CD with the application
License: freeware
Price: free
Disk Management in GParted
A tool for managing computer hard drive partitions. Distributed as an ISO file. Install it on a flash drive or burn it to a CD and start your computer from it.

Benefits of GParted
- Does not require installation and does not take up disk space
- Attractive free offer for companies
- Wide range of partition management capabilities for almost any file system
Flaws
- Mastery takes time
- Only available via Live CD
License: freeware
Price: free
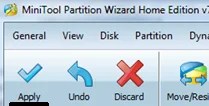
MiniTool Partition Wizard
Performs all operations with hard disk partitions and also hides it. Copying the contents of the disk and changing the file system.

Advantages of MiniTool Partition Wizard
- Lots of tools, including disk cleaning and checking
- Convenient visual wizard for each operation
- Allows you to convert NTFS to FAT32 without formatting, change the disk type from MBR to GPT
License: freeware
Price: free
Active@ Partition Manager
Performs operations on disk partitions. Formats the flash drive in FAT32 and NTFS. Fixes MBR disks. Converts MBR to GPT and vice versa.
Benefits of Active@ Partition Manager
- Disk Imaging Tool
- Convenient wizard for creating and changing partitions
- Built-in boot sector editor, allows you to manually make changes
- Shows S.M.A.R.T data. for hard drives
Flaws
- English only
License: freeware
Price: free
The computer hard drive is a means of storing system and user data in particular. Sometimes, it is necessary to divide information into some large sections to avoid confusion. It is recommended to install the system on one partition, and user files, programs, etc. save to others. When purchasing a new PC, most often the hard drive is not divided into local disks (partitions), so you need to carry out this operation yourself. Let's look at how to properly partition a hard drive. For example, we will use Windows 7, which is the most stable among current versions (Windows 8, 10).
Before you begin the process of partitioning your disk, we recommend that you familiarize yourself with the following tips:
- For the OS, allocate at least 50-60 GB of free space, otherwise you will not see normal system operation. Of course, if you have a hard drive of 100-200 GB, then allocating that much space is too troublesome, but for systems starting from the “seven” you need enough memory.
- It is also better to take care of the path for saving files for the browser and torrent client; it is better to set the path for uploading files for them not on the system drive (by default), but on another more capacious partition. You should also understand that desktop content takes up space on the system disk.
- If you have a hard drive up to 1 TB, divide it into 3 partitions, if from 1 TB to 2 TB, divide it into 4 partitions, and more than 4 TB into 5 partitions. This is explained by the fact that when downloading large files to the hard drive, optimal division will allow it to be written correctly.
- Do not use all available memory on your hard drive. It is necessary to leave some space “in reserve” to restore damaged clusters.
If you follow these tips, you can set up hard drive partitioning once and not worry about it again until you decide to expand the memory on your computer.
How to partition a hard drive in Windows 7?
To partition the hard drive, we will use a standard tool in the Windows operating system. It's called "Disk Management". To open this utility, you need to do the following:
Now let's move on to how to partition a hard drive in Windows 7. The instructions are as follows:

How to partition a hard drive in Windows 8, 10
Using Windows 7 as an example, we looked at the partitioning process. There will be nothing fundamentally new in the “eight” and “ten”, so you can use this procedure for this system as well. The only exception is that we will slightly adjust the tips to complete the task correctly:
- For the system disk, leave (add) at least 70-80 GB of information. Starting with “seven”, the system writes information about the current state to the local disk so that you can use system recovery if necessary. In addition, after many updates (including up to 8.1, 10), large files are formed that are protected by the system;
- Divide the disk into several partitions, do not leave 2 partitions. This will make it more convenient for you to handle files that are recorded on your hard drive, logically structuring them into sections.
How to partition a hard drive in Windows 7, 8, 10 using third-party programs
What to do if you don’t trust the standard tool for working with local disks? We suggest using a third-party application Partition Wizard. This application is free, does not require much space and is stable. Of course, its functionality is far from Acronis Disk Director, but it will be just right for partitioning a hard drive.
So, first, download it and then install it in a convenient location on your computer. When the program is installed, run it and wait until it loads the necessary information about your system and hard drive.
An unallocated partition will be designated as "Unallocated". Right-click on it and click "Create".
When you run this command, you will need to provide the following information in the next window:
- Section title;
- Partition type (for example, logical);
- Drive letter;
- File system type;
- Volume.
Please note that in the case of the program that is built into the system - “Disk Management”, these operations are performed in different windows, but here, for convenience, everything happens in one window. For example, we created a new “Test” section with 400 GB on board. Once created, the file system looks like this:

This process can be repeated as many times as you like until you run out of free unallocated space. Please note that it is very important to leave very little free space so as not to damage the hard drive. To create another new partition, simply repeat the instructions. Don't forget to save your progress using the Apply button.
As you can see, the process of dividing a disk into partitions is not complicated, but very simple if you approach the issue with instructions from our website.
Every owner of a new computer or laptop has to face the need to create several partitions on their hard drive. Ideally, there should be at least two of them: system C and D, which will store the data necessary for the user. Each of them can have its own file system, which will allow you to boot several operating systems from one hard drive and not lose personal files if you need to reformat it.
Step-by-step instructions on how to create a disk for storing data in Windows 10
The easiest way to split the hard drive into logical partitions if you have Windows 10 is to use OS tools and without wasting time searching and installing special utilities. Let's look at how to accomplish this task using built-in applications.
Step 1: Launch Disk Management
This utility has remained unchanged since it was introduced into the Windows 7 system. You can work with it in two ways through:
- "Control Panel";
- "Run" window.
When you select the first option, the utility is launched through the “Start” button. Moving the cursor to it, you need to right-click and select the “Disk Management” line in the list.

The window that opens will contain a list of your physical disks and the logical partitions they consist of.

The second way to call the utility is more efficient. When using it, the “Run” window is activated using the command interpreter using the “Win + R” key combination. Then enter “diskmgmt.msc” into the “Open” line and click the “Ok” button.

As a result, the same window will open as in the first case.
Step 2: Create logical partitions using Disk Manager
The application window, opened using any of the considered methods, displays information about all devices available on the computer for storing digital information.
Advice! The top lines of the list are reserved for the operating system. They store the files used to reset it to its initial state and the bootloader. You cannot touch them during the creation of a new disk.
All connected drives are listed below. From them, you need to select a volume with sufficient free space and, by right-clicking, select the line “Shrink volume” in the window that opens.

This Disk Management Manager feature is designed to create new partitions from existing and working ones, without losing the data stored on them.
In the window that opens, focusing on the capacity of the hard drive and the amount of unallocated space on it, enter the desired size of the volume to be created and activate the “Shrink” button.

After a few minutes, “Unallocated” will appear in the line with the freed area, and its size will be subtracted from the total disk space.

The created disk is marked "Unallocated"
- by placing the cursor on the space allocated for the new disk and right-clicking on it, the user proceeds to selecting the line “Create a simple volume” in the drop-down list;
- if the allocated area is allocated for one partition, then it will occupy all the unused space;
- when dividing it into several parts, the size of the first of them in megabytes is indicated.
Step 3: Formatting the new drive
Working with the "Create Simple Volume Wizard" begins by selecting the size of the new partition.


As a result of the work done, a new partition with its own file system will appear on the computer’s hard drive. This method allows you to divide the hard drive into two or more parts, which depends on the free space on it and the needs of the user.
Sometimes you have to think not only about creating new volumes, but also about increasing the volume of one of the existing ones. To do this, there is an “Extend” function in the Disk Management Manager. But using it, you should not count on being able to resize a partition that takes up all the free space on the physical media.

It allows you to merge previously created volumes in order to return to one of the disks the space previously taken from it. This happens as follows:
- By opening the Disk Management window, select the partition that you decide to merge.
- When you right-click, a drop-down menu appears. In it you need to select the line “Delete volume” and click “Yes” to confirm the operation.
Advice! When using this function, keep in mind that along with the partition, all information on it will be erased. If you need the files stored there, you need to copy them to another disk in advance.

After deleting the selected partition, a box marked “Not allocated” will appear in the Disk Management window.
Now all that remains is to hover the cursor over the disk whose volume it was decided to increase and, by right-clicking, activate the “Expand Volume” command. This action will open the Wizards window. After confirming the size, click the “Next” and “Finish” buttons. The result of expansion will be an increase in disk size due to unallocated space.
Creating a new partition during OS installation
The hard drive of a computer that does not yet have an operating system can be divided into volumes during the installation process.

But using this method involves formatting the hard drive when creating new partitions. Therefore, it is not suitable for drives containing information important to the user.
In this case, creating a disk will consist of the following steps.


Video - How to create a disk on Windows 10
Very often there is a need to create an additional partition on your hard drive. This may be due, for example, to the need to protect certain data (you can encrypt the entire dedicated partition). But it happens on the contrary, you do not have enough space on a physical medium divided into logical partitions, and then you will need to make one out of two and at the same time not lose the data that you store. Today it has become clear that Microsoft has decided to unify all previous developments (Windows 7, Windows 8 and Windows XP) into one Windows 10 system. Sooner or later, most users will switch to this operating system. Therefore, there is no need to describe it for previous versions, but I will tell you how to partition a hard drive into Windows 10 partitions.
Hard disk partitions - how they are arranged
The main goal in allocating logical partitions on the main physical disk is ease of operation and separation, for example, of operating system files from user files. Sometimes you need to be able to boot multiple operating systems from a single hard drive. If there is only one disk or you do not want to mix storage files with operating system files, a logical disk system will help you. Each logical partition can have its own file system.
When a new partition is created, information about it is recorded in a special partition table (in English: partition table). The first sector of the physical hard drive contains the master boot record (MBR). The partition table is part of the master boot record. The MBR allocates 64 bytes for storing information about logical partitions, and each partition occupies 16 bytes in this area. Accordingly, a total of 4 logical drives can be created on one hard drive. This limitation was present at the very beginning when creating and developing the logical structure of disks, but it can be circumvented using special programs called a partition manager
For a better understanding of how to work with logical partitions on a hard drive, using Windows 10 as an example, I will show you how to delete, create, compress and divide into several.
Partition manager in Windows 10
Step 1: To work with disks in Windows 10 there is a special utility called “Disk Management”. You can launch it from the launch bar by pressing the Win+R combination and in the “Open:” field specify diskmgmt.msc and click OK.
Step 2: A faster way is to launch the utility through the “Start” button. Right-click the Start button and select Disk Management from the list.

How to delete and create a hard drive partition
Step 1: In the disk manager, you will see a list of all your physical disks and each logical disk into which they are divided. In my case, the physical disks are Disk 0, Disk 1 and Disk 2. The logical disks are C and G. To delete one of the virtual disks, right-click on it and select “Delete Volume...”.

Step 2: Make sure you are removing the exact drive you want. All data on it will be permanently deleted. Confirm deletion.

Step 3: After deletion, the area that was previously allocated to the disk will be marked as “Unallocated”.
Step 4: If you need to delete all partitions, do the same operation with all logical partitions until the entire disk area is marked as “Unallocated”. My Disk 2 and the unallocated area are the same size.

Step 5: You can only create a new volume from a partition that is marked as “Unallocated”. Right-click on the area to create and select “Create simple volume...” in the context menu list.
Step 6: In the Create Simple Volume Wizard window, specify the required volume size. If you need to create a disk from all available space, specify the maximum capacity. If you specify a smaller size in MB, the manager will create a partition equal to the specified one, and leave the remaining area unallocated. Click Next.

Please indicate the required size
Step 7: Assign a letter to the partition you are creating. The choice is possible only from those available. Click Next.

Select a letter for the partition from the list available
Step 8: Formatting the created partition. You can select without formatting and then the partition will need to be formatted manually separately, or you can select a file system to format. From the drop-down list, select the formatting type, cluster size (it’s better to leave it as default if you don’t know why you need it) and specify the volume label (this will be the name of your partition).

Step 9: Upon completion of creating and formatting the partition, the Volume Creation Wizard will display summary information about the created hard disk partition.

Step 10: A partition created and formatted as NTFS looks like this in the disk manager.

Compression - how to partition a hard drive
Compression in Disk Management Manager is a function of selecting a separate partition to create a new one. Using compression, you can create a new logical disk partition from an already existing and working partition. In this case, the data will not be lost (unless, of course, the size of the remaining part is sufficient for storage).
Step 1: Launch Disk Management Manager as shown in the previous example. On the partition in which you want to allocate an area for a new partition, right-click and select “Shrink Volume...”.

Step 2: In the "Size of compressed space (MB):" field, enter the required amount of space. I specified 350,000 (this is about half the capacity of my entire hard drive. Its size will be 350 GB.

Specify the compression size
Step 3: Once compression is complete, the new and old partitions will look like this. The new partition will be marked as “Not allocated”, and the old one will simply be smaller.
Step 4: On the unallocated partition, right-click and create a simple volume. The previous section explains how to create a volume.

Expansion - how to combine hard drive partitions
In Disk Management, Enhance allows you to increase the capacity of an existing partition by using unused space on another partition. Naturally, it is impossible to expand a partition that occupies the entire area on physical media. In the same way, it is impossible to expand a partition without having a free area on the disk that is marked as “Unallocated”. If you have several physical disks, you can expand the volume of the partition using another partition on the second physical disk.
Step 1: First you need to free up the area for expansion. There are two options for this:
- Compress one of the volumes by biting off the required volume from it, which will then be expanded to a new volume.
- Completely remove one of the existing volumes to expand to a new volume.
I have one unnecessary volume on my disk and I'm deleting it. Right-click on the volume and select “Delete Volume...”. The area of the deleted volume will be marked as "Unallocated" by the system. This is exactly what we need.

Step 2: On the unallocated area, right-click and select "Extend Volume..."

Step 3: In the Extension Wizard, the section will be automatically added to the Extension Selected window. You can add to the same window from those available on the left.

Step 4: When the Extension Wizard completes, click Finish.

Step 5: The new extended volume will look like this.
Hard drive partitioning when installing Windows 10