HDD Regenerator: functionality and use of program capabilities. How to use HDD Regenerator to check your hard drive The regenerator is working
Hello, today we will talk about how to use the HDD Regenerotor program, how it works and what it is all about. So, let's move on to the instructions...
The software product is intended for testing and repairing hard drives, restoring their operation if this does not happen entirely correctly. able to cope even in the most difficult cases. The probability of this is more than fifty percent.
How the program works with data recovery on a hard drive
Pulses in the form of high and low level signals are generated and methodically sent to the damaged surface of the hard drive area. As a result of these influences, a process of magnetization reversal of the disk occurs. This process assists in the restoration of sectors that become inoperative due to incorrect disk magnetization processes.
Correction of system errors on the hard drive occurs without affecting user information. As a result, the data on the disk will not be affected in any way and will not be damaged.
Download program HDD Regenerator it is quite possible in the free version - distribution of the software product is completely free (can be easily found on the official website or on).
Most popular versions:
- 2011;
- 2015;
- 2016.
After we have downloaded the software to our computer, we run the file in the archive with the name “ Read me" It should be read and accepted as instructions for use, which describes the software installation process. In the same archive you can find a patch with a serial number (key) and a localization code (rus).

Instructions for working with the HDD Regenerator program
After the installation process of the program is completed, an icon with a logo will appear on the desktop HDD Regenerator. Double-clicking on the icon will launch the program.
A window appears on the computer monitor where you will be asked to scan the hard drive, as well as create a bootable USB flash drive or disk.

Let's move on to the restoration work: you need to click on the image with the button " Regeneration" The button is located on the top panel of tabs, then in the list that drops down, click – “Run process for”.
The next window prompts you to select to begin restoring it. It can be visualized by such quantitative parameters as capacity and number of clusters.

Button press " Start"("Start Process") causes a window to appear with an information message about the use of disk space by software already running on the electronic device. To continue the recovery process, you must end all open software and processes.

When the window shown below appears, click on the “ Retry».
This will cause a window typical of DOS to appear on the monitor screen.
- Carry out diagnostics of the hard drive and continue restoration work;
- Perform diagnostic operations and display data upon completion;
- Restore certain sectors of the hard drive;
- Display statistics.

After a normal scan, the program will offer to correct the errors found, select item “1”.

In the next window, indicate which sector you want to start scanning the disk from; we recommend starting from “0”.

So let's get down to business. Let's look at how to use the hdd regenerator 2011 program. First, download and install the program. Before using the program, disable all programs that operate on the hard drive. For a more comfortable use of the program, you can download and install the crack. It should be accompanied by instructions on how to use hdd regenerator 2011 rus, which will help you install the crack without any problems. We strongly recommend that you strictly follow the instructions, otherwise uninterrupted operation of the hdd regenerator program is not guaranteed.
After starting the program, a dialog box appears. In order to check and restore the HDD in the system shell, you need to click the top button “Click here to restore defective disk sectors directly from under Windows (XP/Vista/7).” In the window that appears, select the disk partitions that need to be restored. 
Sometimes the system notifies that the SATA HDD is operating in ANCI mode. To fix this, reboot the computer through the BIOS and select SATA IDE as the mode. Often this cannot be done, and a dialog box constantly pops up during the scan. Select the “Cancel” button, a command line console appears with 4 items:
- Calculation and regeneration of bad sectors and partitions.
- Full disk scan with/without data recovery
- Software version.
- Information about the progress of the regenerator program.
- Select item 2 and Start, the HDD checking process has begun.
Please note that restoring a hard drive in this way does not always bring excellent results. What to do in this case?
A bootable flash drive will help us.
To work, you will need a flash drive with a capacity of at least 1 GB. Having launched the hdd regenerator program, select “Create a bootable USB flash drive” and wait until it is formatted and boot data appears on it. Reboot the computer. In this case, you need to go into the BIOS and select the priority for loading the OS via a USB flash drive.
A DOS window appears. In it you need to select sections for diagnostics and regeneration. Having selected the required one, click Start. The process has begun.
To interrupt the scan, you need to press “Esc”, but it is unknown what the results will be. Therefore, it is best to wait for the process to complete.
If the HDD has suffered significant damage, then the hdd regenerator will “slow down” when processing sectors, and the operating time may extend for several hours. Then you have only one option - buy a new HDD and transfer onto it the information that still remains thanks to the hdd regenerator 2011 program.
The hard drive (HDD) of a personal computer is the most vulnerable device, since its design uses many mechanisms through which data is read. However, due to such advantages over integrated memory units as speed and the ability to format without losing clusters, HDDs are still used in PC architecture. During intensive work over many years, mechanical damage to the hard drive is often observed, which can lead to the loss of some information.
How to restore the HDD?
The main reason for incorrect HDD operation is “broken” sectors, the reading of which is not possible. Often, PC owners, when their hard drive fails, try to “reanimate” them themselves, which can lead to even more dire consequences, and specialized information recovery services require fairly high payments for their services.
It should be noted that in some cases we are not talking about restoring the functionality of the HDD at all, because only the information contained on the hard drive is important. For these reasons, the only sure way to access lost data is specialized software.
In this article, we will look at the HDD Regenerator program, which is often used for professional purposes by many services. The main difference between HDD Regenerator and many similar programs is its low-level operating algorithm, which allows, through integration into the DOS environment, to gain access not only to the HDD itself, but also to monitor and restore sectors and disk memory cells, as well as participate in monitoring and control of hard drive mechanisms using hardware methods.
For these reasons, HDD Regenerator actually restores “broken” sectors, preserving the information that was stored in them, and does not demagnetize and remove them from the general array. Initially, we need to download and install HDD Regenerator on a PC. In order to describe in more detail the process of working of the program for hard drive recovery, we will look at the functionality of the software through the Windows interface.
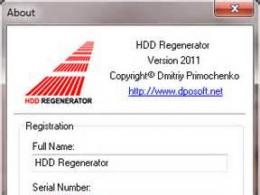
So, after installing and launching HDD Regenerator, a dialog box appears in front of us.
HDD Regenerator works directly in OS Windows.
To check and restore the HDD in the system shell, click on the top line shown in the photo. A window will open for you to select the hard drive partitions that need to be restored.
Sometimes a warning appears that your HDD controller SATA works in mode ANCI. To fix this error, you need to reboot through the BIOS and set the operating mode to SATA IDE.
Remember! When using this program, you must disable all applications that access the hard drive during operation (antivirus software, search indexing, etc.).
It often happens that this cannot be done, as is clearly demonstrated by the dialog box that constantly appears during the verification process.

In order to avoid such messages, click the button " Cancel“, as a result of which the Command Line console appears in front of us, where four items are indicated.

1. Diagnostics and scanning of “broken” sectors and partitions.
2. Full HDD scan with/without data recovery.
3. Software version.
4. Information about the results of HDD Regenerator.
As an example, press the key 2 And Enter and monitor the progress of the hard drive check.
It is worth noting that HDD recovery using this method does not allow for complex hard drive repair, and is therefore very ineffective in some cases. How can I restore the operation of my computer's hard drive?
HDD recovery via bootable USB flash drive
To do this, you need flash memory with a capacity of at least 1 GB. When starting HDD Regenerator, click on the item “ Create a bootable USB flash drive“And wait until the data on it is formatted and the boot data is placed. After this, the program will offer to restart the PC, which is what we do.
During the process of rebooting the PC, you need to go into the BIOS and set the priority for loading OS Windows through the bootable flash card!
After this, a DOS window will appear in front of us, in which we will be asked to select partitions for analysis and recovery.

Select the required directory and click Enter. All. The process has started and now we can only wait for the results.
Remember that you can stop the scanning process by pressing the Esc key, however, in this case no one guarantees correct results, so you should wait until the full recovery process is completed.
If the HDD is significantly damaged, the program will “freeze” while processing a particular sector, and the duration of the program can be several hours. In this case, there is nothing left to do but purchase a new HDD and copy onto it some of the information that was recovered using HDD Regenerator.
Being the most fragile element of a computer, the hard drive (HDD) stores all your information. But sometimes it turns out that “broken” sectors form on the hard drive. Therefore, every owner of a PC or laptop should know how to use Regenerator. It is this program (hard disk recovery software) that allows you to restore a damaged hard drive.
Using a special method of reversing the magnetization of an unreadable sector, HDD Regenerator is able to restore rather than hide “broken” sectors. This feature of the program allows you to restore a damaged hard disk (program to restore the hard disk). To successfully work with the program, use a special boot disk/flash drive, which is created after starting the program. How to work with HDD Regenerator is absolutely clear: the interface is intuitive.
Main features of HDD Regenerator
- It has the ability to detect and fix bad sectors.
- The program is able to ignore the file system, scanning the disk at the physical level, which allows it to scan any file system, also with unpartitioned and unformatted hard drives.
- Has the ability to work “directly”, i.e. act directly from the OS (WinXP and older).
- It has the ability to create bootable disks and flash drives.
It is better to use the program when booting your computer from a flash drive that was created after installing HDD Regenerator. However, it makes sense to try restoring the hard drive through the Windows interface.
HDD Regenerator - how to use
After downloading the archive with the Regenerator program, open it and run the file HDD.Regenerator.v2011.exe. When installation is completed on the desktop, a program shortcut will appear and the Internet page will open at the same time. You can close the page, but launch the shortcut. A program window will open.
To start scanning and recovering your hard drive directly in your operating system, you need to click the top button. The corresponding disk selection window will appear.
Moving the cursor to the bottom of the window, select the disk and click “Start process”. The window that appears will contain information about a warning that the disk is now in use, and will suggest that in order for the program to work correctly, close all programs on the computer that use the hard disk.
Therefore, find programs that “run on the hard drive” (for example, antivirus, etc.) and disable them. After that, click "Repeat". If you receive a warning again, it means something was missed. For example, Windows 7's fast search indexing is capable of using the drive you intend to scan and repair. Be that as it may, even if you were unable to disable all programs or services using the hard drive, you can still continue to use the recovery tool by clicking “Cancel”.
In the command line console that opens, the following items are written:
- Scanning and viewing bad sectors.
- Scanning (followed by recovery / without recovery).
- Viewing the version.
- View scanning statistics.
Select the number you require on the keyboard and press Enter. If it is, for example, the number 2, then the scanning work will begin, and at the bottom of the window you can see the number of bad sectors ("broken" sectors) - designated "B", and the number of recovered sectors (recovered) - R.
Hi all! Nowadays there are practically no people who do not use a computer. Each of us, to the best of our abilities and abilities, uses this device, which has already become part of the usual course of our lives. But, like any other equipment, a computer can break down. Based on this, we are divided into people who only use a computer, and in case of a breakdown, they resort to the services of specialists. Others try to repair themselves. For this category of inquisitive people, today’s issue contains a review of one interesting program.
One of the important problems associated with computer failure is the unstable operation of the hard drive. Why do I say unstable, if it completely fails to work, the problem is solved mainly by purchasing a new one. Of course, it’s unpleasant when your HDD suddenly starts acting up. It stores a lot of necessary information and the loss can be irreparable.
What causes HDD failure? The most common option is the so-called “broken” sectors, which cannot be read. Various utilities are used to check and restore them.
One of the most successful in terms of restoring bad sectors without losing information is the HDD Regenerator program. True, it is in English, but you can figure it out. You can also find a Russian version of the program. The developer claims that the operating principle of the program is based on a special algorithm for reversing bad sectors, while the data structure on the disk remains unchanged.

The recovery program can be launched directly from Windows. In this mode you can also check the S.M.A.R.T of the disk. However, to fully work on correcting errors, it needs to be loaded from DOS from a flash drive or disk, and run
How to use the HDD Regenerator program from Windows?
So, download the program from any source available to you and install it on your computer. The program interface is also good because it allows you to easily write the program to a flash drive or disk without using additional programs - all the tools are in the interface. After this, the program window will open. Next we have to do the following operations. In the English version this window looks like this:

In the Russian version it’s like this:

Let's start with running the program under OS Windows. Select the topmost, first window (highlighted in red in the English version, arrow in Russian).
Before you begin, disable all running applications, including your antivirus program.
After selecting the hard drive check menu, a window will open for selecting hard drive partitions required for recovery. After you have selected the required partition for recovery, the scan will begin. However, before this, the following message may appear telling you to restart your computer. In this example, a message states that the disk is busy, and the system offers to run a scan from a bootable flash drive or disk.

Click on the cancel button and you will see a window appear asking you to select a disk (if you have more than one hard drive):

In later versions, after selecting a disk, we get a menu with the following items:

Let's translate this into Russian:
- Diagnostics and scanning of “broken” sectors and partitions. Broken sectors will be restored;
- Full HDD scan with/without data recovery;
- Reverses magnetization of all sectors in a row, including undamaged ones;
- Information about the results of HDD Regenerator (statistics by sector).
Select the first item and start checking.

To immediately cure the disk, select the item highlighted in red. The treatment process will begin:

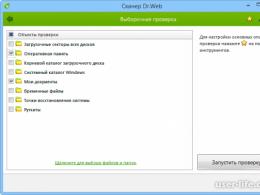
The test results are displayed on the screen, the program shows everything clearly:

The recovery process can take quite a long time. Modern hard drives are quite capacious. To restore a disk completely, you need to purchase a licensed program, because if you come across an unlicensed one, it will only check the first sector.
How to burn HDD regenerator to a flash drive or disk
If you are going to work with the program via a flash drive, then you need a medium of at least 1 GB. It also happens that sometimes flash drives may not boot on some laptops. In this case, you can burn a bootable CD. We launch the program and see a familiar window:

Here we select the second window (highlighted in red). The program will format the media and install boot files on it, after which the computer will restart.
Setting up BIOS to run HDD Regenerator from DOS
Now you need to configure your computer so that it boots the next time you turn it on from a flash drive. It's easy. We insert the flash drive into the computer and reboot it. If you press the key when restarting the computer F9 or most often F12- you can call the boot menu:

As soon as you see this window, click F12, you will be taken to the menu for selecting the device from which you need to boot:

On computers with UEFI BIOS, it is also possible to boot the computer from a flash drive, but here you first need to enter the BIOS by pressing the Del or (F2) key.

After which you also need to select the desired flash drive from the list:

On laptops, in order for the flash drive to boot like a hard drive, sometimes you need to additionally disable the UEFI boot mode (or Secure boot):

Another important point - on many modern motherboard models, in order for the program to see your hard drive, you must first switch operating modes AHCI V IDE. The hard drive operating mode was previously carried out through the interface IDE. With the advent of faster devices on the SATA bus, a corresponding new mode has appeared. For such programs, you need software switching to the mode IDE. On laptops this setting is easy to find:

In UEFI BIOS, the settings window looks different and is located differently, but the essence is the same:

A DOS window will open, where you will need to select disks for analysis and recovery. Everything is done in the same way as we did before. After completion, a statistics window awaits us:

In principle, there is nothing complicated when using the program. To see this clearly, you can watch the video
Video about how the HDD Regenerator program works
Personally, this program has helped me out many times. But I’ll say right away that it won’t improve S.M.A.R.T. It is intended to eliminate relatively minor damage. By the way, in combination with Victoria, it restored the functionality of some disks. First I went through one program, then another. The main thing was to save the data. See you!