How to install Camtasia Studio? And where can I download it? Camtasia studio is not installed.
Good day, dear visitor. This tutorial will tell you in detail how to install the Camtasia Studio program, and of course we will consider where to download it officially.
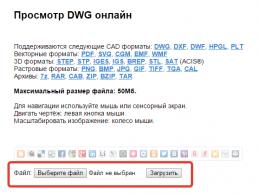
Anyone who wants to from their laptop or computer screen will have to. This program is a powerful tool for creating so-called screencasts(video from the monitor screen), as well as editing the footage.
This is what the program itself looks like:
Where to download Camtasia Studio?
This program can be downloaded from the official website:
http://www.techsmith.com/camtasia.html
On the right there is a FREE TRIAL button, and since the program is paid, we can download a trial version. In terms of functions, it is exactly the same, it’s just that there is a period of 30 days when we can use the program absolutely free of charge, and then either buy it or delete it.


To download the 30 day trial, we need to enter our email address and click the Download Trial button.

After that, specify the location on the computer to save the program and wait until it is downloaded. Camtasia Studio weighs a lot, so you have to be patient.

Install Camtasia Studio
Now, to install Camtasia Studio, let's look at the steps we need to go through. First of all, double-click the downloaded file.

In the window that opens, we need to select English. Russian, unfortunately, no.

Further, basically in all windows, we will need to click OK, Next or Next. Well, this is the standard installation type. It’s only worth saying if you don’t have it installed on your computer at the moment Microsoft .NET Framework 4, then it will be automatically installed along with Camtasia Studio, as it is needed for the program to work correctly. In general, I showed the whole process in the pictures, and indicated everything with arrows:


After installing Camtasia Studio once completed, you can launch it from the shortcut on your desktop and start recording video from the screen.

But since this version is trial, every time we start the program, we will see a window with the number of days that we can still use this program. If after 30 days you do not buy the program, then it will most likely stop working.
I hope you figured out how to download and install Camtasia Studio, and in the next lesson we will look at how to record video from the screen in this program.
Hello dear reader. I dedicate this article to this very topic - how to download and install the program video recording from Camtasia studio 8 monitor screen, because she herself faced some problems, for the solution of which she did not find information on the Internet. And I really wanted to have a program, in view of its more advanced capabilities when creating videos compared to .
Where can I find a program that records video from the monitor screen?
You can download the archive with Camtasia studio 8.
Enjoy! Moreover, it is completely without advertising and for free. If I honestly found it hard to find a working version, and even in Russian.
How to install camtasia studio 8?
And we do everything as it is written there.
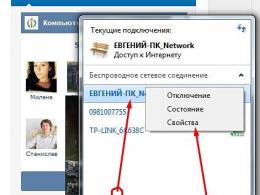
- We turn off the Internet (although I forgot, it seemed to have passed, everything worked out).
- Making changes to the hosts file. This must be done so that the manufacturer’s website cannot see the installed Camtasia studio 8 program. Otherwise, the program simply will not work.
Where to find?Very simple. In the menu Start → Computer → Drive C → Windows → Sistem32 → dravers → etc → hosts.
What's next?Open it with notepad and paste the information you need. We save and ... .. Try it, maybe you can do it, I didn’t succeed. The system began to swear and say that administrator rights are needed to change the file. It's cool that I found a few videos on YouTube and all the commentators said yes, you need administrator rights, I can't do it right now, I already have it.
The fact is that I own a personal laptop (and you, probably, too) and am part-time administrator, but the first time I did not succeed.
What to do?
First. Go back here Start Menu → Computer → C Drive → Windows → Sistem32 → dravers. Then, by right-clicking, select - Properties and remove the read-only box in the attributes. Click apply. Don't be afraid to agree that you are the admin and have the right to make this change.
Second.In the hosts file, we make the necessary change and save it, for example, to the desktop or somewhere else according to your desire. Now we transfer this text file to the etc folder. I personally renamed the old file and saved it here. Suddenly something goes wrong.
Third . Now we need to convert the text file to the desired format. I hope you are displaying file extensions. If not, then you need to go to Control Panel → Appearance → Folder Options → View. Uncheck the box next to Hide registered file extensions. Apply, ok.
Now it remains just to erase the .txt extension. Attention - together with a dot.
Save, everything is ready!
- Install CamtasiaStudio8.0.4 Installer.exe. We agree with everything there, when asked to register whether you have a license or get a 30-day version, select I have a license and enter the name and key right now. They are also in the Recommendation.txt file.
- Install CamtasiaStudio8.0.4 Russifier.exe in the folder with CamtasiaStudio8.0.4! We also agree with everything, I recommend that when offering what exactly to Russify, choose everything that is possible.
- When you first start the Camtasia studio 8 program, there will most likely be several error messages. Pay no attention to them.
As you can see, installing a program for recording video from the Camtasia studio 8 monitor screen is not so difficult if you know what to do.
P.S. A little brain training
There are 50 circles on the table. Each circle is white on one side and black on the other. Initially, all circles are white side up. Next, you close your eyes and 10 of them are randomly turned over to you. How, without opening your eyes, divide the circles into two piles so that each of them has the same number of black circles. With your eyes closed, you can flip any number of circles in any pile.
2014-05-19T08:18:49+00:00 Hope For YouTube Soft and just usefulcamtasia studio 8, video recording from the monitor screenHello dear reader. I dedicate this article to this very topic - how to download and install the video recording program from the Camtasia studio 8 monitor screen, because I myself encountered some problems for which I did not find information on the Internet. And I really wanted to have a program, in view of its more advanced capabilities with ...
Nadezhda Trofimova [email protected] Administrator Blog siteYou may also be interested in:

Useful resources for YouTube channel owners

How to add an image to a group description
Hello dear reader of my blog. Currently, almost everyone has their own VKontakte account. Many create groups for themselves. Someone for personal self-realization, but ...

computer accelerator program
Hello dear readers of my blog. This article is about the computer accelerator program. I remind you that very often I write on my blog what I have already done or am interested in ...
How to embed youtube video in wordpress site
This article describes some of the tricks on how to embed a youtube video on a website. It seems to be wrong to embed a youtube video on a wordpress site...
Creating videos, multimedia presentations is considered to be quite a difficult job. If we were taught the basics of computer literacy at school, in computer science classes, then to work with graphics, sound and video, as a rule, you have to attend expensive courses.
It should also be noted that Mac OS users are much more fortunate than Windows owners: they have a wider selection of programs, including free ones, for working with video - ScreenFlow, Screenflick, iShowU. Similar applications for Windows can be listed on the fingers, among them Camtasia Studio takes, perhaps, the first place.
Camtasia Studio is the most functional and at the same time quite easy to learn tool. You can download a trial version that works for 30 days. The price of the product is $299, the license for educational purposes (Education Pricing) will cost much less - $179.
In this lesson, we will show you how to create your own video presentation, screencast and save the result on your hard drive or publish it on the Internet.
Procedure
Getting to know the system requirements
Compare your computer configuration with the minimum requirements of Camtasia Studio. If they are not "in your favor", the video processing process will hardly be stable and comfortable.
So, the minimum system requirements are:
- OS Microsoft Windows XP SP3, Windows Vista or Windows 7;
- Microsoft DirectX 9 or later;
- Dual core processor;
- 2 GB RAM;
- 2 GB on the system drive where Camtasia Studio will be installed;
- Screen resolution 1024×768 or higher;
- Windows-compatible sound card, microphone and speakers.
The last point of requirements is optional. However, if you plan to record voice, you will need any kind of microphone, not necessarily a professional one.
Determine the theme of the video
Before you start recording, think carefully about what you want to get as a result. Once you define the "plot", it's easier to record a video without having to resort to complex editing and lengthy editing, cutting out unnecessary scenes and adding missing elements due to the fact that you changed your intentions several times. It doesn't matter if it's a technical video or a full-fledged work of art - the essence is the same.
Recording video
While there is no need to open Camtasia Studio 8, the package includes a tool for recording video from desktop. Open Recorder (Start | All Programs | TechSmith - Camtasia Recorder 8). Go to the "Recorder" settings ("Tools | Options").
General tab
In the "Capture" section, to improve performance, you can deactivate the "Capture layered windows" option, as well as "Disable Aero during capture". As a format (section "Saving | Record to"), it is better to leave .camrec.
Difference between formats:
- camrec: this allows you to edit the mouse cursor after recording the video, add markers, and control built-in Camtasia features such as SmartFocus;
- avi: The video will be saved on the fly in a playable format, saving a lot of time (especially if you make videos that do not require editing in haste). Please note that choosing this format will "hit" performance.
Specify the location of the temporary folder "Temporary folder", 2 GB should be reserved for it on the disk (see the minimum system requirements above).
Input tab
Select the TechSmith Codec 2 codec in the “Video Settings” settings (“Video” settings section). By clicking the “Configure…” button, you can use the slider to set the video quality.
By default, Camtasia sets the microphone as the recording device. Despite this, in the "Audio" settings, check by the indicator that the microphone is turned on and responds to sound. In "Audio Settings ..." check the quality settings: as a rule, the initial settings are set to the minimum, but "48000 Hz, 320 kbps Stereo" will be just right.
Hotkeys tab
It is not necessary to change the hotkey settings. But it is important to familiarize yourself with them in order to know what to press or, conversely, not to accidentally press during recording.
Workflow Tab
If you don't want to always see the window with a countdown to start recording, you can turn it off by unchecking the "Record screen after starting capture" option.
Choose an area for recording
When recording, you can capture both the entire screen ("Full screen", that is, according to the size of your monitor), and a specific region (drop-down menu next to the "custom" button). You can select the appropriate mode on the “Recorder” toolbar in the “Select area” section. Among other things, you can freely move the recording area, resize using the squares on the edges. The active recording area has a bright background, the inactive area is darkened. Be careful when setting manual options and make sure the padlock icon on the "Lock" button is closed, otherwise the video will be blurry and, as a result, unplayable.
Setting up the microphone
If you plan to voice over video, make sure that the microphone is active and that the recording level is set correctly.
Tip: it's better not to overdo it and set the volume a little less than necessary. In extreme cases, the sound of the recording can be pulled up a little, but wheezing and distortion will no longer be removed. The most acceptable volume level will correspond to the middle of the “Audio Input” scale and the green indicator with normal pronunciation, without yellow and red shades. You can adjust the volume using the slider.

In "Recorded inputs" it will be quite appropriate to activate the webcam, if available, by switching from "Webcam off" to "On". Of course, the camera must be recognized by the operating system, in case of an error, install the latest drivers and check the settings ("Tools | Options | Inputs | Webcam").
Microphone recording tips:
- Use a USB microphone, as TechSmith claims it is more convenient than an analog microphone connected to a sound card. As practice has shown, the best option would be a headset slightly more expensive than $ 20 of any well-known brand.
- Avoid recording in noisy places. However, a noise-canceling headset will eliminate the possible problem.
- Do a little test before starting a clean recording: say something in a calm tone into the microphone in recording mode. If your ear picks up hiss or similar distortion, move the microphone away or adjust the microphone volume and down side.
- Background music (in addition to purely aesthetic function) will help smooth out the noise of the microphone, "smooth out" the change in volume level.
Screencast recording
Press the "rec" button to start recording.
There are two ways to record: using a pause, record a continuous file, or make each episode a separate file. The choice is entirely yours.
The recording process can be paused and resumed by pressing the "F9" key. An alternative option is to open Camtasia Recorder and click "Stop" but then you will have to cut that piece of video while editing.
Completely stop recording - "F10". In the future, you can view the recording in the preview window ("Recorder's Preview") and select one of the options for further action:
- Go to editing the video in Camtasia Studio (click "Save and Edit" and specify the location to save the file).
- Publish the video without editing ("Produce").
- Delete the record ("Delete") and record the failed fragment again ("rec").
Video Recording Tips:
- Record video in high resolution, save the final file in a smaller one if you use smart focus (SmartFocus). Increasing the original resolution looks unprofitable.
- Record snippets longer than 30 seconds: Camtasia optimizes long snippets, for short clips you'll have to set the pan animation and zoom yourself.
- Try not to move the cursor while commenting, don't move it too fast.
- When scrolling, try to use the mouse wheel rather than clicking the scrollbar slider with the cursor, as SmartFocus will zoom in unnecessarily.
Specify video dimensions
Once you have recorded a video and clicked the "Save and Edit" button, Camtasia will prompt you to specify the resolution of the video in the "Editing Demensions" window.
To ensure the best quality of the video, we advise you to specify "Recording Demensions", that is, the original dimensions when recording, otherwise specify the specified proportions, making sure that the "Keep aspect ratio" option is checked.

Editing Videos on the Timeline
Conventionally, the Camtasia Studio interface can be divided into 3 parts: timeline (Timeline), preview window (Preview window) and library (Library).

Video editing is carried out on the Timeline, where you can freely drag and drop elements for editing. To add a new material, go to the File | Import media…" or drag it from the file manager to the timeline, here referred to as the Clip Bin. From the Clip Bin, in turn, it is easy to drag the file to the Timeline or select "Add to Timeline" from the context menu.
In addition to the ruler with a timeline, Timeline is made on tracks (tracks, tracks). There can be an unlimited number of tracks, you can use them at your discretion: move materials within one track, from one to another. In order not to accidentally move already arranged materials, simply lock the track (the lock icon on the left edge of the track).
To zoom in, use Ctrl+ and Ctrl− or Ctrl + mouse wheel. The section you are working on can be selected by clicking and dragging the left (green) or right (red) handles, thereby changing the edit area to the left or right. Copying, cutting and pasting works with the usual hot keys: Ctrl + C, X, V, respectively.
To preview a section of the video in the Preview window, set the marker to the place where you want to start playback and press the space bar.
Adding zoom
Enlarging a fragment of the screen will be useful if you need to focus on a certain amount of time. Shooting "close-ups", focusing "enliven" the video, make it more interactive.
Go to the beginning of the fragment where you want to zoom in by clicking on the timeline to set the marker, go to the menu "Tools | Zoom-n-Pan…” and with the mouse mark the area to be enlarged in the upper left corner. Then, on the Timeline, go to the end of the fragment that you want to increase, and set the Scale value to 100% (on the preview screen in the "Zoom-n-Pan ..." section or the "Scale media ..." button below it).

In addition to the usual zoom, Camtasia offers "smart zoom". SmartFocus focuses on those parts of the video where the viewer is expected to pay attention. So, if you place the cursor in a text field or open a menu, SmartFocus will magnify that part of the screen. This is clearly demonstrated:
To apply SmartFocus to a video, select the desired block on the Timeline and click the "Apply SmartFocus to selected clips" button. If you want to apply Smart Focus throughout the entire video, select "Apply SmartFocus to timeline".

Adding cursor effects
The advantage of the camrec format is that you can customize the appearance and effects of the cursor after the video has been recorded. To do this, go to the "Tools | Cursor Effects" and change the settings:
- Highlight Effect: highlighting the cursor with a color;
- Left-click effect: effect when the left mouse button is pressed;
- Right-click effect: effect when the right mouse button is pressed.
Similarly, you can change the click sound of the right and left mouse buttons (it is absent by default).
If you save the video immediately in AVI, apply the effect settings directly in Camtasia Recorder, before recording - “Effects | Options | Cursor". Deactivate the "Make cursor effects editable in Camtasia Studio" option to control cursor settings.
Adding transition effects
If your video will have several episodes, you need a smooth transition between them, otherwise the impression of fragmentation will be created. For these purposes, we have a tool "Transitions" ("Tools | Transitions ..."). There are about 30 effects available, you can quickly get acquainted with all of them (double click - effect preview).

Left-click on the effect you like and place it between the fragments that you want to make with the transition. If you need to increase or decrease the duration of the transition, move the cursor to the edge of the block with the effect and, holding the left mouse button, change its size.

Click the "Produce and Share" button on the top bar.
From the drop-down list, you can select the format for saving the video. In most cases, "MP4 only (up to 470p)" or "MP4 only (up to 720p)" will be the optimal format.

If you want to set the save format yourself, select "Custom production settings". For example, Camtasia developers recommend using the following settings to save to AVI:
- Colors: Automatic
- Frame Rate: Automatic
- Video Compression: TSC2
- Audio format: PCM, 44.1 kHz, 16 bit, Mono
- Largest Video Size: for DVD: 720×480 (NTSC), 720×576 (PAL)
Follow the instructions in the Production Wizard, click the "Finish" button, wait for the project to finish rendering. At the end of the process, open the video file, check if it plays correctly. If video, audio is not played, or the compression quality does not suit you, review the settings for saving the format.
Posting a video to YouTube.com
You can also publish the video directly to the YouTube video service. To do this, at the first stage of saving (after clicking "Produce and Share"), select the "Share to YouTube" option, click "Next" and enter your username and password on the service. In the next window, fill in the fields with a description of your project: Title, Description, Tags, Category and be sure to check the box "Public (Recommended)" if you want to make your creation publicly available.

Camtasia Studio 8 can be used to record desktop video. The program has a huge functionality that allows you to perform various actions related to capturing video from the computer monitor screen. It is enough to download camtasia studio 8 in Russian for free to feel all its advantages.
Camtasia Studio is the best tool for today with which you can record videos of various applications and games in any popular video formats. Ready videos can be edited without leaving the program, it is possible to convert and reduce the size.
The program has multiple useful effects to turn the video into an interesting and beautiful video, has excellent Russian translation, and also provides the ability to independently edit the video by cutting out unnecessary fragments.
This feature is useful for creating video tutorials and connecting multiple videos to get one video. It is possible to use the Russian language when adding audio files. The program allows you to insert music or texts into the video.
Download Camtasia Studio 8 and you will be able to perfectly compress video without losing quality, without overloading the system. Therefore, the program can be downloaded to weak computers.
What are the features of the program
- Accurate free video obtained after recording.
- Numerous effects that can be used in the design of videos.
- Consists of four programs.
- Availability of Russian translation.
- The ability to preview the resulting video.
- Endless possibilities regarding video editing (connecting, dividing, cutting, pasting, effects, adding captions, and others).
- The ability to convert the video to convenient formats.
- Free crack, installed immediately after the program is installed, allows you to use the program in Russian.
Download this great program that has all the tools you need to help you create professional videos. And this does not require a long and tedious training.
Camtasia Studio 8 allows you to create spectacular video materials with which you can conduct training, training, sales and many other features, such as recording actions from the entire screen or from a specific window or part of the monitor screen.
The audio track is created from the original sound from the computer, or sounds from microphones are added, or various audio files are superimposed on the video. It is possible to highlight the mouse cursor and indicate keystrokes to attract the attention of viewers. The resulting video is saved instantly in almost any format, or immediately uploaded to YouTube or Screencast.com.
It is impossible to ignore the advantages of Camtasia Studio 8.
The program has many advantages.
- The ability to record not only from the entire monitor screen or a selected area, but also from a webcam. Recording is done with little or no preparation and no delay during the process.
- The presence of different audio tracks for the sound from the microphone and system events.
- Ability to edit: increase the desired fragments, add explanatory arrows, inscriptions, text-graphic blocks and other effects.
- The ability to edit the audio stream using the built-in noise reduction, volume control and more.
- The presence of the Russian language.
- Possibility of free download.