Bulk photo editor. Batch processing in Photoshop
When a novice photographer is faced with the need to process a large number of photos, the question inevitably arises: How to reduce the time spent on processing, how to automate routine operations?
To do this, Adobe Photoshop has several tools in its arsenal: operations or actions, scripts or scripts, and droplets.
Operations, also known as action games, macros or macros are recorded and saved actions on an image that can be applied to another image as well as used in batch processing. Actions are also the basis for creating droplets.
Droplet is a small application, a kind of program that automatically processes all images dragged onto it. The droplet icon can be placed, for example, on the desktop and dragged onto it with image folders for processing.
Scripts or scripts are also programs, but written in one of the scripting programming languages. The use of scripts allows you to automate operations for which it is impossible to write an action, that is, the possibilities of scripts are much wider. The only negative is that to write scripts, you need to master certain programming languages, for example, Java Script.
In this article, we will write a simple action and see how to use it in batch processing using the command Image Processor
As an example, let's take a way to tone photos using a color fill in blend mode. hard light. Here is the original photo
First, let's create a set in which we will place the operation to be recorded. To create a set, click on the folder icon in the Actions palette. In the dialog box that opens, enter a name for the set.


Now, with the set active, click on the icon for creating a new operation

In the dialog box that opens, enter a name for the operation. Assign a color and keyboard shortcut, if necessary, so that you can quickly start the operation. Click burn to start the recording process. Now in the palette Operations the recording icon is active, it will turn red.


Before starting recording, it is advisable to plan all the steps and write them down on paper. A well-planned action works without errors and its stability does not depend on which version of the program is used, Russian or English. A properly recorded action will work in any. If this is not the case, it means that methodological errors were made during planning and recording, for example, the names of layers or channels were recorded.
Now let's create an adjustment layer Color. To do this, click on the icon for creating an adjustment layer in the palette. Layers, then select a layer from the list Color.


In the dialog box that opens, select the desired color. It is necessary in advance, even in preparation for recording, to write down the values of this color through the RGB channels, so that you can then enter it and immediately get the desired color.

Change the layer's blend mode to hard light

We will get something like this

Now you need to weaken the effect of the adjustment layer on the skin. Skin is known to be the lightest in the red channel of the image. Make the mask of the adjustment layer active. To do this, press the key combination CTRL+\. The active layer mask will be framed

Now let's load the red channel of the image onto the mask. To do this, go to the menu Image - External channel. In the dialog box that opens, set the following settings Layer - Background, since it is from the background layer that we will use the red channel. Channel - Red, check the box on the right Invert, since for the mask we need just the inverted red channel, Overlay - Normal, Opacity - 100%. After completing the settings, click OK. Now the effect of the adjustment layer is through a mask based on the inverted red channel, which looks like this


We got a slight toning effect on the image

Now the action recording can be stopped. Then, returning the original state of the image using the palette Story, you need to check the operation of the action. Now it can be used for batch processing.
Batch processing is best done with a script Image Processor. It can be found on the menu File - Scripts - Image Processor.

Or, which is much more convenient, you can run the image handler from the module Bridge, having previously selected photos for processing in it. In Bridge Image Processor is on the menu Tools -Photoshop - Image Processor.

Setting Batch Processing Options in the Dialog Box Image Processor presents no difficulty. You need to select the location to save the files, the format and quality of saving, as well as a set of actions and the actual action that you want to apply to the selected images.

4 Batch Image Processing Software
Image post-processing typically includes resizing, cropping, adjusting exposure, contrast, noise reduction, and background removal. Applying these changes to a single image is pretty easy. However, it's incredibly tedious if you want to apply them to hundreds of pictures. However, there are 4 great software programs for this!
1. ImBatch
ImBatch is a free tool used for post-processing large volumes of digital images. It provides a large number of options for cropping, resizing, transforming, rotating and renaming files. The unique feature of ImBatch is that it allows you to create photo editing projects and automatically edit large amounts of images, thus saving you a huge amount of time.
2. FastStone Photo Resizer
FastStone Photo Resizer is a batch processing tool ideal for enhancing large images at the same time. It provides a user-friendly interface that allows you to easily resize, rotate, crop, rename, add watermarks, add text, change color depth, apply color effects and add effects to images without quality loss. The tool supports multi-thread processing to process multiple images at the same time at a faster speed.
3. Light Image Resizer
Light Image Resizer is a program for resizing large volumes of images in batches. It compresses, converts and makes copies of multiple images at the same time.
Often we have to work with a large number of photographs. Processing 300-500 photos at a time is very difficult and time consuming. Thanks to a little Photoshop tutorial on batch processing photos, you will learn how to do several actions on images at a time, which will significantly reduce the time for work.
Consider the lesson on the example of such a concept as preview. It is extremely important for any photographer. You might now say that only by zooming in on an image you can realize its quality and skill, but as practice shows, even the best photographs are rarely posted in their original size. Most likely, as part of the preview, they will remain. Then it is extremely important that, despite the small size, the user feels the quality of the photo.
The main thing in processing small photos is sharpness, especially if you have greatly reduced the original size of the image. In addition to resizing, when creating a preview, sharpening is required.
If you are to process hundreds of photos (batch processing), then the most appropriate option would be to resort to help. In this case, you only need to record the course of actions once, and that's it, then the program will do everything for you.
Our action can be applied to photos of any size and subject. The main actions that we need from the action are to resize the photo, increase the sharpness and then save it in the desired format. To do this, we first need to study the command , it's in the tab File - Automation.
As opposed to just a team "Resize", which changes the size of the image, regardless of whether the photo was originally horizontal or vertical, recognizes the type of photo and accordingly brings it to the desired view.
In order to visualize what the work of the team is, I will give an example. Let's imagine that through "Resize" we set the parameters to 400px, as a result, all horizontal photos will be processed correctly, but the vertical ones will become much larger, since they should not have a width of 400px, but a length.
Through we simply put the two necessary numbers and the program itself will recognize which number refers to the length and which to the width.

Now let's move on to the instructions for batch processing a photo.
Step 1
To begin with follows. We will carry out a series of operations on it, which we will write into an action.
Step 2
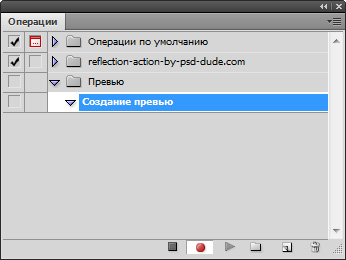
Let's start recording the action. To do this, open palette Operations, create or select a folder where it will be stored, click the small button at the bottom of the palette Create a new operation, give it a name. You can find out more information about . The recording has begun!
Attention! All of the following actions are already recorded in the action.
Step 3
It is necessary to convert the photo to sRGB format (only this standard is correctly displayed by all browsers, on any devices). To record an action, press Edit - Edit Profile. If all sources are already saved in the required format, then this step can be omitted.
Step 4
V the Change Dimension option set the value to 700px. Of course, you can put any number, but as practice shows, this is the ideal size for a preview.
Step 5
Now the main thing is sharpness. To optimally increase the sharpness, it is best to use a filter. So let's go to the section. Filters - Sharpness - Smart Sharpen. Set the optimal parameters.
Step 6
The last step is to save the image. The next step is to specify the quality of the photo. For Internet sites, the optimal parameter would be 9-10.
Step 7
Finally, close the photo if you don't want to end up with 300 open tabs.
Step 8
We press Stop. Everything! Our universal action is ready.
There is one thing that makes editing photos for the web even easier and more convenient. This . Thanks to this, you can create a file that will run the entire action.
How to create
It is created from an already recorded action.
Step 1
We go to File - Automation - Create Droplet

Step 2
You need to set the parameters:
- Select the folder where the photos are stored;
- Select an already recorded action;
- Select the folder where you want to save the received photos.

After clicking on the OK button, a droplet will appear in the folder you specified. in the form of a blue arrow. You just need to transfer your photos to this arrow, and all the preset settings will be applied to them immediately.
Save your time and use batch photo processing!
Noticed an error in the text - select it and press Ctrl + Enter . Thanks!
Getting a lot of pictures in the age of digital cameras is not a problem, it is much more difficult to sort out your photo archive later, because it can store hundreds and thousands of images with meaningless names. Therefore, renaming photos is indispensable, and this is one of the most time-consuming operations for organizing a photo collection. Renaming photos manually is long and tedious, it is better to call on the help of applications for batch image processing, with the help of which the named task is solved almost instantly.
But this is only one side of the issue. Pictures, depending on their purpose, have to be subjected to one or another additional processing. For example, if you intend to publish photos on the Internet, then, as a rule, you can not do without resizing, and in some cases - converting to another format and adding watermarks to images. In addition, it may be necessary to correct photos in order to improve them (color correction, adjust contrast and saturation, etc.), as well as to decorate photos. Of course, all these operations can be performed manually, but if there are a lot of pictures, it will be a truly titanic work. You should not waste your time so senselessly, it is better to carry out such routine operations in batch mode.
There are a lot of software solutions equipped with functionality for batch processing of images on the market. These are graphic editors (including Adobe Photoshop recognized by all professionals), and photocatalogers (including the eminent Adobe Lightroom and more modest products for the general user: Zoner Photo Studio, PicaJet, etc.), and various kinds of graphics viewers (IrfanView, XnView and etc.). However, simple routine image processing operations are often more convenient to perform using specialized batch processing utilities. Such utilities are very easy to use, compact, have an impressive speed of image conversion and are often free, and therefore will be useful to any user.
Renaming pictures
The names assigned to images by the camera when shooting are completely uninformative - it is absolutely impossible to guess which picture is hidden, for example, under the name DSC02799.jpg. Therefore, when photos are copied from the camera to the photo archive on the hard disk, they are usually renamed, giving descriptive names that “talk” about when and where the photo was taken, what event is displayed on it, etc. It is useful, for example, to indicate the date (possibly only the year and month) and number of the frame in the name of the image - for example 2011-09-05_0015.jpg or 2011-09_0015.jpg (15th frame taken on September 5, 2011 or September 2011 ). It is also possible to add the name of a place or event to the name of the image - a variant of the name of a specific photo from the group in this case may look like: Thailand_2011-09_0015.jpg.
As a rule, such renaming is carried out in batch mode. To rename a group of images, a generic file name mask is specified. Typically, such a mask can use letters of the English alphabet, numbers, underscores, and a number of special characters that conditionally designate the original file name, the year and month of shooting, serial number, etc. (character designations may vary in different utilities).
For example, let's rename several photos with the utility FastStone Photo Resizer. Activate the tab Batch Rename, in the left part of the window, open the folder with the source files and add the images of interest to the list in the right part of the window. Please note that the files in the left part of the window can be displayed both as a list and as thumbnails, which is more convenient. After that, if necessary, you can open the next folder with source images and select photos for processing again, etc. Then the file mask is entered in general form (in our case - Large_Patok_2011_07_####). This will mean that the name of each image will include the name of the place (Large_Patok) and the date of shooting, and at the end the sequence number of the frame will appear. Now it remains only to start the process by clicking on the Rename button (Fig. 1), and all selected files will be renamed and will be saved in the original folder.
Rice. 1. Batch Rename Files in FastStone Photo Resizer
The renaming of images in other utilities that support this feature is approximately the same. However, in some solutions, more flexible schemes can be implemented, for example, in the program Rename Master the type of names generated in batch mode is limited only by the user's imagination. There are no particular difficulties in forming such names here, although at first the utility's interface seems complicated, and the help leaves much to be desired. The principle of renaming files in Rename Master is step-by-step: the whole process is divided into many separate actions (delete characters at the beginning / end of the name, replace the number or text, add a certain set of characters to the beginning / end of the name, etc.). To perform a specific action, on the tab Renaming Scripts activate the desired script and adjust its parameters in accordance with the task being solved, then perform similar operations with respect to the next of the scripts of interest, etc. Let's consider this in practice to replace the names set by the camera in a series of shots (that is, names like DSC_0064.jpg) with names like Dacha_winter_2013_0021.jpg (the 21st frame taken at the dacha in the winter of 2013). First, we sequentially delete the first three characters of the name (action Remove characters) and replace the number of the image according to the number of images in the processed folder and the shooting sequence (Replace numbers; Fig. 2). Please note that the preview panel (located in the right part of the program window) immediately displays the result of connecting any script, which allows you to make sure that the selected parameters are correct or incorrect. After that, add text at the beginning of the name Dacha_winter_2013(Fig. 3) and complete the renaming by clicking on the Rename button. As a result, the entire group of files will be renamed in a matter of seconds. By the way, the date (as well as other information that is available in the file properties or meta tags, is not necessary to manually specify at all, since this program implements the ability to connect the corresponding variables inside scripts (Fig. 4).

Rice. 2. Setting up scripts for deleting and replacing characters in a name using Rename Master

Rice. 3. Connecting a script to add a phrase at the beginning of the name (Rename Master)

Rice. 4. Add shooting date when batch renaming in Rename Master
Preparing images for online publishing
Many users publish their photos on various Internet resources and exchange pictures with friends and colleagues via e-mail. However, the photographic material captured in modern cameras "weighs" a lot and it takes quite a long time to upload a large number of images in their original form to your online photo album even with the current Internet connection speed. Yes, and it makes no sense. Therefore, images intended for publication and online exchange are usually pre-reduced to web standard. In addition, in some cases, before publication, you have to resort to converting images to another format in accordance with the requirements of a particular resource. It will also be useful to add watermarks to pictures when posting them on the Web. Performing all these operations manually for a long time - get the result faster using the tools for batch image processing.
For example, in the Fotosizer utility, to change the size of a group of images in batch mode, in the simplest case, just drag the pictures into the main program window (one by one or in bulk), specify the processing parameters: size (we chose a preset profile for sending by e-mail) and a folder to save, and then start the process (Fig. 5).

Rice. 5. Batch resizing photos in Fotosizer
If we are talking about a large number of images, it will be no more difficult and even faster to reduce the size of images using the Photo Magician utility. True, drag and drop will not work here in normal operation - you will have to manually specify the source folder and the destination folder. Then the processing parameters are determined (it is easier to choose a profile for placement on the Web or viewing on a portable device of interest) - fig. 6 - and start the process. The utility will spend a minimum of time on processing images and, in addition, it will carefully offer to immediately send the images to the Internet, for example, to a Facebook photo album.

Rice. 6. Adjust Reduction Settings for iPod Viewing (Photo Magician)
A more visual way to reduce the size of images (due to the display of a thumbnail with an indication of the basic dimensions) is implemented in the PIXresizer program. At the same time, the batch processing technology is approximately the same as in other utilities of this plan: you need to specify the source folder and source folder, determine the desired photo size (Fig. 7), change the format if necessary, and start the conversion process.

Rice. 7. Batch Resize Images in PIXresizer
You can also simply prepare thumbnails of images for online use in ImBatch. It is enough to drag the original photos into the utility window, select the operation in the list of tasks Resize and set the desired size in certain units. After that, select the operation to save images ( Save as), indicate the destination folder and start the processing process (Fig. 8).

Rice. 8. Batch image reduction with ImBatch
Other operations are performed in a similar way, which sometimes also need to be carried out before publishing images on network resources - converting and adding watermarks. With conversion, everything is elementary, since here you just need to select the desired format and, in some cases, also adjust the conversion settings. With watermarks (as a rule, this is the signature of the author and / or his logo) a little more difficult - unlike professional solutions for introducing watermarks in the utilities in question, you cannot create watermarks themselves, you can only insert ready-made images on a transparent background. The ability to control the display of such embedded watermarks is minimal here, the program boasts the greatest functionality in this regard. ImBatch(operation Watermark- rice. 9), which allows you to adjust not only the level of transparency of the sign and its position, but also the scale, type of overlay and a number of other parameters.

Rice. 9. Applying a watermark to a series of images in ImBatch
Correction and artistic processing of images
We do not always like the received pictures. The reasons may be different: due to excessive noise, insufficient sharpness, due to poorly selected shooting parameters (for example, incorrectly set white balance or exposure), insufficient or excessive lighting when shooting, etc. Unfortunately, it is not always possible to shoot again and take better pictures, so some of the low-quality photos have to be corrected. In particular, to suppress noise, increase contrast, correct color distortions, increase detail in dark or light areas, increase sharpness, etc. There is no doubt that in order to obtain professionally designed images, such operations are performed using solid graphic products (such as Adobe Photoshop), moreover, as a rule, an individual approach to each image is assumed. However, it is possible to process a specific series of images with the same shooting defects, if desired, in batch mode. In some cases, to improve amateur photographs, you can resort to the appropriate toolkit of utilities for batch processing images. However, counting on a miracle with such a correction, of course, is not worth it - at best, you will only be able to slightly improve the image.
You can try to connect to the case a very easy-to-use XnConvert program, which provides functionality for correcting levels, equalizing the histogram, brightening / darkening the image, changing the exposure, adjusting the color balance, etc. To quickly improve a group of pictures in it, you need to drag the images to the tab Input data(you can also open files on this tab directly) and add on the tab Actions a set of image correction operations of interest. The result of any of the added operations will be immediately displayed in the preview window (for the first image from the group), and by changing the parameters, you can try to improve the image to some extent (Fig. 10). After that, the output data is determined on the tab of the same name, that is, the output folder is specified, and if necessary, the file name in general form and extension are specified if it is intended to simultaneously batch rename and convert. When finished, just click on the button. Transform- Converted photos will appear in the specified output folder.

Rice. 10. Darken some too bright shots in XnConvert
The utilities discussed in the article can also be useful in the simplest artistic processing of images, for example, for adding frames, applying filters and effects. The most interesting in this regard is the aforementioned XnConvert utility. For example, let's try to use it to turn an ordinary modern photo into an old photo in the "retro" style. In our case, we managed to achieve such a metamorphosis by connecting the “sepia” and “retro” effects in the program in combination with the vignette effect to darken the edges of the image (Fig. 11).

Rice. 11. Getting a photo in the "retro" style using XnConvert
The possibilities of all other solutions in the considered plan are much more modest - the corresponding possibilities in them are often represented by just a few simple filters. And it can often be quite difficult to select the parameters of effects in these programs, primarily because of the inconvenient preview. But still, this toolkit should not be discounted. For example, let's create a frame with a shadow for the pictures using the ImBatch utility. The procedure will be as follows: first, enable the operation Rounding edges, then add the effect soft shadow and at the end we will turn on another effect inner shadow. The first of the shadow effects will add soft outer shadows to the border of the image, and the second will create a shadow inside the border (Fig. 12).

Rice. 12. Framing images in the ImBatch utility
Finally, we will conduct one more experiment - we will try to turn an ordinary photograph taken in the Northern Urals into a Martian landscape, which, as you know, is distinguished by a peculiar reddish-brown color of the surface, scorched by the rays of the red-orange sun. Let's use the Image Tuner utility to carry out such an operation. Technically, there is nothing complicated in processing, the original images are dragged into the utility window, a folder is specified in it for saving images and the necessary settings are selected. Of course, determining the size and format for images is as easy as shelling pears, difficulties arise in the process of selecting the values of the parameters for brightness, contrast and saturation, as well as colorization parameters, which is relevant for us in terms of the problem being solved. The fact is that the selection is carried out in the full sense of the word at random until the desired effect is achieved, and each time after changing one or another parameter, you have to click on the file to update the image in the preview window (Fig. 13). However, in the end, if desired, it is still possible to achieve an acceptable result. Upon completion of the selection of settings, the conversion process is started (button Process images).

Rice. 13. Image colorization using the Image Tuner toolkit
Briefly about products
FastStone Photo Resizer 3.1
Developer: FastStone Soft
Work under control: Windows 98SE/Me/XP/Vista/7
Price: free for personal use and educational purposes; commercial use requires a license for $19.95.
FastStone Photo Resizer is a simple batch image processing software. The main tasks solved with the help of this utility are conversion (tab Batch Convert) and renaming ( Batch Rename) burst shots. Source images can be in a variety of graphic formats, only JPEG, BMP, GIF, PNG, TIFF and JPEG2000 formats can be converted. Simultaneously with the conversion, images can undergo a number of transformations - you can change their size, rotate, adjust the color depth and carry out color correction (change brightness, contrast, hue, gamma, saturation and sharpness). Also, when batch converting, it is easy to add text, watermarks and borders to images. Renaming is carried out taking into account the mask selected from the list or entered by the user.
FastStone Photo Resizer 3.1
Developer: XnSoft
Work under control: Windows XP/Vista/7; There are versions for Mac and Linux
Price: is free
XnConvert is a cross-platform batch image editing tool. The program understands many graphic formats (including RAW) and allows you to perform more than 80 different operations in batch mode - from standard actions in such applications (resize, rotate, reflect, change color depth, add a watermark, perform color correction, etc. ) to fairly complex operations. The list of the latter includes, for example, noise reduction, sharpening in the focus area, blurring of the image, as well as the imposition of a number of artistic effects (oil painting, retro, “old camera”, etc.). It is also worth noting the wide possibilities of color correction - here you can adjust the levels, color temperature, color balance, exposure, brightness / contrast / gamma, etc. When saving, it is possible to rename files by mask and convert them to another format; EXIF data may be stored during processing.
ImBatch 1.5
Developer: high motion software
Work under control: Windows 2000/2003/XP/Vista/7/8
Price: is free
ImBatch is a handy batch image processing program. It handles all popular image formats (including RAW) and can be used to quickly resize images, rotate and rename them, convert them to another format, and perform a wide variety of other operations with images: adding watermarks, cropping (usually in in order to obtain a simple frame), rounding edges, etc. There is a simple functionality for color correction, adding blur (by Gaussian and in motion) and shadow, converting to grayscale, etc. It is possible to save or delete EXIF? / IPTC tags during processing . Prepared images upon completion of batch conversions can be published to Facebook directly from the ImBatch interface.
Photo Magician 2.3.6
Developer: Sheldon Solutions
Siteprograms: http://sheldonsolutions.co.uk/photomagician/
Work under control: Windows XP/Vista/7
Price: is free
Photo Magician is an easy-to-use program for batch resizing and converting images. The utility understands dozens of popular graphic formats (including RAW and PSD) and differs from analogues in high processing speed, as well as the presence of a large number of built-in profiles, which make it easier to choose the right settings for viewing photos on various devices (TVs, iPhone, iPod, etc.). etc.). There are two processing modes: basic (it has access to all settings) and accelerated processing mode, designed for fast image processing in accordance with a specific profile. In addition to resizing and converting in batch mode, images can be rotated, flipped vertically/horizontally, and one of the three available effects (sepia, negative, conversion to black and white) can be applied to images. It is allowed to save EXIF data in the final images. Immediately after the conversion is completed, the resulting images can be sent directly through the utility's interface by e-mail, uploaded to an FTP server or to a Facebook photo album.
Image Tuner 4.1
Developer: Glorylogic
Work under control: Windows NT/2000/XP/Vista/7/8
Price: is free
Image Tuner is a simple batch image processing program. With it, you can quickly resize images, rotate and mirror them, convert to another format, rename, and also convert, that is, adjust brightness, contrast and saturation, colorize and add watermarks. There is functionality for the simplest color correction and colorization of images, but there are the least settings here. EXIF data and other information may be removed from the resulting images. The utility is characterized by fairly fast image processing and opens all common graphic formats (JPEG, BMP, PNG, GIF, TIFF, PCX, etc.), as well as a number of RAW formats; You can only convert to JPG and PNG formats.
Fotosizer 2.01
Developer: Fotosizer.com
Work under control: Windows XP/Vista/7
Price: Professional - $15.95; Standard - free
Fotosizer is a batch image processing utility. The program can work with files in JPG, BMP, GIF, PNG and TIF formats and allows you to quickly resize many photos (taking into account the quality level and DPI value). If necessary, resizing can be combined with rotation and reflection of images vertically/horizontally, as well as with the imposition of simple effects (sepia, black and white, etc.). When processing JPG images, EXIF data may be stored. The converted images are saved in their original format or in any other supported format; it is also possible to rename files based on a mask selected from the list or created by the user. The commercial edition Professional additionally includes functionality for watermarking, color correction of images, etc.
PIXresizer 2.0.6
Developer: David De Groot
Work under control: Windows 98/Me/NT4/2k/2k3/2k8/XP/Vista/7/8
Price: is free
PIXresizer - a simple tool for resizing a series of images in batch mode; can also be used to process single photographs. The utility supports JPEG, GIF, BMP, PNG and TIFF formats and along with photo scaling can be used to convert them. The new size is set in pixels across the width of the image, and at the same time displaying a thumbnail of the image, which displays custom sizes compared to the base ones. It is possible to save EXIF data in the final images. The range of additional features is limited to grayscale conversion. In the single image processing mode, it is also possible to rotate the image, print it and open it in an external editor.
PIXresizer 2.0.6
Developer: Jackass JoeJoe
Program website: http://www.joejoesoft.com/vcms/108/
Work under control: Windows (all versions)
Price: is free
Rename Master is a utility for batch renaming files. The program works with different file formats (including graphic ones) and is characterized by high performance. With its help, you can add, delete or change any fragments of the file name and, if necessary, combine renaming files with moving them. The program does not require installation and can be used to run from removable media (for example, a flash drive).
The renaming process is built with the connection of scripts; scripts for frequently used renaming options can be saved for later use. When forming new names, along with the standard set of functions (deleting characters at the beginning / end of the name, replacing text, adding new fragments of the name, etc. - there are many options), it is also possible to include information extracted from the properties of the file and JPEG / MP3 / Video tags. The result of any changes in the script settings is immediately visible on the preview panel; in the case of incorrectly selected parameters, the new names are displayed in red, which allows you to orient yourself and make appropriate corrections.
Today, each user in practice deals with hundreds and thousands of pictures. At the same time, it is often necessary to perform a number of similar and fairly simple operations with many images (rename, reduce size, rotate, convert from one format to another, etc.). This is an incredibly time-consuming task if you process each image manually.
Believe me, you should not waste your energy and precious time on such routine actions, because exactly the same result can be obtained much faster - by processing photos in batch mode. The only question is in what software product this work should be carried out. This is a matter of taste and personal preference. There are many options, and the final choice can only be made taking into account a wide variety of factors. Perhaps users should also take a closer look at one of the programs discussed in the article, the main advantages of which are ease of use and speed.


