Removing arrows from shortcuts windows 8.1. Ways to remove arrows from program shortcuts
In all desktop operating systems created by Microsoft, on the desktop icons in the lower left corner there is always a small addition to the labels - arrows. It is difficult to say for what purpose the chevalier from Microsoft decided to add such a twist, but not all users are delighted with it. Moreover, some immediately after installing the distribution kit, the first thing they decide is "how to remove arrows from shortcuts in Windows 7".
Existing Options
Unfortunately, there is no developer way to remove arrows from desktop icons. The user has only two options for solving the problem: install a special system settings program and disable the display of arrows, or apply a workaround by replacing the standard image with your own. Both methods allow you to equally effectively remove the designations on the labels. Therefore, each user must make his own choice.
invisible picture
The notorious arrow is an image that is automatically overlaid on the desktop application icon. The exceptions are the system "Basket" and "Computer". The need for such an overlay is spelled out in the registry. It is thanks to this that shortcuts for Windows 7 acquire a “decoration” in the form of an arrow. One of the easiest ways to fix the situation is to edit the system registry. We hasten to warn some "hot heads" against hasty actions: if you simply delete the entry that forces the OS to place arrows on shortcuts, then there will be a black spot in place of the pointer - a square. The result is, frankly, terrible. Therefore, it is very important not only to carefully study how to change labels, but also to understand what causes certain requirements.

So, the user must create an empty (transparent) image in any graphics editor with dimensions of 48 x 48 pixels and a color depth of 32 bits. By naming it, for example, blanc.ico. After that, you need to open the registry editor regedit and follow the path "HKEY_LOCAL_MACHINE\SOFTWARE\Microsoft\Windows\Current Version\explorer". Here you need to create a string parameter "Shell Icons", in which to place the item "29", the value of which is the exact path to blanc.ico. That is, if the created file with an empty image is copied to the windows folder, then in “29” you need to write “C:\Windows\Blank.ico,0”. After that, it remains to restart the computer and enjoy the "new" desktop icons without the annoying arrow. This is one of the ways to remove arrows from shortcuts in Windows 7. Moreover, it does not require the installation of additional applications. If for some reason it becomes necessary to return everything to its place, then Shell Icons must be deleted (not the file!).
Changing a registry value
There is an alternative solution. True, it does not apply to all versions of Windows. By running regedit ("Start" - "Run"), you need to follow the path HKEY_CLASSES_ROOT.

In the left column, you need to find Lnkfile and click once on this entry with the left button. A list of variables will appear on the right. Among them is IsShortcut. By selecting the "rename" command, you need to change the name to IsNotShortcut. Returning to the issue of partial compatibility, it is worth noting that in some systems, for example, WinXP, the entry is not renamed, but instead the parameter "1" ("enable display") is assigned to it, or the item is removed ("prohibit"). A reboot is required for the changes to take effect.
Aero Tweak Program
In addition to making changes to the system registry, a computer owner looking for a solution to the question of how to remove arrows from shortcuts in Windows 7 can use third-party applications. Most customization programs allow you to hide annoying arrows from icons by simple manipulations. One such application is Aero Tweak.

Despite its very respectable age (the last update was back in 2010), it is able to quite effectively solve this problem. After installation, select the “Windows Explorer” section on the left side of the window, and check the box on the right that prohibits the display of arrows. Again, a reboot is required to activate the changes.
Windows Shortcut Arrow Editor Utility
In addition to combine programs that allow you not only to figure out how to remove arrows from shortcuts in Windows 7, but also to configure many other operating system parameters along the way, there are highly specialized solutions designed specifically to control the display mode of arrows on icons. One of them is the Windows Shortcut Arrow Editor. You should run it as an administrator by selecting the mode with the right mouse button. After initialization, a window will be displayed in which the user is prompted to make a choice from four items. Activating the top will give the reins to the hands of the operating system. The second one from the top will make the arrows the same as they were in the outdated Windows XP. The third point will completely save the user from any additions to the icons. Well, the fourth will allow you to replace the arrow with an arbitrary picture. This utility has several advantages:
- it does not require installation, that is, it is initially portable;
- no need to reboot. It is worth ticking the selected item - and the system Explorer automatically reboots, which is very convenient, since you can quickly evaluate the changes;
- performance is guaranteed in operating systems from Vista to modern Win 8.1, and any bit depth;
- the program really works.
Combine Winaero Tweaker
The following application was suggested by the same developer as the previous utility. Accordingly, he copes with his task "excellently". After launch, you need to open the "Appearance" section on the left and select "Shortcut Arrow" in the list that opens.

As a result, the usual four items will appear on the right, allowing you to control the “behavior” of the arrow on the icons.
Vista Shortcut Overlay Remover App
This program, although it is quite small (distribution kit less than 2 MB), requires installation. In addition, the user must download and install the version corresponding to the bitness of the operating system used (32 or 64 bits). After that, four items known from the Windows Shortcut Arrow Editor are displayed, the functionality of which is exactly the same. True, a reboot is required. The solution works fine on versions of Windows that have replaced Vista.
Looking for a result
The abundance of solutions that allow you to refuse to display the arrow on the icons suggests that the developers from Microsoft, most likely, miscalculated something. Many users are absolutely not satisfied that there is no possibility by means of the system itself to make a choice in favor of this symbol or completely abandon it. Perhaps in future versions this point will be taken into account, and there will be no need to use third-party applications or prescribe something in the registry.
Greetings, dear readers! In this article, I will show you how to remove arrows from shortcuts in Windows Xp, 7 and 8 (any version of Windows).
In fact, the arrows on the labels do not bring any serious inconvenience. But still, they interfere a little, especially for perfectionists. This article was written especially for them.
The first way is to download and run (it does not require installation) one simple program that will edit the registry for us and the arrows will disappear. The second way is to do it yourself manually.
Unfortunately, it is not so easy to remove the arrows from the labels yourself. We will not only have to rummage through the Windows settings, but get into the registry and change a couple of values there. And I, as you know, hate editing the registry, as it is quite dangerous. Therefore, I will write a very detailed instruction, with pictures for each step!
And here is the instruction! I will first show you how to do it manually and then how to do it with a program.
How to remove arrows from shortcuts in Windows XP, 7 and 8 manually?
Now we need to go to the register. I already told you how to do it, but I'll tell you again.
We use the hot key combination Win + R (Win is the key with the Windows logo or with the inscription "Win", and R is the usual Latin letter of the alphabet)
The Run application will open. In the line to start the application, you need to write "regedit":
As a result, the terrible and dangerous WIndows registry will open.
Using the explorer on the left, you need to go to the section HKEY_CLASSES_ROOT\lnkfile.
Just don't confuse lnkfile and nkfile:
Now let's go to the section HKEY_CLASSES_ROOT\piffile and in the same way we remove the IsShortcut parameter.
After restarting the computer, all the arrows from the shortcuts should disappear.
How to remove arrows from shortcuts in Windows XP, 7 and 8 using the program?
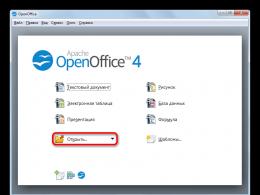
With the program, everything is made much easier! The name of this wonderful program is Aero Tweak, and you can download it.
As I said earlier, the program does not require installation. Therefore, we download, unpack using any archiver, such as WinRar, and immediately launch it.
A window will open. We find the menu on the left and select the item "Windows Explorer" there. Next, check the box next to the item "Do not show arrows in labels":
Check out other features of the program. It also has a bunch of other useful features.
When you have selected everything that interests you, click on the "Apply" button and restart your computer.
Now there are no arrows on the labels.
Each file in Windows 10 has its own icon, which allows you to identify the type of file, as well as the application in which it is opened or executed. A separate category is the so-called "shortcuts" - links to files that are located in other locations on your computer. Most often, shortcuts are created for installed applications. After installing the program, the system places a shortcut on the desktop and in the application list of the Start menu that links to the program's executable file. You can distinguish a shortcut from a regular file or folder using a small arrow in the lower left corner of the icon, as well as the inscription "- shortcut" in the name. And if the latter can be easily removed by simple renaming, the arrows near the icon simply cannot be removed. Yet there are many (including myself) who don't like these arrows. This begs the logical question: how to remove shortcut arrows? The good news is that they can be removed quite easily. It only takes a few minutes from you, as well as a couple of tweaks in the registry.
Much better.
For reference: You will need an Administrator account to remove the arrows next to the shortcuts. If you do not have one, the system will ask for an Administrator password when you try to open and make the appropriate changes.
How to remove arrows near icons
This procedure is performed by editing the system registry. It should be noted that the system registry is a database of low-level settings that is critical for the system. Therefore, you should not change these parameters blindly, as well as simply delete different keys. Thoughtless editing of the registry can cause the system to work poorly or fail altogether.
For reference: Before proceeding directly to the instructions, we advise you to create a Windows restore point. In this way, you will create a backup copy of the system registry and, if something goes wrong, you can quickly return everything to its original form. Creating a Windows restore point will not take you much time, but it will save you a headache in case of an error or an unexpected result.

There is a good chance that this method will only work until the first reboot of the computer (on earlier versions of Windows 10 it will work without problems). After that, large black squares will be displayed instead of arrows, which is even worse. In this case, you need to do the following:

Shortcut arrows are designed to make it easy for the user to distinguish between a regular file and a shortcut. Deleting the latter will leave the file in the system (only the empty link will be deleted), while deleting the file will also cause the shortcut to fail. Therefore, it is important to understand what exactly you are deleting - the target file or the shortcut. Since you just removed the shortcut arrows, the links are now displayed as regular files, so there is no visual reference. To check which type of file you are deleting, right-click on it and click Properties. Go to the tab General and look at the parameter value File type. If it is indicated there Label (.lnk) , which means that if necessary, you can freely delete it without worrying about the safety of the file itself, to which this shortcut refers. Alternatively, you can simply hover your mouse over an object and wait until a tooltip appears. If you hover over the shortcut, the address of the file location will appear. If you are dealing with a file, the system will display its properties, such as format and size.
How to get shortcut arrows back on Windows 10 desktop
The procedure for returning to the original form of the labels is exactly the same as in the instructions above, but instead of creating a new key, you need to delete it.

How to Remove Shortcut Arrows Using Third-Party Apps
There are a large number of a wide variety of programs that allow you to customize the operating system at your discretion. Often, these applications take on all the work of changing the registry of the operating system, so you don’t have to go into the registry yourself, look for and edit the necessary keys. If you don't want to risk it once again, we can recommend you to use the application WinAeroTweaker- a real storehouse for fans of customization.

There are thousands more settings in WinAero Tweaker, but in this article we have only focused on how to remove shortcut arrows.
All shortcuts in Windows XP and older are marked with arrows. This is done so that users can distinguish the source file from the created shortcut. However, these arrows annoy many; if you share the opinion that these icons are not needed, then you will be interested to know how to remove the arrows from the shortcuts.
Using the tweaker
If you have a Windows 7 or 8.1 system, then you can hide the arrows with the help of a small free Aero Tweak utility. This program does not work on Windows XP, so if you are still on the old system, then use the TweakUI utility.
Important: Before making changes, be sure to manually create a restore point in order to quickly return the system to a healthy state if necessary.
Aero Tweak does not require installation. Immediately after downloading and launching, the main window appears, which contains several sections. You need a "Windows Explorer" tab. Inside it you will see the option "Do not show arrows on shortcuts" - check it and restart your computer. 
After restarting the system, the arrows should disappear. If you have any problems displaying the desktop or icons on it, use System Restore and roll back to a manually created checkpoint.
Manual registry editing
If you prefer not to use third-party software for fear of infecting your computer, you can make changes to the system registry manually.

After restarting the computer, the arrows will disappear. The method was tested on Windows 7 and Windows 8.1 - no errors appear.
Windows 10
If you need to remove the arrows on Windows 10, you will have to go a little longer:

Close the registry and restart your computer. After re-entry, the arrows should disappear. But if transparent or black squares appear in their place, then use another method:
- Download the blank "blank.ico" icon.
- In the registry editor, open the parameter "29" (the order of its creation is described above).
- Double click on the parameter and in the "Value" field specify the path to the "blank.ico" icon.
Close the editor and restart the machine. After restarting Windows 10, the screen will have clean shortcuts, without arrows and squares.