Reset password from hitachi hard drive. How to remove password from hard drive
Another it-shnaya riddle about passwords on media.
We have a WD400 hard drive like this:
Playful hands (or evil rock? (-:) set a password on it.
On numerous forums smart people they write what (setting a password) for WesternDigitall storage media sometimes happens due to a power outage, incorrect termination of programs like PQmagic or Acronis.
So, there is a task to remove.
A little theory from the help to Victoria:
Management of security options. Passwords, password removal, temporary unlocking.
Theoretical introduction:
Modern hard drives have 2 types of passwords and 2 levels of secrecy. First, let's look at the types of passwords:
- User password: used to restrict access to user information. When setting a User password, the hard drive rejects commands such as read and write. Consequently, information from a password-protected hard drive cannot be read, changed, or erased. This can only be done after removing the password or after temporarily unlocking.
- Master password: NOT designed to protect information. Its purpose is to remove the User-password in case the latter is lost. The master password, being set on the hard drive, will not affect its performance in any way.
- High: high level. The High level password can be removed using the Master password, keeping the information on the hard drive.
- Maximum: maximum level. If the user-password of the Maximum level is set on the hard drive, then it will not be possible to remove it with the Master password (the screw will give an error), and to remove the password, you will have to use Security Erase. This is a special command that will ask you to transfer the Master password to the screw, after which it will erase all information from it, and only after that it will unlock it.
Is it possible to "find" a lost password by brute force? In the case of a hard drive - almost impossible. According to the ATA standard, after FIVE unsuccessful attempts to enter a password, the screw will block commands (in this case, the "Expired" status will appear in the passport). Re-entry is possible only after turning the power on/off. There is no 5 attempts limit if you use the master password wipe to remove the password. In this case, a pause for waiting for readiness (about 1 second) issued by the screw will be a natural obstacle to enumeration.
Practice setting and removing passwords.
There are keys for working with passwords.
PWD : set password to disk;
DISPWD : remove password from disk;
UNLOCK : temporarily unlock the screw (until the power is turned off);
LOCK : temporarily disable the password system (until the power is turned off);
After entering the commands, a menu will appear on the screen with a choice of password options and privacy level. Navigating through the menu is carried out with the arrow keys (up and down), selecting the desired item - with the ENTER key. Next, you will be prompted to enter a password:
Enter password:_
After entering the password, press ENTER. If the screw did not give an error, the password will be set immediately.
It should be borne in mind that master passwords for most hard drives are pre-installed at the factory, and thanks to the Internet, they can be known to a wide range of people. Therefore, it is better to change the master password immediately. The set master password will not affect access to information in any way.
On the contrary, if someone password-protects a hard drive (for example, malware virus), knowing the master password you can unlock it.
To remove a user password using a known master password, you need to:
- By pressing F10, select the menu item "master password";
- enter the master password (up to 32 characters). Winchester will be unlocked.
this, having received a passport, make sure that the passwords are removed.
A useful application of the password erase option is to quickly delete all information (for example, before selling the HDD). In addition, security erasure, being by nature a record, has its own
ability to eliminate some types of surface defects and update SMART statistics. In order to perform a quick erase through the security system, you must:
- set any user-password of the Maximum level to the screw;
- set any master password on the screw, for example 1234. Both passwords can be the same;
- by pressing F10, select the master password, then enter it and wait for the operation to complete.
Note:
- If you have already called up the password entry line, but changed your mind about entering it, press ESC.
- To prevent forgetfulness, the program creates a small (32 bytes) text file in the current directory, in which puts the entered password. The next time you enter the password, the program will read the contents of the file itself and slip it under the user's nose :) This option can be easily disabled, how to do this, see the "Working with the ini-file" section.
- If the tested drive says in the passport that it does not support security options, a message will be displayed on the bottom line of the screen: "Attention: this HDD does not support passwords!" The inscription does not interfere with _trying_ to set / remove the password in order to make sure of this in practice.
After some googling, it was found out that the standard master password for hard drives WD is 32 characters like this: " WDCWDCWDCWDCWDCWDCWDCWDCWDCWDCWD".
Nothing worked at first:

Then, apparently, a miracle happened and we saw the wonderful inscription "Done" after executing the password reset command:


And it looks like URA! ....but after the reboot, the password reappeared and now it can't be removed in any way...
Does anyone have any thoughts on this?
P.S. Acelab PC-3000 and A-FF REPAIR are not offered, since the use of these products is much more expensive than the cost of the hard drive.
Recently I had to face a terrible situation. The hard drive has locked up, though it’s only 8GB, but still it’s also money (:
When you turn on the computer and determine the devices, stumbling over the definition of the hard drive, the computer displays a message
HDD Locked. Please enter the password
After researching the problem, I found a lot of interesting information regarding locked screws. After reading everything below, did what is even below (:
There are paid solutions (expensive and 2 options with saving information (more expensive) and without it - cheaper).
Master passwords for HDD. Master ATA password.
Contrary to popular belief, it is impossible to “lock” or “lock” a drive using a Master password. The master password can only be changed. The master password can unlock the drive if the USER password is forgotten, but this is only possible if the "High" security level has been set. If the protection level is “Maximum”, then the drive can only be unlocked by knowing the User password. If the protection level is “Maximum”, the User password is unknown, but the Master password is known, then it is possible to unlock the drive with the destruction of all data using the Security Erase Unit ATA command. This is implemented in MHDD (FASTERASE command), but this procedure in MHDD only works with User passwords.
Thus, a drive locked with a "High" security level can be unlocked using either the Master or User password. If the protection level is "Maximum", then unlock
the drive can only be used with the User password, or with the help of the Master password, but with the destruction of all data.
Manufacturers set factory Master passwords, and if they are not changed in advance, then they can be used to unlock a password-protected drive, the protection level of which is “High”.
You can set the User password by issuing the PWD command to MHDD. This sets the protection level to "High". The ability to set a different level in MHDD is not available for security reasons. Also, the entered password is displayed in the mhdd.log file. After setting the password, the drive must be turned off.
Unlocking a drive password-protected with the "High" protection level is possible using a User or Master password. If the password is unknown, then, in general, it is impossible to unlock the drive, although there are two ways:
1. If the password is not encrypted by the drive itself, you can try to read it from the surface using technological commands;
2. It is possible to unlock using specially designed methods.
If the password is known, then the procedure for unlocking the drive in MHDD is as follows:
1. issue the UNLOCK command, select the User password, and enter the password. This temporarily unlocks the drive (until the power is turned off).
2. Issue the DISPWD command, select the User password, and enter the password again. This completely removes the blockage.
According to the ATA/ATAPI standard, you cannot suppress the DISPWD command without first unlocking the drive with the UNLOCK command.
If the password is unknown and the protection level is "Maximum", then without special means not enough. If the password is unknown, and the protection level is “High”, and the Master password has not been changed, then it is possible to unlock the drive, knowing the factory Master password.
List of known Master passwords:
Fujitsu Winchesters: thirty two spaces. In MHDD, you need to enter 32 spaces to ask for a password.
Seagate hard drives: the word "Seagate" without quotes, capitalized, padded with 25 spaces to 32 characters. In MHDD, when prompted for a password, you must enter the word Seagate, followed by 25 spaces. Also, advice from one of the site visitors: if the password does not fit, try entering the word SeaGate and 25 dots.
Maxtor Winchesters: the phrase "Maxtor INIT SECURITY TEST STEP" - case is important! There is one space at the end of the phrase. The password length is 31 characters.
Samsung hard drives: 32 "t" characters. In MHDD, you need to enter 32 characters t to ask for a password.
Winchesters western digital: the phrase "WDCWDCWDCWDCWDCWDCWDCWDCWDCWDCWD", without quotes.
IBM hard drives:
DTTA series: "CED79IJUFNATIT" padded with spaces to 32 characters. in MHDD, when prompted for a password, enter the above phrase, followed by 18 spaces.
DJNA series: "VON89IJUFSUNAJ" padded with spaces to 32 characters. in MHDD, when prompted for a password, enter the above phrase, followed by 18 spaces.
DPTA series: "VON89IJUFSUNAJ" padded with spaces to 32 characters. in MHDD, when prompted for a password, enter the above phrase, followed by 18 spaces.
DTLA series: "RAM00IJUFOTSELET" padded with spaces up to 32 characters. in MHDD, when prompted for a password, enter the above phrase, followed by 16 spaces. http://www.ihdd.ru/mhdd
Winchesters Hitachi, DK23AA, DK23BA, DK23CA series: thirty-two spaces. In MHDD, you need to enter 32 spaces to ask for a password.
Toshiba hard drives, all series: thirty-two spaces. In MHDD, you need to enter 32 spaces to ask for a password.
Below are the User passwords set in certain situations by various popular programs:
MHDD versions 3.x occurs when internal error: 32 letters "A" or 32 letters "B" (large Latin).
HDDL, occurs when a quick erase fails: "fuck".
HRT: 32 characters with code 0. In order to enter such a password in MHDD, it is enough to press ENTER when prompted for a password.
HDD ERASE 4.0: while cleaning the disk, it sets the password "idrive" - you can also remove it with it!
That's just a program HDD ERASE 4.0 I had a screw locked up, all because I didn’t wait for the end of the “erase” to reboot the car ...
yeah answer off lenovo Alexander Goncharov:"
Added 3 minutes later:
I found a programmer on Ali Express =)) with the ability to cure my problem at the hardware level, the problem is that it costs more than a new hard...
Added 11 minutes later:
Spoiler
Aleksandr Goncharov : Hello, my name is Aleksandr Goncharov. How can I help you?
Aleksandr Goncharov: Are you here?
. Gennady: Hello, I have a specific problem. after the kids played with my G700, the bios got screwed up. I removed the password through the service center by flashing the chip. there they told me that I have the same screwed up HDD. Empirically, I found out that the lock level is High, I need a master password from st500lm000-1ej162. I already contacted the SeaGate company where they answered me that the motherboard manufacturer can help me !!
Aleksandr Goncharov: We do not have such passwords.
Contact our service center, they may be able to help you.
https://www3.lenovo.com/ru/ru/services-cts/
. Gennady: I can't tell...
. Gennady: t
. Gennady: already applied, everyone wants more money than hard costs ...
Aleksandr Goncharov: Unfortunately we are just a support we do not have such information
. Gennady: I found a way, I found software, but I need information that the laptop manufacturer knows, and so I communicate with the manufacturer's representative and they say to me: "we don't know anything" somehow this is not right !!
. Gennady: ok where is this info?
. Gennady: for free
Aleksandr Goncharov: This information is available only to Lenovo engineers, this information is not available in public access and we cannot provide it to you.
. Gennady: super!!! question and why the hell!? there is a hard drive lock...
. Gennady: you can't who can?
. Gennady: Or how can I communicate with the engineers?
Aleksandr Goncharov: There is no blocking, there is a white list of devices that can work with this motherboard
. Gennady: noooo you're not talking about that...
. Gennady: it's not about blocking with a TPM chip
. Gennady: we are talking about setting an ATA password on the hard drive
. Gennady: I'm going to smoke for 5 minutes, otherwise this problem is pulling my nerves out of me
Aleksandr Goncharov: Unfortunately, I can’t help you. This password can only be set by the user, and we don’t have information on how to remove the ego.
Aleksandr Goncharov: the master key may be from the lenovo factory but it only applies to new devices, old devices are only recycled.
. Gennady: when installing any hard drive in any laptop, at the time of initialization (filling the MBR or GPT layout table) motherboard enters a master password into a certain cluster on the system "partition (beginning of the disk)" of the disk...
. Gennady: in the BIOS of any computer, you can set a user password so that this hard drive cannot be read without first unlocking it with a password, the only way to remove a user password is to enter the master password that the motherboard set. This results in a complete loss of data.
. Gennady: You can't even reflash the firmware of the hard drive itself without unlocking it!!
. Gennady: the second way is the PC3000 software and hardware complex, and then if there is a cut for it on the hard
. Gennady: all
. Gennady: Now I have information for you =))
Aleksandr Goncharov: I forwarded this question to our technical department from there immediately received an answer that we do not provide such information. We just don't have it.
. Gennady: where is it and how can i contact them?
. Gennady: email, phone, form to fill out, just so that I know that the request will go where it needs to go !!
. Gennady: *form
Aleksandr Goncharov: We do not have such an opportunity. and I repeat once again, you will not be provided with this information, since this information is for internal use only and it is not in the public domain
. Gennady: You didn't help me with anything...
. Gennady: give me false hope
. Gennady: if I deal with this problem myself, then you will all become complete jerks and idiots in my eyes ....
. Gennady: you can’t do technique without protection from a fool !!
However, this would not be a problem if people did not forget these most established codes. If this is the first time you have encountered such a situation and do not know how to remove the password from the hard drive on a laptop, then this article is designed just for you.
HDD
If you installed the code on internal media and forgot, then you will not even be able to boot the OS installed on your PC. That is, the possibility of using a laptop or computer for its intended purpose will simply be absent. In such a situation, the user can only delete set password because there is no other way to get access to the computer.
Online service
There are several ways to remove the password from the hdd, and one of them is the well-known online service " BIOS Password Removal for Laptops».
In order to get rid of forgotten code by using it you need to:
- Enter it incorrectly 3 times (any combination of numbers or letters).
- After that, a special code should appear in the window.
- We copy the received numbers.
- We enter the same combination on the site, at the link above.
A few seconds after entering a combination of numbers in a specially designated line, you will receive a code that will help you reset the password from your drive.
It should be clarified that this program suitable for all models and manufacturers of hard drives (seagate, hitachi, toshiba, wd, etc.). Moreover, it does not matter which operating system installed on your computer or laptop, because this service is considered universal.
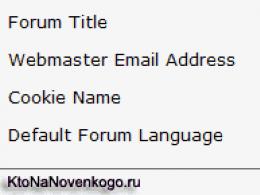
BIOS
You can remove the password from the hard disk in the BIOS only if the cipher was originally set via bios'e.
All you need is to use the standard option to reset the default settings:

Thus, we reset the password from the HDD.
Second way
The next option is free, specially designed for a variety of hard drive operations.

First, you need to familiarize yourself with the scheme of the password protection of the drive:
- Winchester can have high or maximum protection.
- Using the MHDD application, you can set a custom protection level.
- The master password set by the manufacturer can only be changed.
- The use of a master password makes it possible to unlock the drive only when high level protection.
- In the case of the maximum level of protection, the hard drive can only be unlocked if a user code is set.
- If the maximum level of protection is set and there is no user password, then the drive can only be unlocked by destroying all data using the Security Erase Unit ATA command.
Given the above information, in order to remove the password from the hard drive, you should:

Thus, you can extremely quickly remove the previously entered and forgotten cipher.
Third way
The HDD_PW.EXE (18KB) program will also help you remove the password from the hard disk. In order to remove the code with its help, you need to do the following:
- Find out the error code (when loading, press F2 and enter the wrong combination of numbers three times, after which a special code will appear on the screen)
- Launch an MS-DOS application.
- Select the name of the utility in the window that opens.
- After a space, enter the error code that you learned earlier, and add 0 through the space.
- By pressing "Enter", several passwords will appear in front of you, one of which is sure to work.
After entering the code, be sure to change it to a new one and write it down.

When performing these steps on a 64-bit system, you may encounter some difficulties. The system may generate an error due to a utility mismatch. In this situation it is necessary:
- Download DOSBox, install and run.
- Mount drive "C" with the command "mount c c: /".
- Then, at startup, press "F2", again type the wrong cipher 3 times and do the same steps.
To eliminate the possibility of such situations, it is recommended to completely get rid of the cipher by disabling it in the PC settings. If you are in dire need of it, then you should write it down in a notebook or any other place so that you do not have to reset it again.
In case you have lenovo laptop and at startup, the message “enter hdd password” is displayed on the screen, the method discussed in this video will help you:
youtube.com/watch?v=dKLZjrTyTeQ&t=174s
How to Recover deleted files is not a problem, there are dozens of utilities for this. But what if the drive is corrupted, has a bad geometry definition, or is password-protected at the controller level? Then the Victoria utility comes to the rescue. It is written in assembler, takes a few kilobytes and works directly with the controller.
FROM MS-DOS TO WINDOWS 10
Victoria was conceived as a tool for advanced diagnostics of drives (then - hard drives, and today also SSDs) and managing their settings through low-level commands. Belarusian programmer Sergei Kazansky has been developing it for ten years and has released an author's set of utilities for data recovery. During this time, there were many commercial releases of Victoria, several free versions̆ and one unofficial one, to which we will pay special attention.
Victoria was originally a disk utility for MS-DOS written in assembler. The ancient operating system was better suited than Windows, due to the fact that
in a single-tasking environment, it is easier to provide exclusive access to a disk. With the advent of support for the porttalk.sys driver, Victoria versions 4.xx learned to work in multitasking WinPE environment, as well as in Windows from XP to 10 of any bit depth. It has become easier to run it, the actions in the graphical interface have become clearer, and the mode of operation itself has changed. But here's the problem: without understanding the new features of the program, some users began to lose data and entire disks instead of restoring them. Therefore, the latest official version 4.46b has a developed "fool protection".
By default, only non-destructive operations with drives are available in it. This is not just a read-only mode, as in other utilities that access the HDD / SSD using the Windows driver. At the first start, Victoria is also blocked from changing the HPA (and messing up with the disk geometry), accidentally starting low-level formatting and "shoot yourself in the foot" in more sophisticated ways.
Victoria is the most versatile utility. It accesses any type of storage device (HDD, SSD, USB Flash) and with any ATA-compatible interface. Its job is to send ATA commands to any device that supports them. Therefore, everything said about Victoria's work with disk drives is also true for solid-state drives, with the exception of what applies to them. design features. It is clear that it is pointless for an SSD to watch the spin-up time of the spindle and try to control the positioning speed of the heads - it does not have either. Nevertheless, it is quite possible to test and even restore an SSD using Victoria.
Recover data on hard drive using VICTORIA 4.47
This version was made in 2013 by Oleg Shcherbakov, a programmer from Moscow. He patched the latest official build of Victoria 4.46b. Download better (zip). On this site, Shcherbakov published it along with the patch sources. The rest of the resources can distribute anything under the guise of the new Victoria.
Although Victoria is far from new program, it also contained critical errors that required correction. One of them led to the fact that running Victoria in 64-bit Windows versions was impossible. Because of the other, problems could arise when working with large disks. If the volume was above a terabyte, then Victoria 4.46b simply spent all virtual memory for drawing and color coding checked LBA blocks. In version 4.47, Shcherbakov fixed all this.
 Running Victoria 4.47 on Windows 7 SP1 x64, API Mode
 Victoria has two modes of operation: PIO (Programmed Input/Output) and API (Application Progoramming Interface). In PIO mode, the drive controller is polled by the program through the porttalk.sys driver. If you select API, the operating system tools will be used. Disk performance in PIO mode drops because DMA and high-level read and write optimizations are not supported. However, PIO mode allows you to use all the features of Victoria and send any ATA commands directly to the disk controller, bypassing the OS and standard drivers. It is through PIO that they most often work with disks in data recovery laboratories. Victoria supports both drives with a modern SATA interface, as well as old ones - PATA (it is often mistakenly called IDE). Victoria knows how to work with external drives(features will be described below).
Having selected the PIO mode, at the beginning of work, you need to scan the bus and determine the disk controllers with the PCI-Scan button. To the right of it, a disk port selection window is displayed. Internal ones are usually detected without problems, but for external drives you'll have to figure out their port numbers first. This can be done in the hardware properties or in any diagnostic program (for example, AIDA64). After that, you must manually set the port in Victoria. Also, even at the scanning stage, you can check the All dev checkbox (all devices) and use the exclusion method to find the desired disk in the list of found ones.
 Victoria 4.47 in PIO mode
 It is advisable to use the PIO mode for low-level commands. A simple search for bad sectors and their reassignment to a spare disk area is much faster (but less reliable) in API mode.
The limitations of the API mode are as follows: you cannot set or remove ATA passwords, work with the Host Protected Area and view registers are also disabled. If any of these functions are needed, then you can switch to PIO mode. However, it happens that the PIO mode is not available. This happens when using older versions of Victoria on 64-bit OSes. Another reason may be errors in working with the porttalk.sys driver or the selection of the SATA AHCI mode in the BIOS / UEFI. You can definitely get out of the situation in the following way.
- We record with WinPE x86 and put on it Victoria program simple copy.
- We connect the required drive to the SATA / PATA port, if we have not already done so.
- Disable all other HDD or SSD (optional).
- We go into the CMOS setup, switch the SATA controller mode from AHCI to compatible (compatible, native or IDE).
- Download WinPE. If necessary, install additional drivers, including porttalk.
- We start Victoria in PIO mode, initialize the required HDD or SSD and execute the necessary command.
Settings can be set through the GUI or in the vcr40.ini file. The same file will help to remove the blocking of work with the primary port. It is enabled by default to protect the system disk from accidental modification. To be able to select Primary from the list of ports, you need to do two things:
1. Disable the option "only non-destructive functions" and close the program.
2. In the section of the vcr40.ini file, add the line Enable PM=1, save the changes and restart the program.
PORTTALK
The latest versions of Victoria are able to automatically install the porttalk driver, but it is completely useless on 64-bit systems. The fact is that, for the sake of greater security, they removed a couple of functions that are needed for porttalk and Victoria to work. Therefore, the porttalk driver (and, accordingly, the PIO mode) works only in 32-bit versions of Windows, where there are Ke386SetIoAccessMap and Ke386IoSetAccessProcess functions.
EXTERNAL DRIVES
External drives are ordinary laptop (2.5'') or desktop (3.5'') models in containers with USB and FireWire interfaces. They are supplied with various controllers with the general name "SATA bridge". Many of these bridges do not translate low-level commands. Therefore, with one external drives Victoria can immediately work in PIO mode in the same way as with internal drives, while others will first have to suffer. In the simplest case, it will be enough to remove the disk itself from the case (do not open the HDA!) and connect it directly to the port.
SATA hard drive without SATA port
At Western Digital and, possibly, other manufacturers, some external hard drives were already produced with a soldered SATA - USB bridge. Therefore, they do not have a conventional SATA connector. Nevertheless, they can still be connected directly to the port by soldering the SATA cable to the pins on the drive board. To understand if your drive belongs to such a series, you will have to disassemble it, or google by model number and look for datasheets.
HDD password recovery
One of the most requested low-level commands in PIO mode is working with passwords. According to ATA certifications, disk access can be restricted with a password. It is set by the user from the BIOS or using external utilities. There is also a factory-preset master password. You can only lock a drive with a custom password. If you forget it, then the lock can be removed with a master password.
Depending on the set security level, the result of entering the master password will be different. At a high level (high), the master password acts on a par with the user password. It just unlocks the drive and that's it. If the maximum security level (max) is set, then entering a master password instead of a user password will unlock the disk only after all data on it has been completely erased (secure erase).
Working with ATA passwords is further complicated by the fact that, according to the standard, they always consist of 32 bytes (no matter how long you set it). Extra characters are ignored, and the missing ones are added automatically. The problem is that different programs write them in different ways. Regular security utilities on some laptops are especially guilty of this. Instead of traditional zeros (or at least spaces), they use non-printable characters. The code 00h cannot be typed at all from the keyboard (even through (ALT) + code). There is only one way out: do not enter the password in the program window, but read it from a file. Any characters can be written to a file using a hex editor.
It is not uncommon for a user to be unable to unlock a drive even when they enter the correct password. When changing a laptop or losing a regular utility, any other utility (for example, HDDL) will append the password to 32 bytes with its own characters.
There is also a preliminary modification of the password. In many laptops, it is actually encrypted before being sent to the controller. Usually these are the simplest logical operations, but this does not make it easier. The user thinks that there is a password known to him, while in reality the controller accepts a completely different one. If you have tried all the variants of the supposed user and standard master passwords, but have not achieved a result, then there is only one way out - to carry the drive to the laboratory, where they will work with it in the technological mode.
How to get back the lost terabyte
Sometimes Victoria's ability to work in PIO mode with HPA (Host Protected Area) is very helpful - a service area of memory in which the disk geometry is recorded. It determines the capacity of the drive by specifying it as the number of LBAs.
In my practice there was an amusing case. Received the standard complaint: "the computer does not turn on" (read, the OS does not boot). The owner complained that he had been suffering for about a month. First he traveled all over service centers, then invited different enikeys - to no avail. I came, looked and also thought hard. All components are correct. The disk is detected in the BIOS, but it does not boot from it. Launched Linux from a flash drive. The hard drive is visible, but the logical partitioning utilities show a strange picture: 64 MB in total and one partition with an unknown file system.
And then I realized that the HPA just crashed on the hard drive. As a result, a terabyte disk began to be defined as a 64-megabyte stub. I switched the SATA port mode from AHCI to compatible in CMOS setup, took a USB flash drive with WinPE and launched Victoria in PIO mode. Then he sent the NHPA command (restore factory volume).
Usually in such cases it is possible to instantly restore the passport value of LBA blocks, but this time the miracle did not happen. Therefore, I found a service utility for hard drives of this series and sent a similar HPA recovery command from it. A terabyte of data returned from oblivion on the next reboot.
Why did Victoria let her down? I suppose because this disk had some specific features unknown to me or the universal program.
FAIL HDD SECTORS
Most often, Victoria is used to find and fix bad sectors. If everything is in order with HPA on the disk and there is no password protection, but no utilities can read files from it in a reasonable time, then it's time to perform a surface test. Victoria can do this in any mode (PIO / API) using sector-by-sector reading (read), writing (write) and writing with verification (verify).
 Bad sector detection
 When restoring data, you can use read-only, but its options also vary. The simplest of them is sequential: from the first block to the last. The start and end values of LBA can be specified manually, which is convenient for many reasons at once. Firstly, this way it becomes possible to check disks of any size, simply by performing the test in fragments up to one terabyte. Secondly, you can re-check the suspicious area and exclude external factors. Victoria analyzes the sector access time. Usually, for new disks, it does not exceed 5 ms in 80% of sectors. Sectors with a polling time of less than 50 ms are also considered normal. Those for which it is measured in hundreds of milliseconds are candidates for bad sectors.

If the sector was considered after a few seconds, then this is an unambiguous bad block. Such a disk controller must identify itself during idle time and replace them in the address table with good sectors from the spare area. However, in practice this does not always happen. Victoria can ask the hard drive to perform such an operation (Remap) for those sectors that have not responded to requests for too long. Formally, part of the information is lost during this procedure, but in reality it was already lost at the moment when the sector became faulty.
In the paid version of Victoria, the Restore function was available - an attempt to read data from a bad sector at any cost and then overwrite it with a good sector. However, the program has not been officially supported since 2008, so purchase it full version Not sure it's going to happen. Free Victoria has more than once helped out by restoring HPA, resetting passwords and fixing bad sectors, which caused other data recovery programs to freeze.
 Reading chart for HDD surface test
 HOW free Victoria saved a secret job
Let me share with you another story. Laboratory at the research institute, our time. The analytical instrument is controlled from the computer that came with it. A very specific software is preinstalled on the computer, which the developers no longer support. The distribution kit is neither on the disk nor on the site. There is only installed program and she stopped working. The laboratory performed research under a multi-year government contract. Without a miracle device, the employees were bound hand and foot. We tormented ourselves and found out that the problem was with the disk. From antiquity, it was covered with bads, and normal work became impossible. An attempt to make a clone of the disk with skipping bad sectors was unsuccessful - the cloning program hung tightly. We ran the disk with the Victoria test with the Remap function. Pre-selected the necessary settings. By the evening of the same day, they successfully removed the disk image, and then restored everything from it to a new hard drive. The device came to life, the contract was completed on time.
Victoria has four methods and three types of surface testing (twelve modes in total). In each, it automatically counts the total number of defective blocks and writes their addresses to the log. Like a disk editor, Victoria can show the contents of sectors and allows you to change it. In PIO mode, Victoria displays information about the logical partitions on the media, even if it is not detected at all in the BIOS. Not a single utility with access through the API is capable of this.
Additionally, Victoria knows how to manage the level acoustic noise drive (AAM), adjusting the speed of movement of its heads during the search, run low-level formatting, change the HDD volume and perform benchmarks. It can even be used to check the physical interface (cable and port status). At home, it will save the HDD or SSD in many difficult situations, except for difficult ones. mechanical damagĕ, requiring the opening of the HDA. The lab will handle them too, using Victoria as one of the proven utilities.