How to connect the antenna cable. How to connect the antenna cable to the power supply
Very often, a second TV appears in one family. In this case, there is only one antenna. The question arises: how to connect two TVs to one antenna? There are ways to use one antenna on two or more TVs.
What you need
To connect, you will need several parts:
- two-output splitter (splitter). This is a device that allows you to divide the signal from the antenna into two or more streams. It has an input on one side and two or more outputs on the other - for connecting television receivers.

- 5 connectors corresponding to the splitter;
- 2 adapter plugs;

- antenna cable.
Important: When purchasing a splitter, do not confuse the number of outputs! A three-way (three-output) splitter is used to connect three receivers, but not two! If you still have a three-output one at hand, you can solve the problem by connecting a ballast resistor (resistance 75 Ohms) to the free output. And if there is a plan in the future to install and connect several TVs to this antenna, then it is better to immediately buy a splitter with several outputs and temporarily drown out the empty outputs with the same resistance.
Work progress
We will try to talk about the connection in such a way that even someone who does not understand radio engineering at all can cope with the task. This is done step by step like this:
- Selecting details. The first thing you need to do is buy a splitter. They come in a variety of varieties, including those that require soldering and those that do not. If you know how to solder, then it is better to take those that involve soldering. This connection is always more reliable than any other, it produces less signal loss and preserves its quality.
If you do not have soldering skills, then you need to choose an appropriate splitter, as well as one suitable for a specific type of cable. A win-win option would be a splitter with built-in sockets for coaxial cables.
Having chosen a splitter, select the appropriate connectors. F-connectors are now very popular due to the fact that they are reliable and easy to install.
- Choosing a location for the splitter. It is optimal to position the device so that the antenna cable can easily reach it and, if possible, have the shortest distance to both TVs.
- Cutting the existing antenna cable. It is necessary to cut so that the cable can freely reach the splitter. The old plug is cut off along with a piece of cable.
- Cable stripping and installationF– connector.

For those who know how to solder, there is no point in telling them how to cut a cable and solder it to a splitter - they know it themselves. What follows is written for the average user who is not familiar with the radio business.
So, we cut the cut end of the wire, as shown in the figure: we strip the edge, wrap the braid. The middle core insulator should protrude slightly, and the middle core itself should protrude by at least 5 mm. Insulation stripping tool with coaxial cable At home, an ordinary kitchen knife is used.
Important: The cable must be standard; DG 113 or SAT 703B are more often used. Under no circumstances should the cable braid be connected to the central core, unless otherwise the signal will not pass through at all.
Install the F-connector. It is also called wrap-on because the connector is wound onto a soft wire. The connector for connecting the cable and splitter is ready.
- Cut two pieces of wire with the expectation that the length would be enough for each TV.
- We mountF- connectors similarly for connecting TV cables and splitter outputs. We do the same at the other ends of the cables.
As a result, we have all five connectors used, including:
- one from the antenna, to enter the splitter;
- two televisions, for exiting from it;
- two televisions free.
- We connect the connectors to the splitter.


- We connect two free connectors with adapters. An adapter is a device with an F-connector attached at one end and a coaxial plug at the other for connecting to television receivers. Typically this device is generally referred to as a plug.
- We turn on the television receivers. Let's check how both receivers work. If everything is done correctly, the image should be normal. Now you can easily enjoy an excellent picture on two receivers at once, without interfering with each other.

Using the diagram below you can see the path along which you need to connect 2 TVs to one antenna:

How to install an antenna with an amplifier
But what if after connecting the splitter the image quality deteriorates? This may mean that the antenna on two TVs does not provide the required signal, while the separating device also takes over some of its share. The solution can be an antenna with an amplifier, it is also called a Polish one. Such an antenna for two TV receivers connected to the device will improve the signal quality in both TVs. To do this you need:
- In an existing circuit with a splitter put awayF- connector from the entrance to it.
- In his place connect the plug to the power supply from the antenna kit with amplifier.
- At the entrance install an adapter with an antenna socket(the so-called “mother”) and insert the plug from the antenna with an amplifier there.

This should improve the signal quality.
Splitter with amplifier
There is a second option - look for a splitter with a built-in signal amplifier. This method is good when the TV initially showed well and a new antenna is not required. However, before purchasing a new device, discuss your specific case with a specialist.
Amplifiers, including those on the antenna, have different gains, and too much signal is just as bad as a weak one, and can also cause distortion. The telemaster will measure the signal level and give advice on purchasing an amplifier.
By the way, the problem with signal attenuation can even arise if you connect several TVs to one antenna. The more receivers, the more the signal attenuates. Therefore, when planning to connect several television receivers, weigh all the pros and cons.

Below are video instructions for connecting an antenna to two television receivers:
In contact with
It is difficult to imagine modern housing without television. For stable reception of a TV signal, a TV antenna is required, connected to the TV with a special TV cable. The average service life of such a wire when properly connected is 10 years. Temperature changes, room renovations, rearrangement of furniture and other unfavorable factors can reduce the service life of the cable.
Wire connection methods
Some people turn to specialized workshops to install a TV antenna, but most home craftsmen prefer to do this work themselves. It is not particularly difficult and can be done by anyone who has basic knowledge of electricity and understands how to select and install an antenna cable for a TV.
There are several ways to connect antenna wires to each other:
- Soldering (using a soldering iron with tin and rosin).
- Twisting (mechanical twisting of the free ends of the wire).
- F-nut connection (simple and securely fixed threaded contact).
Due to the complexity of the first two options, we will consider the most current, easily accessible and time-tested method of connecting a cable using a special connector - an F-nut. Although there are two more ways to solve the problem, they require much more time and effort, without guaranteeing one hundred percent success in terms of high-quality signal reception. The first method additionally requires skills in handling a soldering iron.
Stages of work completion
Before you start working, you should disconnect the television receiver from the power supply. Then you need to carefully inspect and feel the antenna wire for wear on its outer insulation. If there are microcracks and peeling in certain areas, it is advisable to completely renew them. After this, you need to measure the length of the TV cable that requires replacement or extension and write down the indicators. Highly undesirable a large number of docking nodes, since each of them affects the quality of the received signal. The best option is to replace a single piece of antenna wire from the divider to the TV.
When extending the cable, it is better to create a reserve of its length for possible change location of the television receiver in the future, and roll the excess into a ring of small diameter and secure it by wrapping it with adhesive tape.
Before going to buy materials for an antenna, it is advisable to cut off a small piece of the existing wire as a visual example for selecting a similar one. This will help you choose the right cable if you don’t know its letter or number designations.
Explaining how to choose a cable for satellite television, experts advise choosing it according to the presented fragment or depending on the brand of television receiver. You also need to decide in advance on the method of laying the antenna wire (open or hidden).

When using hidden installation, the cable is mounted in a strobe under a layer of plaster, floor or baseboard. With this method, brands such as APV, APPV, VARN, APS, etc. are used. It requires a slightly thicker layer of external wire insulation. Having purchased the required quantity of cable of the required quality and decided on the installation method, you can begin installing the antenna cable.
Structure and installation order
To understand how to connect the antenna cable to each other, you need to get an idea about him general structure . Experts call it a special coaxial wire for transmitting a TV signal, image and sound. There were two main dwellers in it:
- central (receives video and audio signals);
- shielding (protects against magnetic and radio interference).
Coaxial tv cable comprises four components. The main one is the central rigid wire (it is copper or aluminum, filled with continuous insulation made of polyethylene or fluoroplastic). This wire is wrapped in a thin braid of copper or aluminum. The presence of insulating polyethylene prevents the two main wires from contacting each other, which is critical an important condition for high-quality signal reception. The final layer is the outer insulation, which protects the cord from mechanical damage. The most commonly used wires are RG-6, SAT-50, SAT-703.
To understand how to connect a TV cable to each other, you must follow the instructions:

If the F-nut does not fit tightly, you need to crimp it with pliers directly on the wire until it is securely fixed.
Splitter device and principle of operation
If the goal is to divide the feed signal into several receivers, use divider or "crab".The original name of this device is splitter. It is a box with connectors for connection with an F-nut.
The inscription IN on the connector is always the same on the divider and is used for the signal supply cable. The inscription OUT is intended for cables going to receivers (there may be several of them). The number of connectors labeled OUT should always be one more than TVs, that is, for two TV receivers - 3 connectors, for three - 4, etc. It is undesirable to leave empty connectors, as this leads to deterioration of the signal due to loss of resistance in the cable. But if the task is to divide the cable into 4 or more TVs, you should connect special splitters with amplifiers.
 Before connecting the receiver, all that remains is to figure out how to properly connect the antenna cable to the plug, that is, directly to the TV. A nut connection is also used here. The plug can be straight or angled. Which one to choose does not matter, since there are no fundamental differences between them. Sometimes there are cases when the straight plug (used most often) is inconvenient to connect due to external interference.
After making sure that all necessary elements are securely connected TV antenna and their resistance to external mechanical loads, you can turn on the power and start tuning the TV. Independent work Properly connecting the coaxial antenna wire is not a very difficult task and is quite within the capabilities of a person who wants to learn something new.
Even in the age of digital technology and the total penetration of the Internet into all spheres of life, many apartments receive a television signal via cable. An incorrect attitude towards its installation can have a very negative impact on the quality of the received signal, even if you choose the most modern and expensive material. In this article we will tell you how to connect a television cable different ways, we will give recommendations to beginners.
Features of cable routing
The television cable “comes” into the apartment from the floor panel and is routed through the television receivers available in the house. To correctly install a TV cable throughout your apartment, you should follow some recommendations.
 The main elements of a TV cable in stripped and completely exposed form
 To avoid signal interference, it is recommended to place the cable away from the electrical wiring. Telephone wire or Internet cable do not interfere with the normal passage of the TV signal, and therefore the general installation of these communications in one cable channel is allowed. If it is impossible to avoid placing an electrical cable together with a television cable, then you should purchase a TV cable with a core diameter of over 1 mm with a double protective screen.
Throughout the apartment, the cable should be pulled in one piece, avoiding any connections or twists that affect the quality of the picture. Crossing cables with electrical networks is not recommended, but if this cannot be avoided, then the intersection should be arranged strictly at an angle of 90°. Read also the article: → "".
Cable routing across rooms to ensure shielding and high quality contacts is carried out using factory-made splitters. Self-made devices are unlikely to be able to provide acceptable signal quality. You should also avoid connecting a television cable with sharp bends or in a coil - the quality of the picture on the screen may suffer greatly from this.
It is better to lay the section of the line running from the floor box to the apartment in a widened cable channel, taking into account the possible activation of an alarm or an additional telephone line. To facilitate maintenance, splitters should be placed in areas with easy access.
 TV cable models may vary, but general principle connecting them is unchanged
 How to choose the right cable
Even the most modern television receiver and cable plugs are unable to produce an acceptable image if the cable is of insufficient quality. High-frequency TV signal currents flow somewhat differently than home electrical currents. The higher the frequency of the current, the closer to the edges of the main wire it flows, therefore, in cables used in the military or space industry, in order to avoid a critical reduction in the quality of the television signal, they are treated with a silver or gold compound.
Selecting a cable to connect
When selecting material, you must adhere to the following recommendations:
- all markings must be present on the outer shell;
- the resistance value of the product should be 75 Ohms, because all television receivers are designed for this value;
- the outer diameter must be more than or less than 6 mm;
- The main core and shielding braid must be made of copper.
In the latter case, manufacturers often sin by trying to reduce the cost of products as much as possible by making the central core from steel and simply covering it with copper plating, making braiding from copper alloys, and shielding from foil. Read also the article: → "".
Marking of television cables
Let's look at the markings using the example of the Chinese RG 6U television cable, the most common in our country.
An example of Russian-made cable marking indicating the main characteristics and technical specifications
How to connect a cable to a plug
You can connect the plug to the cable yourself, especially since the TV signal voltage is too low to cause any harm to health. Even an unplugged cable can be cut without fear of electric shock. A short-circuit between the braid and the main conductor also does not cause any harm. For different sizes Cables come in a variety of plugs, so when choosing a cable, you need to pay attention to its diameter. The most commonly used are F-plugs.
First you need to cut the cable, which can be done in two ways:
- with braid bend;
- without inversion.
The most reliable method is considered to be cutting with a twist, but if it is not possible to install the plug, then the second method is used. The cable is cut with a scalpel or a sharp knife: the outer sheath is carefully cut to length without damaging the screen. Once the cut is complete, the insulation is folded back and removed.
 Step-by-step diagram of crimping a television cable with bending the braid and releasing the main core by 3-5 mm
 The copper braid and shielding foil are wrapped. In general, three types of shielding can be used in TV cables:
- aluminium foil;
- copper braid;
- aluminum foil with copper braid.
Aluminum foil is often coated with polyethylene on the inside for strengthening purposes. It is unlikely that it will be possible to clean the film without damaging the foil, so to improve the contact of the screw-on plug with the foil, the bent part of it is slightly wrapped back so that the uninsulated piece of foil faces outward. If the cable diameter is too small, the end entering the plug is wrapped with electrical tape.
The insulation from the main core is removed in a manner familiar to many, similar to removing insulation from electrical wires, without damaging the core itself. Then the plug is screwed onto the foil, and the excess main core is bitten off with wire cutters or cut off with a knife, leaving a length of approximately 3 mm on the outside.
Connecting the cable to the antenna
Connecting the TV cable to the antenna should be carried out in compliance with the rules for switching electrical appliances, guided by the diagrams available in the technical data sheet of the TV. To complete the work you will need:
- splitter;
- antenna cable;
- antenna amplifier;
- wire cutters;
- sharpened knife or scalpel;
- soldering iron
An antenna amplifier is used when the signal is not strong enough or too weak. The splitter is useful for connecting several TVs to one antenna at once. Read also the article: → "".

 The cable is connected directly to the TV antenna using screw terminals
The cable, splitter and amplifier must be installed next to the separated cable. In an individual house the best place The attic is where all the equipment is located. The end of the cable coming from the antenna is connected to the amplifier through a special terminal. From the amplifier the signal goes to a splitter, to which the television receivers in the house are connected. When connected to satellite dish You will need to use a receiver to which a cable is connected via an antenna connector. Preparing the cable is similar to cutting it before connecting it to the plug.
Tip #1. Before connecting the TV, you must carefully check all the connections of the switching devices and the reliability of the plugs in the appropriate sockets. If the image is noisy or the signal is too weak, you should adjust the antenna amplifier.
Connecting to a splitter
Nowadays, no one can be surprised by the presence of a TV in every room. A small problem is supplying a TV signal to all receivers, since in most cases there is only one signal source. The solution to this problem is to use an antenna splitter. The picture quality when connecting TV receivers through a splitter may deteriorate somewhat, but the connection process itself is not difficult and is completed in just a few minutes.
The connection diagram can be presented step by step as follows:
- choosing a location for the splitter and securing it there;
- removing plugs from used connectors;
- cutting and connecting TV cable.
Connecting the cable in the panel
When laying or connecting the cable, it is not allowed to twist it into knots and coils, bends or sharp bends, which sharply worsen the quality of the received television signal.
Tip No. 2: The section of cable that goes first from the panel to the apartment should be placed in a wide cable channel.
In the case when the cable connection in a staircase box must be performed by soldering, the length of unshielded sections should be minimized, since their presence and length directly affects the quality of the signal and image. After soldering is completed, it is recommended to cover each contact under a layer of varnish - it can prevent the occurrence of pockets of corrosion damage and the ingress of dust particles between the contacts. Dust adhering between the contacts causes signal deterioration when air humidity increases: the image reproduced by an analog TV will become very snowy, and when transmitted digital signal the image will simply disintegrate into pixels with an unpleasant squeaking sound.
 Connecting a television cable in the entrance panel is not difficult
 FAQ
Question No. 1. Is the F-plug suitable for digital TV signal transmission, or only for analogue?
Despite the fact that this type of plug has been used for quite a long time, both its connector and characteristics allow you to fully enjoy not only analog (by the way, broadcasting will cease forever in the near future) television, but also digital and satellite television signals.
Question No. 2. What to do and what to do if the diameter of the cable is slightly smaller than the diameter of the internal thread of the plug? After all, in this case, reliable compression will not work.
Question No. 3. When installing the plug into the corresponding socket, the TV cannot be placed close to the wall. What is the way out of this situation?
In this case, you should use an angled plug, which can be purchased at almost any store that sells electrical household appliances.
Question No. 4. In old Soviet-made TVs, the cable was connected to the plug by soldering. How to connect to it modern type cable?
If the signal quality deteriorates or the cable needs to be replaced due to poor contact, the plug and cable can be connected, as before, by soldering.
Question No. 5. How can I connect to an antenna or network? cable television several TVs at once?
To connect several television receivers, you can use a special device - a splitter, also called a “divider” or “splitter”.
 Using splitters to connect several TVs to one TV cable
 Typical connection errors
- Not everyone knows that some manufacturers coat the inside of the cable with polyethylene, which cannot be cleaned even with a scalpel. Plastic, even with the best cable stripping, will prevent the creation of high-quality contact with the plug. To avoid signal distortion, it is recommended to wrap part of the turned-off foil in reverse side so that the conductive side is on the outside.
- A typical mistake is getting the thinnest braided wires onto the main core of the cable when crimping it. This may result in poor quality or intermittent signal dropouts. A common mistake when installing and laying cables is placing them in the same baseboard as the electrical wiring. This cannot be done, otherwise the interference created can significantly spoil the mood when watching TV shows.
Many satellite TV users are faced with the problem of connecting the antenna cable to the power supply. We tried to solve this problem and below are some tips to fix it.
For reference. The power supply is a secondary power source. It is used to provide the receiver nodes with electricity. In most cases, the power supply also performs additional functions. It provides stabilization and protection of the supply voltage.
In order to connect the antenna cable to the power supply, you need to connect the cable and the plug of the active antenna power supply.

1. First we cut the cable. To do this, step back one and a half from its end and remove the insulation in a circle using a knife. Be careful not to damage the cable braiding underneath the insulation. These are different wiring and screen foil.
2. We remove a piece of the cut outer insulator and move the screen hairs and foil back.
3. We retreat half a centimeter from the shifted edge of the braid and cut off the inner insulating layer in a circular manner. After that we remove it.
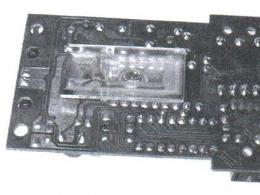
4. We take the cable and place it under the clamp of the power supply plug. We perform all actions very carefully, making sure that the central core is inserted into the latch, and that the metal braid and screen are in contact with the tinned area.
5. We tighten the screws and fix the contacts of the power supply cable.


NOTE! Then make sure that the braid and the main core located in the center are not closed. If this happens, the indicator light will not light up, and if it does light up, it will be very dim. Also, make sure that the metal braid is in contact with the tinned area of the plug. Otherwise, the supply voltage will not reach the TV cable.
If all actions are performed correctly, you will see all channels on the TV screen immediately after scanning and making settings. When you disconnect the power supply from the network, the channels will either disappear from the TV screen or their image quality will deteriorate.
For reference. A television cable is used to connect an antenna to a receiver or television. It is very important to choose the right antenna cable with optimal impedance. This will help ensure maximum power transfer. There are several factors to consider when choosing a cable. Symmetrical lines are sensitive to contamination and very often lose signal. Coaxial ones are susceptible to weather influences and have a short service life. In most cases, single-ended antenna cables with a thick copper main conductor are used. They are equipped with a plastic dielectric. The braid is made of copper wire. The top layer is made of polyethylene or polyvinyl chloride. The second factor is diameter. We give preference to the thickest possible cable, since a thin one will lose a certain part of the energy. A weak signal will affect the image quality.
Correct connection - quality reception!
Due to incorrect connection of the antenna cable and plug, the quality of the signal deteriorates, or the TV completely stops receiving it.
In the video in simple language explains how to avoid such errors by achieving stable reception and uninterrupted operation of the antenna. The author compares the two types of most common plugs, tells how to connect them to a cable so that the signal quality does not drop over time, and gives other valuable recommendations.
It clearly shows where the central core should be connected, and where the braid should be connected:
“There is a screw on the straight plug, under which some people simply clamp the core, and they squeeze the braid. It is not right. It is necessary to solder it to the outer part of the plug. Then you will have a good connection."
In addition to standard straight models, the video explains the features of working with angled antenna plugs. All items shown close-up, as well as the junction of the braid and core with metal parts. Thanks to such a detailed examination, everyone will be able to understand the basic principles of connecting an antenna cable.