How to save a table created in excel. Excel program - ways to save and its options
Those who constantly work with Microsoft Excel often have to wonder about the correct copying of table data while maintaining formatting, formulas or their values.
How to insert a formula into an Excel table and keep the table format? After all, when solving this problem, you can save a car of time. To do this, we will use the "Paste Special" function - this is a simple tool that allows you to quickly solve complex problems and master the general principles of its use. Using this simple tool allows you to quickly format all tables in the same format and get the result you need.
How to copy a table with column width and row height
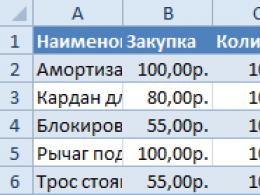
Let's say we have such a table, the format of which needs to be preserved when copying:
When copying to another sheet using the usual Ctrl + C - Ctrl + V method. We get the unwanted result:

Therefore, you have to manually “expand” it in order to bring it into a convenient form. If the table is large, then it will take a long time to “mess around”. But there is a way to significantly reduce temporary losses.
Method 1: Use a special insert


She received the original parameters and looks perfectly accurate.
Method 2: Select columns before copying
The secret of this method is that if you select its columns along with the headings before copying the table, then when you paste the width of each column will also be copied.

For each case, it is rational to apply its own method. But it is worth noting that the second method allows us not only to quickly transfer the table along with the format, but also copy the height of the rows. After all, there is no “line height” option in the paste special menu. Therefore, to solve such a problem, you should act like this:


Insert formula values while maintaining the table format
Paste Special, while not perfect, should not underestimate its capabilities. For example, how to insert a formula value into an Excel spreadsheet and keep the cell format.
To solve such a problem, you should perform 2 operations using a special paste in Excel.
Operation I:
 Operation II:
 Since the copied range is still on the clipboard after copying, we immediately call the special paste again where we select the “formats” option. Click OK.

We have pasted the formula values into the table and saved the cell formats. As you guessed, you can do a third operation to copy the width of the columns, as described above.
Useful advice! In order not to perform the second operation, you can use the Format Painter tool.
Microsoft Excel provides users with almost unlimited possibilities for calculating the simplest functions and performing a number of other procedures. Using the program allows you to set formats, save cell values, work with formulas, transfer and change them in a way that is convenient for users.
XLSX and XLS formats- main toolbar Save in other formats... File>Save document as>Workbook Microsoft Excel 97-2003.
Advice. Save>XLSX dialogue Settings(menu Service>Settings…).
Document execution
The choice of the mode for saving the design depends on how you will use the created document in the future:
- Formatted text
The resulting document will retain the style and size of the font, the division into paragraphs, but will not save the location of objects on the page and line spacing. Thus, a solid text with left alignment will be obtained. For text in which the reading order is from right to left, the alignment will be right.
Comment. Any text with a vertical orientation in this mode will be displayed horizontally.
- Plain text
In this mode, text formatting will not be saved.
Text
- Save numeric data in Digits format
Specifies that when saving recognized text in XLS format, numbers will be saved in Digits format. This format is used in Excel to perform arithmetic operations on cells containing numbers.
- Save headers and footers
Check this option if you want the header and footer text to be preserved. If this option is disabled, the header text will not be saved.
- Create a separate table for each page (XLSX only)
Picture quality
When saving to XLSX format, you can also save illustrations. If the recognized text contains a large number of illustrations, then the size of the final file can be very large. The quality of the images and the size of the resulting file depend on the selected value in the drop-down list. Picture quality.
Advice:
- To set options for saving images, select Custom…. In the opened dialog box User settings select the required values and click the button OK.
- If you do not want to save illustrations in recognized text, make sure that the option Save pictures (XLSX only) not marked.
CSV format
- Click the arrow next to the save results button on the main toolbar and select the save format from the list. If the format you want is not in the list, select Save in other formats..., and in the save dialog that opens, select the required format. You can also save documents using the menu command File>Save document as>CSV Document.
Advice. If necessary, you can configure additional saving options on the bookmark Save>csv dialogue Settings(menu Service>Settings…).
This tab contains the following groups of settings:
Text saving options
- Ignore text outside the table
Specifies that only tables will be saved to the file.
- Separate pages with the end of page character (#12)
Specifies that when the recognized text is saved in CSV format, the pagination will be the same as in the original document.
- Delimiter
Specifies the character that will separate columns of data in a CSV file.
Encoding
ABBYY FineReader automatically selects the code page. If you want to change the code page, select the desired value from the drop-down list in the section Encoding.
A new document at the time of its creation is in the computer's memory, and if it is not saved to disk, then after the application (in this case Excel) is closed, this document will disappear and it will be impossible to restore it. Sometimes a document can indeed be “one-time”, that is, it is created only to use it once (for example, to print). However, in most cases, the created document needs to be saved in order to be able to work with it in the future. In addition, as a rule, you also need to save a document that already exists on disk if changes have been made to it. To save a document, do one of the following: - select the Save tool from the Standard panel; - press the combination Ctrl+S (Save) or Shift+F12; - execute the Save (File) command.
If the newly created document is saved for the first time, then a save window appears, in which you must: » 1) select the drive on which the file will be saved, for which you should open the closed Folder list and click on the line with the drive name; 2) go to the directory where the file will be saved; 3) in the File name input field, enter the name of the file to be saved; 4) press the Enter key or click the Save button. To go to the desired directory, you can use the following methods: enter the directory - double-click on the directory (by name or by image) in the list of directories and files; leaving the directory (going to a higher-level directory) - click on the Up tool or Alt + 2 combination; » return to the previous (last) directory - click on the left section of the Back tool or Alt + 1 combination; « return to one of the previous directories - click on the right section of the Back tool and click on the directory selection in the list that appears. It is not necessary to type the file extension when entering the name, it will be assigned automatically. The Excel workbook file will have an xls extension.
To specify the name of the file to be saved, you can use the closed File name list, which saves previously typed document names. Properties form in which the list is presented as a list, and when you click on a file from the list, a brief description of its properties appears to the right of it (see section 3.2.5). You can also select a presentation shape by clicking on the left section of the View tool or by pressing Alt+b. Forms of representation will be consistently changed. The most commonly used and convenient is the List form. The Table and Properties forms are applied as needed.
The use of other forms is not of great practical interest.
PDF - was developed as a format for presenting books and magazines on computers. In everyday life and business, it is most often used to create, so to speak, immutable documents. For example, you have created a table with tariffs or an agreement and you need to send it to the client so that the client does not change anything there, it is best to save it in PDF. After all, Excel can be easily, even if it is password protected.
XML- was developed as a language convenient for processing documents by programs and convenient and understandable for working with a document by a person. You can say a format specially created for the Internet. Very often, exchanges between two programs pass through such a universal language. For example, automatic unloading from Access and loading into 1C.
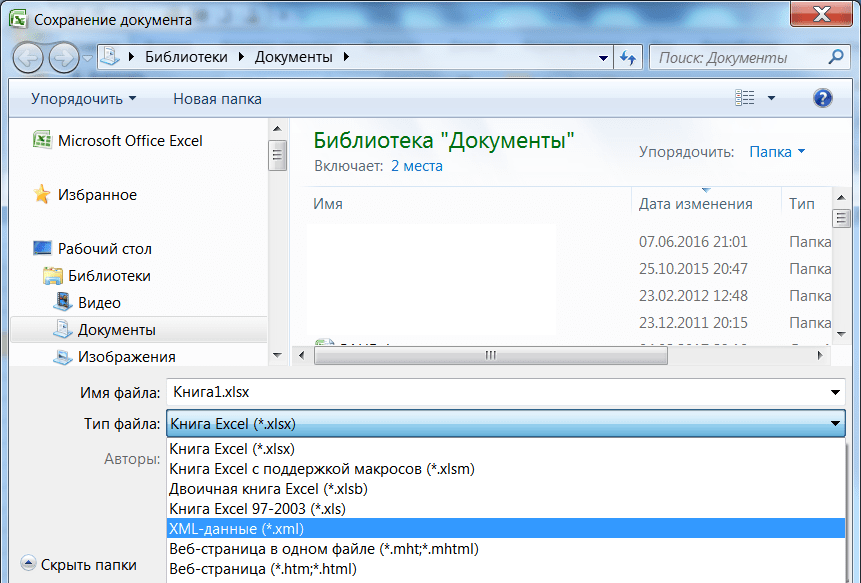
The full list of available formats is shown in the picture:
As shown earlier, to save Excel to PDF, you need to go to the menu, select Save As - then select PDF or XPS (in the first picture).
XPS is also a special format for protecting the content of a document, one might say an electronic sheet of paper.
Excel to JPEG or PNG
There is no special save function for the image format, but it is quite simple to do it using Windows tools.
First of all, almost every keyboard has a special Print Screen button (screenshot), it is located to the right of F12. Most often something like PrtScn or Prt Sc is written on it.
After clicking this button, the picture with the screen image is saved and you can paste it anywhere: in a letter, in Word, or in the Paint program. From Paint, you can already save to JPEG and PNG.
If you only want to copy the active window, press Alt + PrtScn - described in more detail.
It's even easier to find the scissors program (starting in Windows 7 is built-in). Start - all programs - Standard there are these same scissors - now you can select any fragment and immediately save it in the desired picture format. Convenient - I recommend it to those who do not use it.
If you have a MAC, press Shift + Command + 3 to take a screenshot
Save Excel to XML
Again, as shown in the big picture, left-click on Save as - then the save window will open in the File type window, look for XML data (*.xml).
Share our article on your social networks:If you get an error when saving, save as an XML 2003 table, also listed. Most often this happens because. An XML document may not accept more than 65 thousand lines, and the 2003 format cuts them off!
Writing Excel spreadsheets to a computer is called saving. This is such a process in which we make a file from a table and put it on Local disk. Then the file with the table can be opened on a computer, transferred to a USB flash drive, sent over the Internet.
How to save an excel spreadsheet
one . Click on the inscription "File" in the upper left corner of the program.
If there is no such inscription, click on the round button with colored squares. It is also located in the upper left corner of Excel.
2. Select "Save As" from the list.
![]()
3 . A small window will open. Through it, you need to select a place on the computer where you want to write the table. You can do this through the left side.

Then I open the Reports folder.

If the desired folder does not exist, you can create it directly in the window. To do this, click on the "New Folder" button at the top.
I check if the correct location is selected for saving. It will be written at the top of the window.
4 . Type in a name for your file, or leave it as your computer suggests. The name can be changed at the bottom, in the "File name" line.

The window will disappear - this will mean that the file with the table has been written to the specified location.
Now you can close the Excel program and try to find the recorded file on your computer. To do this, open the location that you selected when saving. There should be a file with the specified name or the standard name "Book 1".
Important! When compiling a table, it is better to save it from time to time. To do this, use the following button in the upper left corner of the program:
Clicking on it will overwrite the table. That is, the previously recorded version will be replaced by a new one. This is necessary so as not to accidentally lose data. After all, if a computer crashes (freezes, power outages), then the table is likely to be lost.