All ways to take a screenshot of the screen on a computer. Which key to take a screenshot How to take a full screen screenshot on a computer
Increasingly, when working at a computer, and on the Internet in particular, we need to take screenshots of pages.
Most likely you have already needed to do this in some game, or send some kind of report in the form of a screenshot of the screen, to confirm your words.
Well, or it happens that the interlocutor does not quite understand what they want from him and you need to literally on the fingers, or rather, on the skin, select some element on the page and indicate the action.
It is for these purposes that this article is to solve your problem, which does not give peace and help.
If you can't take a screenshot using the Print Screen key
Let's first take a look at how a screenshot of a page with the Print Screen key is taken, namely, without any additional programs.
Stage 1: put the screen in the clipboard
To do this, if you have a large keyboard (with a numeric keypad), then simply press the PrtScr key.
In this case, a screenshot of the entire screen will be taken and placed in the .

If you want to “take a picture” of only the active window (in the event that several windows are open in Windows), then you need to press the Alt + PrtScr key combination. That is, hold down Alt and, as it were, add PrtScr to make everything work.

If the key combination Alt + PrtScr does not work for you, then find the Fn key (near Alt) and read Fn + PrtScr.
This often happens on a laptop, where the keyboard is small and does not have a number pad on the right.

At this time, you can be on any site, or just in Word or another program, or play a game and press a combination of these keys to take a screenshot.
At the same time, we want to note that you will not see any information that the keys worked. In order to understand that the screen is made, you need to go to step 2.
Stage 2: paste the picture taken into the graphic editor
After we have completed the first stage, we launch the standard Paint program that is available on any Windows OS:

And then just in the program window, press the key combination "Ctrl + V"


The screenshot will be pasted into the program from the clipboard. Now you just need to select "Save" in the top menu, or press the key combination "Ctrl + S" and select a location on your computer to save in any of the available formats: jpg, png, gif.
If you wish, you can stretch or compress it.
Taking a Snapshot of a Page in Windows 7 Using Scissors
If you have a Windows 7 operating system, then you can do without the keys described in the previous section, and without all kinds of inserts.
You just need to run a standard and very convenient program called "Scissors" (Snipping Tool).
You can find it in the Start menu. If it is not visible there, then use the search, just as we searched for Paint.

Immediately upon starting the program, the cursor will change to a cross. By holding the right mouse button, you can select the desired area of the screen, release the button and the screen will automatically be made.
This mode is called Rectangle. It is by default. But you can choose other options from the menu, from the drop-down list: “arbitrary shape”, “window”, “full screen”.

After the screenshot is taken, save it to your computer with the keyboard shortcut "Ctrl + S".
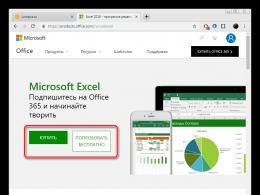
Screenshot program Lightshot
Download software by button (for Windows):
Download Lightshot for free
or go to offsite https://app.prntscr.com/ru/. There is also a version for Mac.

Recently, many users of personal computers are interested in the question: how to take a screen on a computer? The answer is both simple and complex at the same time. Let's start with the Windows operating system. Fortunately, the developers of this system took care of this. They've pinned the screenshot function to the "print screen" key, which is on the top right corner of your keyboard (Figure 1).
How to take a standard photo?
Interesting fact: If you have a multimedia keyboard, then most likely the key can mean a quick send of the document to the printer.
Tip: Refer to your keyboard's documentation. Basically, along with the keyboard, a special disk is also supplied, which will help you reconfigure the keyboard keys.
Although this is one of the oldest methods, it is also the most reliable. When you press this key, a screenshot of your screen is saved to temporary memory (clipboard). Also, when you press the key combination "Alt" + "print screen", a screenshot is taken in the window on which the focus is located or, more simply, which is currently open.
After you have copied your screenshot to the clipboard, you need to save it as an image file. To do this, we need any graphics editor, in our case it will be "Paint". Despite the fact that this is a very simple graphics editor, it will do just fine for our purposes. In order to open it, you will need to go to the "Start" menu, click on the "All Programs" tab, find the "Accessories" tab, and then click on the "Paint" icon (Figure 2).

You will see the working window of the graphic editor. Now you need to go to the "Home" menu and click on the "Insert" tab or press the key combination "Ctrl" + "V". You will see that the screenshot taken will appear in the graphics editor window (Figure 3).

Next, you will need to save this screenshot in graphic format. To do this, click on the menu tab, and select the "Save" tab. You will be offered several formats for saving the graphic file, select one of them. Give your file a name and save it (Figure 4).

Cutting the screen with scissors
This stage of saving the screenshot has come to an end. But what if you need to save only a certain part of the screen? If you have a Windows 7 or Windows 8 operating system, you can use the Scissors tool. The location of this program is located at Start - All Programs - Accessories - Scissors (Fig. 5).

When you run this program, the entire screen will become light and you will need to select the area of the screen that you want to keep. Hold down the left mouse button and move smoothly to select a screen fragment. When the button is released, the cut fragment will open in a new window (Fig. 6).


I would like to draw your attention to the fact that a rectangular selection of the screen is used as standard. If you click on the arrow to the right of the "Create" tab, you will be offered four options for selecting the screen.
- Freeform - any shape you want to apply when drawing with the cursor.
- Rectangular shape is the standard screen selection shape.
- Window - a screenshot under the cursor, highlighted in red.
- Whole screen - respectively, a snapshot of the entire screen except for the cursor.
In the Windows 10 operating system, the Scissors program is also present, and the developers have added interesting functionality to it in the form of a timer. Now you can take a screenshot after a certain period of time.
Also, the Scissors program can take a screenshot of the drop-down menu. To do this, you need to hold down the key combination "Ctrl" + "Print Screen". The program will take a screenshot that you will need to save.
Working with screenshots - programs that will help you
The turn of programs for working with screenshots has come. One of the main programs that I would like to describe is Lightshot. This is a lightweight and easy-to-use program that will help you take a beautiful screenshot. You can download it on the Internet, and the features of the program will be described below.
After installing and running the program, the Lightshot icon will appear in the lower right corner next to the clock. (Figure 9).

First, let's get acquainted with the settings of this program, for this we right-click on the Lightshot icon, and select the "Settings" item (Fig. 10).

A settings window will open and four items will appear in front of you:
- The main ones are the standard settings of the program, in which nothing needs to be changed.
- Hotkeys - You can change the keystroke for saving a screenshot.
- Formats - allows you to change the graphical format of the screenshot.
- Proxy - allows you to run a proxy server (unnecessary function in this program).
We figured out the settings, now let's move on to the most delicious - to work in the program itself.
In order to take a screenshot, press the already known “Print Screen” key. Your computer screen will darken a little, now you must select the area of the screen that interests you and save it by clicking on the floppy disk icon in the program (Fig. 11).

Pay attention to the small menu on the side, it displays additional features of the program (Fig. 12).

They include the following:
- Pencil - allows you to draw or arbitrarily select on a screenshot of the screen.
- Line - makes it possible to draw a line, it is very convenient to notice certain parts of the screenshot.
- The arrow is a very handy feature that allows you to point in the screenshot.
- Rectangle - allows you to mark the places you need in the screenshot with a rectangle.
- Marker - you can select any part of the screenshot with a marker.
- Text - as the name implies, your screenshot can be signed.
- Color - selects a color from the palette that marks the top items.
The bottom menu gives you the option to send or save your screenshot (Figure 13).

The bottom menu contains the following items:
As you can see, the Lightshot program has all the necessary features for creating screenshots.
Description of some screenshot programs
There are many programs for creating screenshots. And each user likes this or that program according to his tastes. A small list and descriptions of these programs are provided below.
FastStone Capture
A very good program for taking screenshots (Figure 14).

Its features include:
- Hotkey settings. You can choose the keys yourself instead of the "Print Screen" key
- Built-in graphic editor. After taking a screenshot, you can easily adjust the picture in the editor
- Support for all known graphic formats.
Snagit
One of the most popular programs on the Internet (Fig. 15).

The amazing features of this program are described below:
- The ability to create high-resolution screenshots, in other words, several pages.
- Built-in graphic format converter.
- A graphics editor that allows you to fine-tune screenshots.
- Screenshot timer. You can set the time interval for taking a screenshot.
- Russian language support.
Floomby
A very simple and effective program (Figure 16).

The main advantages of this program:
- Screen capture with one click.
- Ability to send a screenshot to your server for further work.
- Doesn't take up much memory.
There are programs for hidden screenshots on the computer. The features of such programs include such functions as hidden removal and sending a screenshot to the user's mail at a specified frequency.
Looking for "print screen" or how to take screenshots on Macos
Now it's the turn for connoisseurs of the company "Apple" What to do for those users who do not have a "Print Screen" key and they have a completely different operating system. Let's take a closer look at the steps needed to take a screenshot on the Macos operating system. The main keys that replace the "Print Screen" on this system are:
- "Cmd" + "Shift" + "3" - a screenshot that is saved on the desktop
- "Cmd" + "Shift" + "4" - A certain area marked by the user with saving to the desktop
- "Cmd" + "Shift" + "4" + "Space" - Select a specific window with the ability to take a screenshot
But there are several unpleasant situations:
- Screenshots are saved only in png format.
- All screenshots are saved on the desktop.
- A small shadow around the outline of the screenshot.
In order to fix these problems, you should use the Terminal program and its commands. To do this, you must go to the "Go" menu, then click on the "Utilites" tab and find the "Terminal" program (Fig. 17).

After the console (terminal) has opened, you need to enter the commands To change the graphic format, enter the commands:
- defaults write com.apple.screencapture type format…
- killallSystemUIServer
After the word format, we put one of the options for the graphic format (Jpeg, tiff, etc.).
If you need to remove the shadow from the screenshot, then for this we enter the commands:
- defaults write com.apple.screencapture disable-shadow -bool true
- ёkillall SystemUIServer
And finally, the solution to the third problem, the location of the file. Accordingly, enter the following commands:
- defaults write com.apple.screencapture location ~/Documents (or any other folder)
- killall SystemUIServer
Screenshot software for macos
Naturally, there are programs for taking screenshots for this famous operating system. Let's take a closer look at them:
Skitch
One of the best developments for Macos (Figure 18).

The possibilities of this program are endless:
- Cut out any part of the screen.
- Inscriptions of any type and format.
- The history of your saves.
- Free, which is rare for this family of operating systems.
little snapper
A very beautiful program. (fig. 19)

The advantages are not so great, but they are:
- Built-in browser for creating screenshots for sites.
- Converting graphic formats.
- Grouping screenshots in iPhoto.
Unfortunately, the program is paid, but there is a trial version.
Of course, the list of programs does not end there, but the rest of the programs simply copy the functionality of the ones described above and it makes no sense to dwell on them. This is where I would like to end this review. I hope that it pleasantly surprised you and you learned a lot about taking screenshots on your personal computer.
At the moment, or in other words, a screenshot is an instant photo from the screen. Sooner or later, a novice computer user faces the question: how to take a screenshot of the screen. For example, a similar question may arise when you need to send a screenshot of your screen to a computer specialist for visual familiarization with any problem you have in the system. Surely you have already seen pictures on the network, both from the entire screen and its individual areas. This article will show you how to take a quick and easy screenshot.
How to take a screenshot of the entire screen
You can take a screenshot (screenshot, screenshot) of the entire working area of the screen with just one key - < PrtSc>(Print Screen), which is usually located in the upper right side of the keyboard.
When you press this key, nothing happens, signaling the operation performed, and it seems that nothing has happened. In fact, a screenshot of the screen has already been taken and placed in the form of an ordinary graphic. Now this file needs to be extracted from the clipboard and saved on your computer. To do this, you need to open any program (for example, Paint - a regular Windows editor) designed to process graphic files and run the standard command<ctrl+V> insert a screenshot of the screen into the program. After that, you can do anything with the screen: cut out individual areas, put graphic and text marks on it, convert it to another format, or simply save it unchanged.
How to take a screenshot of a window
Even experienced users often do not know about this method, and to get a screenshot of a separate, and not the entire screen, they use a graphic editor, cutting out the desired area from the picture in it. All you have to do is press a combination of keys<Alt+PrtSc> and the snapshot of the active window will be placed on the clipboard, from where it is retrieved as described above.
If several windows are open, then activate the one you need by moving the mouse pointer to the window title and clicking<Alt+PrtSc> take a picture of it.
How to take a screenshot of any area of the screen
To take a screenshot of not the entire screen, but some part of it, you can take a full picture, and then use a graphics editor (for example, Paint) to select the desired area of the screen from the picture, or use the standard Scissors program.
Hello friends. Are you faced with the need to take a screenshot? Then read this article, and I will talk about several ways to take a screenshot.
The Internet has become an integral part of our daily lives. Every day we visit social networks, communicate on forums, look for solutions to any problems, and also give advice to other people on solving these problems. And sometimes, when an explanation of a question needs to be backed up with visual information, screenshots come to our aid.
The definition of this word is quite simple - it is a screenshot of an electronic device, which can include a computer monitor, smartphone and other modern gadgets. It would seem, what could be easier than taking a screenshot? But some people find it difficult to take a screenshot and turn to search engines for help.
If you are one of those people, then read this article, in which I will talk about several ways to take a screenshot from a computer screen.
Print Screen button
The easiest way to take a screenshot is to use the Print Screen button. In order not to bother you with the search for this key, I took a photo in which I highlighted it. On a regular computer keyboard, this button is located here:
If you have a laptop, then the Print Screen key is located here:

So, where is it, we figured out what's next? And then press this button. Perhaps one of you will say that by pressing the key, nothing happened or will look for where the screenshot was saved. But take your time, because the screenshot is saved only in the memory buffer, and in order to get it, we need to open the Paint graphics editor.
I think that each of you is familiar with this editor, but just in case, I’ll still write where you can find it: Start - Programs - Accessories - Paint. Open it and click paste:

After that, a screenshot of your screen will be inserted into the window, which you can edit if you wish:

That, in general, is all, after that we just have to save our picture in any convenient folder by clicking on the save icon:

This method is suitable for absolutely everyone, as it works in all versions of Windows.
Scissors tool
Another way to take a screenshot of your computer screen is to use the Snipping tool, but if you have Windows XP or earlier, this method will not work for you, since the tool is only available in Windows 7 and 8.
You can find this tool in the same folder as Paint. Opening scissors:

Click create and select the area of the screen that you need to capture. After that, a captured fragment of the screen will appear in front of you, on which you can also perform some small actions, and save it:

Where to upload a screenshot
Each of us has different reasons why we need to take a screenshot, but as a rule, most pictures are taken in order to post them on the Internet. Of course, you can post the resulting picture on your website or on a page on a social network, but how to post it on a third-party site?
Especially for this, there are photo hosting sites created just in order to place your image there. They work quite simply: you upload your screenshot there, in response you get a link to your image, which can be placed on any site. Let's take one of these services as an example and see how they work. I'm used to using photo hosting Radical, therefore, using his example, I will show how to upload a screenshot. I open it:

Select the image to upload and click "Upload". After that, your image will be loaded, and you will receive links for placing it on other web resources:

Third Party Screenshot Software
How long do you think it will take to take a screenshot of your screen using the methods I described above and upload it to photo hosting? I think you will spend no more than two minutes on this. But each of us values our time very much and does not want to waste even these precious minutes looking for easier ways to take a screenshot.
And no matter how ridiculous it may sound, such a way really exists. It allows you to kill two birds with one stone, in our case, take a screenshot and upload it to photo hosting in one click. This method means using third-party programs to take a screenshot. There are also a lot of similar programs, but I recommend choosing Lightshot, which you can download from this link.
After installing this program, just press the Print Screen button, after which you will need to select the area in which you want to take a screenshot, and it is ready. You will immediately be prompted to edit the resulting screenshot, or save it, both on your computer and by uploading it to photo hosting, after which you will be given a link to your image.
Unfortunately, I can’t take screenshots of working with this program, because during its launch the desktop becomes inactive, but I think you can deal with it without me, since everything is extremely simple there.
If you are looking for how to take a screenshot on a computer, then you have come to the right place.
A screenshot is an image that captures exactly what the monitor displays at a particular point in time.
Often such snapshots are used to create instructions for using various programs or for remote troubleshooting.
Creating a screenshot using OS tools
To fix the screen image, use the special key "PrintScreen" (PrtScr). At the moment when you want to save, you need to press this key.
The image will be saved to the clipboard.
Note! It is important not to copy anything else after that, otherwise the information about the copied element will replace the previously taken screenshot. Then, in order to take a screenshot on a computer on windows 7, you will need to open a graphics editor. Anyone will do, in the example we use the standard Paint .
In the open editor window, you will need to press the combination "Ctrl + V", or the "paste" button in the top menu.
You can also select the "selection" tool, right-click anywhere on the canvas, and select "paste" from the drop-down menu.

Once pasted, the screenshot can be edited like any other image, highlighting items to pay attention to or showing a course of action.

After saving, the screenshot will be located in the save directory and available for use.
There is also the option to take a screenshot of the active window only. To do this, along with PrtScr, you will need to press Alt.
In this case, a snapshot of the exclusively active window will be inserted into the editor. So, in the image you can see that a snapshot of the active window is inserted into the Paint editor.

Screenshot programs
In some circumstances, it is not possible to take a screenshot using OS tools. In addition, not everyone is comfortable saving each screenshot in the editor.
Consider how to take a screenshot of the screen on a computer, photos are attached.
Floomby
During the first launch, you will need to go through the registration process. Then the option to save screenshots to the program server will become available.
And, in fact, the ability to work with the program.


To call a frame to capture the screen area, you must click the "Fragment" button. Then select the area of the screen that you want to fix.
A small panel will appear on the side with tools for marking up and adding explanations.
Below are the save options.

The selected area can be saved to the computer's hard disk, to the program server, copied to the clipboard or sent to the required FTP.

Note! Saving a full screenshot to disk will not work. Full screen shots are saved only on the program server. There you can place it in the profile gallery or copy the link in order to share it.

Hot Key Screenshot
Extremely easy to use little program.
After downloading and installing, all that remains is to assign a hotkey for creating a screenshot and select a quality indicator (on which the size of one image will depend).

After that, the screenshots will be automatically saved to the directory with the program.

Important! Unfortunately, it is not possible to change the location where they will be saved.
The program is extremely simple and does not require installation. You can exit it using the tray icon menu or the "Exit" button in the main window.
Pictures are taken exclusively in jpeg format.
Screenshot Maker
Another small program, the functionality of which is somewhat less than that of the first one under consideration. The program has two versions: Professional and Free.
The first version is paid, only it can save images in PNG format.

In the main window of the program, you can select a hot key to create a screenshot, determine the format of the saved image.
And also choose to capture the cursor, set the format for automatic file naming, or set copying to the clipboard instead of saving to a file.
The save directory for the snapshots is also set here.

In the "Comment" tab, you can configure adding a comment to the saved screenshot. Changing the text format is only available in the paid version.
In the free one, you can set the background of the comment, its position in the screenshot, and, in fact, turn the option off or on.

Screenshot Maker has a function to automatically create screenshots. Its launch along with the start of work is available only in the Pro version.
It is possible to set the capture option and the interval until the next or between screenshots.
Screenshot Extensions
Along with the OS and special programs, screenshots allow you to create add-ons for browsers. They help both to take a screenshot of a page on the Internet and save it.
Lightshot (screenshot tool)
Convenient and useful browser add-on. Allows you to take snapshots of the open page in . After installation, a purple pen icon will appear to the right of the address bar.
Clicking on it activates (before taking a screenshot of the page) the capture area on the page.


Above the frame (top right corner) will show the size of the screenshot in pixels.
After defining the capture area, a small panel with editing tools and saving options will appear to the right and below the frame.

On the bottom panel, you can choose one of the save methods:
- uploading the program to the cloud server;
- sending to social networks;
- sending by Google mail;
- printing on a connected printer;
- save to clipboard;
- save to .

Editing tools allow you to add labels to the saved area, highlight its fragments and mark places that you need to pay attention to in other ways.

Saving to the hard disk is the same as any file download from the browser using the operating system explorer.
fireshot
After installing the extension, the corresponding icon will appear to the right of the address bar.

By clicking on it, a menu opens with the key combinations used for certain actions. Also in this menu you can go to the settings page.

In the extension settings, the number format is adjusted and keyboard shortcuts are assigned if the default ones do not satisfy.
To many, the combination of four buttons to take a screenshot may seem cumbersome.

When capturing an area of the screen, only a frame appears to define this very area. No additional tools are provided.

After defining the capture area, the extension redirects the user to a page with save options.

There are four possible ways to save a screenshot: as an image, as , to the clipboard, and send to print.
Additional functions are implemented as a separately installed program. In such a case, the value of the extension itself is questionable.
The previous one is more independent, although it also has an installable program.
How to take a screenshot of a computer screen
3 ways to take a screenshot on a computer