Android how to remove write protection from SD card. Update on Android Lollipop and features of working with an external memory card Permission to write to the sd card android 5
An attempt to save new information to the micro cd will fail if it is write protected. There are various reasons for the access denied message. You can remove protection from microSD in several ways - software and physical. Let's consider the most relevant ones.
Unlocking microSD
Place the memory card on a flat surface or in your palm with the label facing up. On the left side of the card case, at the top, find a small lock toggle lever - the Lock button. "Locker" serves to protect information from accidental erasure. The lever can be flat and only slightly protrude from the body, be white or silver. There is no such switch directly on the microSD. Insert the card into the adapter and locate the Lock switch on the adapter itself. Move it all the way in the opposite direction.
After moving the Lock lever to the override position of the data protection status, the reappearance of the write error notification window may be caused by moving the Lock back to the protection position. This happens due to the weakening of the switch, when the memory card is inserted into the card reader, it moves and turns on the memory lock. Fix it with a piece of rubber, cardboard, or remove it altogether.
To avoid automatic blocking of microSD recording, you can remove its contact with the Lock button on the adapter case. Find a small notch on the left side of the micro-flash drive, seal it with plastic or tape it. Soldering must be done very carefully. The tape option is simpler, but it can cling to when the card is inserted into the adapter.
Change disk properties
If the protection of the memory card does not allow you to copy the information to another disk, but you need to save it, then try to remove the protection as follows. Attach the micro cd to your computer, find its name in the device list and click on it right click mice. In the menu, select the "Properties" line, then the "Access" tab. In the next window there is an "Advanced setting", open it and put a tick in the line "Open general access", Confirm the settings -" Ok ".
Formatting a microSD card
Sometimes, to remove protection from a memory card, it is recommended to format it if the “locker” is missing or did not help. Save important information to another drive, as it will be completely removed. Programmatically you can remove the write-lock on the card using Windows.
Install the microSD card on Personal Computer through a special adapter directly or through a card reader. On modern laptops such a connector is already provided, it is usually marked with a "card" icon and looks like a narrow slot. The operating system recognizes the drive and its name appears in the list of devices on the computer.
Right-click on the CD disk icon and select the "Format ..." line in the expanded menu. Set the file system to the one that your device supports, usually NTFS. Click "Get Started". All information from the disk is now deleted and the protection status is removed.

Changing the file system
When writing a file larger than 4 GB to a memory card, an error window may appear due to file system limitations. If the memory card is formatted with the FAT32 system, the file size is one of the limitations for recording data. You should change the file system to NTFS, as described in point 3.

MicroSD software
You can reset the write protection of a disc by by software without deleting information. For this there are various scripts and utilities, for example - reset.zip. When downloading software from the network, you should be careful - it may contain viruses. It is better to use trusted applications to remove protection. Low-level formatting disk utility Hard disk The Low Level Format Tool erases all data, but it will help you recover even hopeless flash drives that have not been formatted internally by Windows.

Removing microSD protection using a mobile device
Modern mobile devices: players, PDAs, telephones, cameras have the function formatting microSD... Try to find this option through the settings and format the USB flash drive directly on this device. Memory protection could have been programmatically installed in the device to ensure data confidentiality. You can also remove protection in the settings. All types of electronic devices have their own characteristics, so in case of difficulty, read the instructions for the gadget or get an explanation from a specialist in the service center.

Physical damage to the microSD card
One of the options for failure when trying to write data to a memory card occurs due to physical damage: the card is slightly bent, one of the contacts on the card (usually the left one) or on the adapter is dirty, and microSD closes it. In case of contamination of the contacts, they must be cleaned, for example, with a cotton swab dipped in an alcohol-containing liquid or acetone. A badly bent card cannot be restored. You can try to straighten a slightly curved one by putting it under the press.

Use only the native adapter with the microSD card. With a different adapter, even if you managed to format it on the phone, you will most likely not be able to write the information to the disk.
Instructions
First take map memory and insert it into the card reader, just be careful: all protection functions on both accessories must be disabled, otherwise you will constantly see the inscription "Write protection enabled, recording is not possible."
Then insert the card reader with the card memory inside in USB port computer. At correct connection the indicator should light up. The computer will make a distinctive sound and the Found New Hardware Wizard will appear on the screen. Skip this moment by clicking "no, not now" and wait for the inscription "next". Thus, the PC is ready to work with the card. memory.
Go to "My Computer" and in addition to hard drives C, D and E, which is responsible for the DVD drive, you will notice another one, for example, G or H. This will be the card memory connected to the computer. Click on it. You will be presented with the entire list of files. If necessary, you can leave it unchanged or delete some information to free up space.
Open another window "My Computer" and go to the section of the hard disk where the music you are interested in is located. Select the necessary folders or individual tracks with the mouse and drag them to the window where it is open removable drive, i.e. map memory... The copying process will start.
When you have transferred the required amount of music, find the Safely Remove Hardware icon on the right side of the taskbar. Click on it and select the "Stop" item, after which the message "Hardware can be removed" will appear, and remove the card reader with a USB flash drive from the computer port.
If the capabilities of your cell phone allow you to play music and video, then such a device can easily be used as a pocket media player. To do this, you need to put a lot of different melodies and videos on your mobile. Usually, an additional memory card is used to download such files, since often the device itself does not have enough space to store a large amount of information. You can write a memory card for your phone in a few simple steps.
You will need
- - cellular telephone
- - memory card
- - card reader
- - computer
Instructions
First, burn the music and videos you want to burn to your phone to your computer's hard drive. Put all your media in one folder.
If your mobile phone can work in storage mode when connected to a computer, then insert a suitable memory card into the corresponding slot of the device. Then connect your cell to your PC using a USB cable or Bluetooth connection.
In the information window that appears on the screen mobile phone, select Mass Storage mode. Then on your PC, open the C drive and find the folder where the necessary media files are located.
After entering the folder, select the music files and press the right mouse button. In the list that appears, select "Copy".
Then click the "Start" button located in the lower left corner of the computer, and in the window that appears, select the "My Computer" section. Find your new removable disk in this category.
After the necessary files are completely placed on the memory card, disconnect the device from the PC. To do this, in the lower right corner of the screen, click on the "Safely remove hardware and drives" icon.
If for some reason it is impossible to connect your phone to a computer, then connect a card reader to the PC that is suitable for your memory card. Then insert the card into the appropriate slot of the device and open the "My Computer" section on the PC.
Copy the prepared media files from hard disk and paste them into the appropriate folders on your drive. After this operation, safely remove the device.
Sources:
- How to choose in 2017
MP3 is by far the most widespread and popular music format. It is used everywhere: in computers, players. Music discs are burned to standardize and convert all music to MP3 format, because MP3 allows you to record much more music than classic CDA.

Instructions
MP3 recording can be done both from a medium - a music disc, and to a medium - a blank CD / DVD disc. Let's look at the first option first:
You have a music CD with several tracks, usually one album. Insert the disc into the CD-ROM and run Windows Media Player. WMP is the standard player that comes with Windows. Almost immediately, after analyzing the disc, WMP will prompt you to record music to HDD.
The tracklist of the disc will appear on the right, and the tabs, among which there will be the "Recording" tab. Click on it and just below, on the very right side of the screen, you will see a small shortcut in the form of a box with a check mark. Select it with the left mouse button and in the appeared context menu select "Advanced Recording Options".
In the "Options" window that opens, go to the "Rip Music from CD" tab. Under "Configuring Rip from CD", select
Modern mobile devices and cameras, in addition to a small main memory, can be equipped with a memory card, the volume of which can be several times larger than the main memory. For a person who is not knowledgeable in technology, this is a novelty, which raises a lot of questions regarding the use of a memory card. Memory cards come in different sizes, but the technology is the same. So all the tips that will be listed below are suitable for any type of device.
The first difficulty arises with how to write data to a memory card. If the work is done on a laptop, then it has a special slot where the card is inserted. But this slot is made for a large card. If the card is small, then there are adapters into which it is inserted, and the work is done as with a large one. There are adapters for a computer that are connected like floppy drives. In the system, the memory card is defined as a removable disk, so the recording is performed as if it were a USB flash drive. The only difficulty may be removing the card from the device.
Therefore, the next question is about how to remove the memory card. Devices that support memory cards use spring loaded holders. The phone or camera has a slot for a memory card, usually covered with a rubber or plastic cover. To remove it, you need to open it and lightly press the card until it clicks. After that, it will come out of the nest and you can pull it out with your fingers. The extraction scheme from the card reader is the same. If you want to put the card back in, you must press it into the slot until it clicks into place.
In addition, difficulties often arise related to how to clear the memory card. If you need to clean it up not completely, then you need to go to it and delete unnecessary files one by one. If a complete cleaning is required, then you need to format it. To do this, right-click on the device and select Format. In the window that appears, you need to select required settings and click the Start button, followed by confirmation of the operation. In addition, all these actions are available directly from the device to which the memory card corresponds.
Very often they ask questions about how to unlock the memory card of the camera. If the card is in SD format, then it has a jumper on the left side, which, if the card is inaccurately inserted into the slot, switches to the locked position. This jumper must be placed in the upper position and carefully inserted into the camera. Other types of cards can be unblocked only in service center, then all information on it will be saved. If the information on the card is not particularly important, then you can safely format it.
It's no secret that the operating system Android widespread in the mobile world.
Such widespread use of the brainchild from Google also provokes an increase in the number hacker attacks to this platform. In order to combat this unpleasant moment, the IT giant is trying to introduce new functions aimed at increased safety owners of devices with the Android system, but some of these functions can become a source of additional inconvenience. How to eliminate one of these inconveniences, and will be discussed below.
Restricting access to the memory card
In the subject Memory on Android. All sections of the memory of Android devices we have already touched on the issue of mobile operating system memory. Many smartphone users based on Android versions 4.4 and older faced a situation where third-party programs do not have access to the root of the memory card... And there is this problem and from those who have purchased a new device already with Android KitKat and above on board, and for those who have updated to new system after the purchase.
Why can't Android programs have access to the root of the sd card?
The fact is that open access to the root of the drive is a big security hole in the entire operating system... Trying to protect users from intruders, Google went to such a step as limiting access to the memory card.
Speaking simple language, in many firmwares on Android base 4.4 and higher, third-party programs can no longer write data to the root of the memory card. The ability to write to directories located on a flash card has been preserved. The situation is aggravated by the fact that this limitation affected all applications without exception, including file managers.
This state of affairs does not suit everyone, so below we will consider a way to return third-party programs access to the root of the memory card.
It is finished! On the tablet, namely, on the Asus MeMO Pad 7, which I am replacing my honest workaholic, an update to Android 5.0.1 arrived. Now I have a device with Lollipop, or, as they say on the Internet, with Lolipopa.
The update arrived somewhat unexpectedly. To be honest, I was expecting a new firmware for my phone (Asus ZenFone 5) in April - at least they promised it. Nobody said anything about the tablet and here - on you, get it and sign it.
This, in fact, discouraged me (in a good, of course, sense), also because I bought the tablet in December, and it had version 4.3. That is, this is the second significant update of the operating system (in fact, there were more updates, but the number Android version did not change). The previous manufacturer of my devices - Samsung - could not boast of such a rate of fire, although it also updated the operating system twice: from Android 3.2 to Android 4.1.2 (via 4.0.1). Only now it took much longer to wait for these new versions.
Well, long live surprises! Having received a notification about the release of a new firmware version, I immediately downloaded it, which is more than 700 meters, and launched the update. Since I downloaded not through, but through my mobile, it took a little more time for everything about everything: it took about an hour from the start of the download to the completion of the update. The update itself lasted about twenty minutes, but, potentially, it can take more time - because after installing the operating system, the update process follows installed programs... My counter counted to 205. But now, the process is over and it's time to see what has changed.
The first thing that caught my eye was the more sophisticated graphics when unlocking the device. The second is a hand in the notification area. For a couple of days I put up with her, hoping that by chance I would see something connected with her somewhere. I didn’t see it. Then I began to search purposefully and found an explanation on it on w3bsit3-dns.com. It turns out that notifications were divided into important and not so important, and it is possible to specify which notifications you want to receive. If you set the option Always alert , then the hand disappears if the option Important alerts only then the hand appears. To be honest, I removed my hand several times, but, for some reason, it stably returns. Why? I do not know yet.
Here, in fact, is the procedure itself for "removing" this hand:
The method above is not complicated at all. But you can achieve the result even faster and easier: press one of the two volume control buttons - a window will appear on the screen, allowing you to change the volume levels for various components of the system, as well as, attention, control Alert modes ... True, for some reason, these same Alert modes are not always displayed in such a fast version. I haven’t found any pattern yet, but, to be honest, it didn’t hurt and I was looking for it.
| Choosing an external memory card |
| and select the desired item in the menu |
Many happy owners of devices with 4.4.2 "on board" have probably already faced the problem of the impossibility of writing data to a flashcard with most of the applications installed on the device. Made, according to the assurances of Google in order to make the Android 4.4.2 KitKat OS a more secure system.
Limitations of writing to a flashcard concern primarily applications installed from third-party sources. And, most importantly, Android 4.4.2 KitKat prohibits modification of files that are not directly related to the applications that want to make this modification. Hence the impossibility of recording to an SD card.
In practice, this limitation literally means the following: use standard messengers, photo editors, file managers! Because if the developer of your software was unable to respond in time and add an update to your photo editor, for example, then all your edited photos will be "alive" while the photo editor is running - you will not be able to write your edited photos to the card!
More advanced users who are constantly copying data from a USB flash drive to a computer and back may face such a problem: the computer detects your "", sees the files, but cannot do anything with them - access denied! This problem can be corrected by installing an application on your device that will give access to. But this application will work only on ROOT-based devices.
How SDFix works: KitKat Writable is simple: after installing and launching the application, you click on Continue, agree to the terms and click on Continue again. If the Superuser application is already installed on your device, then you should allow SDFix access to ROOT directories in it.

SDFix KitKat Writable MicroSD in the course of its work will change the file /system/etc/permissions/platform.xml, in which it will write permission for writing and modifying files by applications that have the WRITE_EXTERNAL_STORAGE permission. You can find the original modified SDFix: KitKat Writable MicroSD file by the name platform.xml.original-pre-sdfix. Subsequently, you can always restore the original file.
For the most "handy" users with ROOT access on their device, there is an option to make corrections to the desired file without resorting to SDFix: KitKat Writable MicroSD.
To do this, run the file manager, which can edit files, find the platform.xml file at / system / etc / permissions /, and open it with the built-in editor.

After that, find the sections android.permission.WRITE_MEDIA_STORAGE and android.permission.WRITE_EXTERNAL_STORAGE and add the lines with the code in these sections:
After that, save the modified file in the editor.
After rebooting the device, all unpleasant problems associated with the inability to write and modify files on the flash card will be resolved.
While developing a competition application, I ran into a database storage problem. The problem was how do I identify the external memory card. In general, a search on the Internet did not give an exact answer. Therefore, by combining all the results I found, I put together my class. If anyone is interested, look under the cut.
So let's start with theory.
Terminology
Google tells us that there are the following concepts:- Internal ( internal) memory is part of the memory card built into your phone. When used by default, the application folder is protected from access by other applications (Using the Internal Storage).
- External ( external) memory is a shared "external storage", i.e. it can be either part of the built-in memory or a deleted device. Usually this is part of the internal memory, as I saw the last time a device to be deleted on android 2.2, where the built-in memory was about 2GB, and the connected memory became external (Using the External Storage).
- Deleted ( removable) memory - all storages that can be removed from the device without "surgical" interventions.
Prior to KitKat 4.4, the API did not provide functionality for getting paths to external memory. Starting from this version (API 19) the public abstract File function appeared getExternalFilesDirs(String type), which returns an array of strings with paths to internal and external memory. But what about our SD Card, which is inserted into the slot? Again we cannot get the way to it.
searching results
To answer the question posed, I turned to the all-knowing Google. But he did not give me a clear answer either. Many options were considered for determining from using standard functions that lead to external memory, but they have nothing to do with removable storage devices, to processing the rules for mounting devices (Android works on the Linux kernel). In the latter cases, "hardwired" paths to the folder with mounted devices were used (this directory is different in different versions). Do not forget that the mount rules change from version to version.In the end, I decided to combine all the knowledge I gained and wrote my own class that can return the paths to external and removable devices for us.
Description of the code
The class was created MountDevice, which contains the path to the device, the device type and a hash.There are two types of devices (I did not touch the internal memory, since it can be accessed through the system API).
Public enum MountDeviceType (EXTERNAL_SD_CARD, REMOVABLE_SD_CARD)
And the class was created StorageHelper, which searches for available memory cards.
The StorageHelper class implements two search methods - through the system environment ( Environment) and using the Linux utility mount, or rather the result of its implementation.
Method one - Environment
When working with the environment, I use the standard getExternalStorageDirectory () function to get information about external memory. To get information about the memory being removed, I use the environment variable " SECONDARY_STORAGE".I did not find official updates for Android (for our region) on the official sites.
On the forums, I found information that Google released a firmware version for Russia in January 2015. But it is being implemented very slowly on clients' devices.
Thus, I can wait until my device receives a message that there is a software update. After that, I can update Android.
In the operating room Android system 4.4 KitKat is pretty an unpleasant surprise, it consists in the fact that third party applications cannot access write and read on the memory card.
Google made a very unpleasant trick / mistake / surprise - absolutely all devices with Android 4.4 in which you can install a memory card cannot fully work with a memory card, only Nexus devices remain the exception to the rule, since they do not have a slot for an SD CARD. What does this mean for regular user? For example, the file manager will not be able to create / open a folder or file.
In order to fix reading and writing on a memory card in KitKat, you need Root rights
Method 1 (simple option)
Once on your Android smartphone e or the tablet will be installed Root go to the app store Google play and download SDFix: KitKat Writable MicroSD(free). After installation, go to the SDFix application and click the "Continue" button
Then wait a couple of seconds until the error is fixed. Close SDFix and restart Android for the changes to take effect! Everything!
Method 2 (simple, option for those who want to know more)
The method described a little above is automated, but you can fix it by hand, especially since it is not at all difficult! To do this, you need to install a file manager application, for example ES Explorer, having previously provided it with root access to the system partition.
Go file manager to the system partition:
/ system / etc / permissions And find the file called: platform.xmlThen open it with built-in text editor ES conductor
Find the line:
Add one more parameter just below 
Restart your Android smartphone or tablet for the changes to take effect! Memory card access problem solved!
Let's talk about how to remove write protection from SD memory card on Android. Many people encounter this problem when trying to copy or move files to an SD card. In this article, you will find several ways to remove protection Android records.
How to Remove Write Protection from Android SD Card

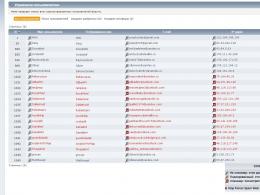
If you get an error like the image above when trying to copy files or format the SD card, then know that this is not your problem. Moreover, the memory card is not damaged or infected with a virus, it just has write protection. Without further ado, we'll walk through several methods on how to remove Android write protection.
How to Remove Android Write Protection from SD Card with Regedit
Most problems and errors can be easily resolved using the registry. Also we can use it to remove Android write protection.

This method helps in most cases, but if for some reason you cannot use it, then try the following methods.
How to Remove Android Write Protection from SD Card with Diskpart
- Insert your SD memory card into your computer and run Command Prompt. You can do this by pressing the WIN + R key and writing "CMD", or simply typing "Command Prompt" in the Start menu.
- In the window command line you must enter the following commands in order.

- diskpart
- list disk
- select disk x (where X is your SD card number)
- attributes disk clear readonly
- clean
- create partition primary
- format fs = fat32
If this method did not help to remove Android write protection, do not despair, we have a couple more solutions to this problem.
Change Resolution
- Insert SD memory card into computer. Right click on the memory card and select Properties. Then, under the Security tab, you will find your account name.
- Change the resolution for the SD card to Read / Write, Read / Execute, or Full Control.
This method will remove the Android write protection.

Alternatively, you can take a close look at your SD card to find the lock button. If it is, just switch it. The lock button is used to protect data from deletion or complete formatting of the memory card.
We hope you managed to remove Android write protection. If you still have questions, please write in the comments below.