How to set up booting from a USB flash drive, CD / DVD drive in computers with BIOS and UEFI
Installing, reinstalling and restoring the operating system, as well as carrying out certain types of diagnostic work, as a rule, requires the mandatory use of special boot disks or flash drives. But in order for the computer to be able to boot from external media, in the settings of the basic input / output system or otherwise BIOSa, you must set the appropriate priority, that is, literally indicate from which source the system should boot.
The procedure for setting up booting from external media is quite simple, however, it raises many questions for many novice users. And this is quite understandable. Firstly, it is rare to encounter the need for such a boot, and secondly, in different computer models, the procedure for entering the BIOS and changing boot priorities may differ in detail. Let's consider everything in more detail.
At the moment, there are two types of basic input / output system: classic BIOS and its advanced version UEFI. Both of them are special programs written on the motherboard chip and designed to configure and check the readiness of the hardware components, and transfer control of the PC to the operating system. Unlike BIOS, UEFI is more autonomous, it has a convenient graphical interface with mouse support, allows you to integrate drivers, run EFI executable files, and work with GPT disks without restrictions. In addition, computers with UEFI start up an order of magnitude faster than PCs with a regular BIOS.
How to get into BIOS or UEFI
To get into the BIOS or UEFI, immediately after turning on the computer, press and hold the Del, F2, or Esc button. Which button should be used to enter the BIOS / UEFI in your desktop or laptop model should be indicated in the supplied user manual. However, on new computers with Windows 8.1, this may be a problem. If fast boot technology is activated in the system, you simply will not have time to press Del or F2 in time. In this case, you must do the following:
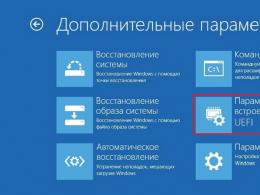
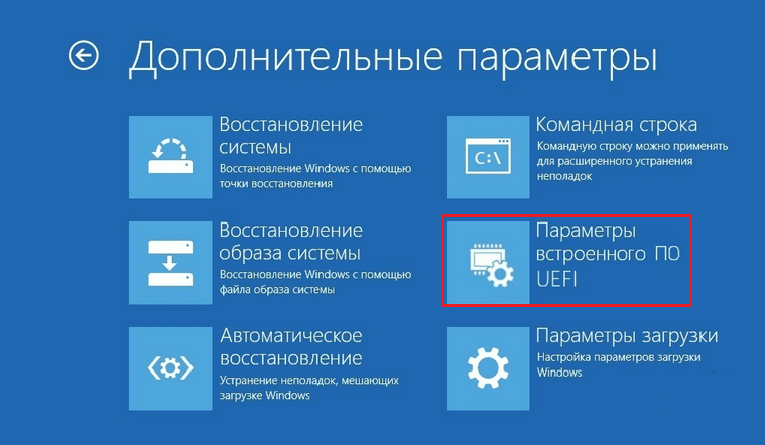
open Settings -> Change PC settings -> Update and recovery -> Recovery -> Advanced boot options, and then click Restart Now. After rebooting, you will be taken to the "Select Action" window. Click Diagnostics -> Advanced Options -> UEFI Firmware Options. The computer will restart and you will be taken straight to the UEFI interface.
Note
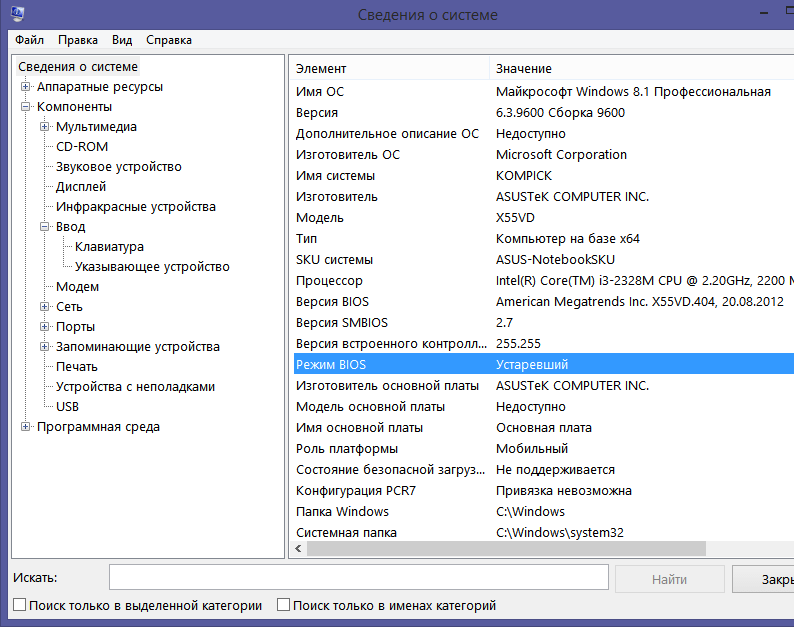
Determining which interface your computer is using is very simple. To do this, press Win + R and in the window that opens, execute the msinfo32 command, and then in the system information window, find the item "BIOS Mode". The old version of the I / O system will be marked "Obsolete", the new one - "UEFI".
Configuring Boot from CD/DVD/USB Flash Drive in BIOS
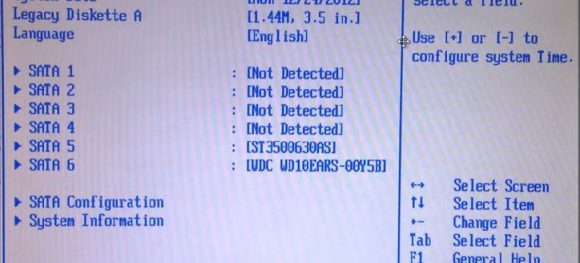
In most BIOS versions, the Boot section is responsible for configuring boot options.
It contains a list of all devices connected to the computer. Since the hard drive and CD-ROM are built-in components, they will be present in the list for any, but if you want a flash drive to be there, you need to insert it into the USB port in advance, even before entering the BIOS. The first device in the list is the device from which the system is currently booting. Using the arrow keys, you can change the boot priority, and by pressing the F10 key, you can apply the new settings.
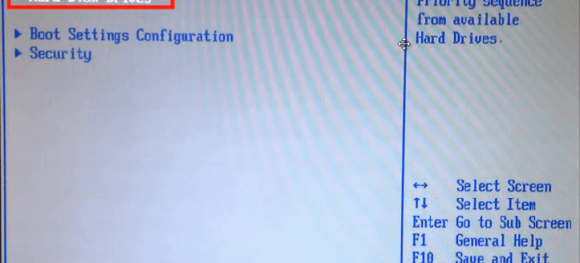
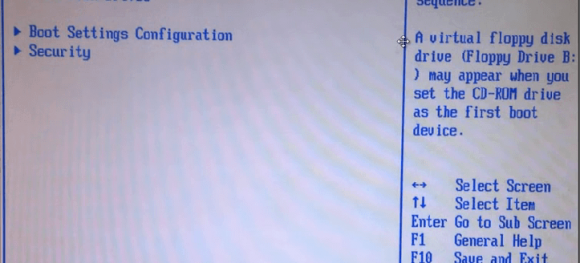
In some BIOS versions, the Boot section may have additional options, such as Boot Device Priority, Hard Disk Drives, and so on.
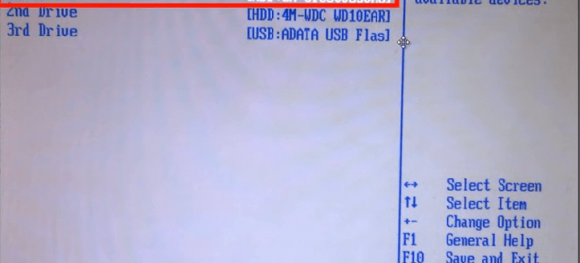
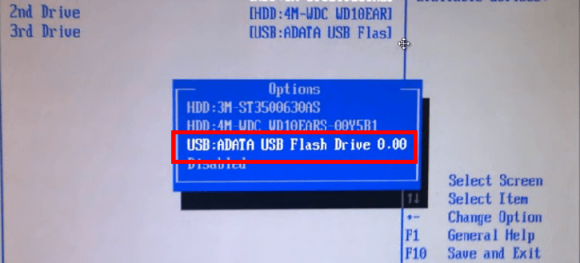
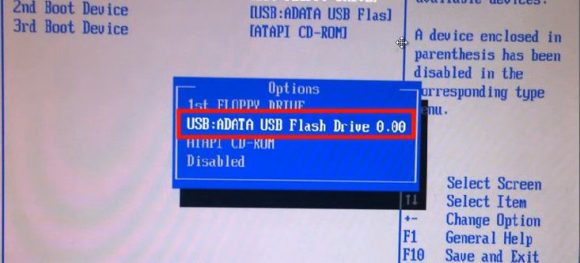
In the case of booting from a CD / DVD-ROM or a regular flash drive, it will be enough to move this device to the top of the list in Boot Device Priority and save the settings. If the flash drive is formatted as an HDD, you will first need to go to Hard Disk Drives, select the first device (1st Drive) in the list, press Enter and select the flash drive in the menu that appears. Then the same will need to be done in the Boot Device Priority subsection. Save the settings with the F10 key. This is about AMI BIOSes.
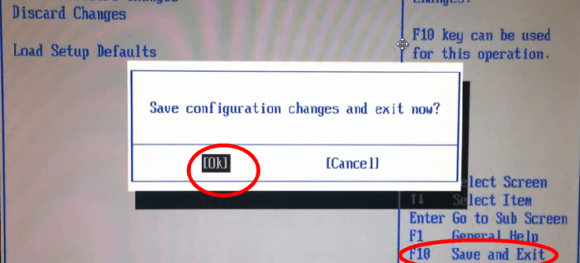
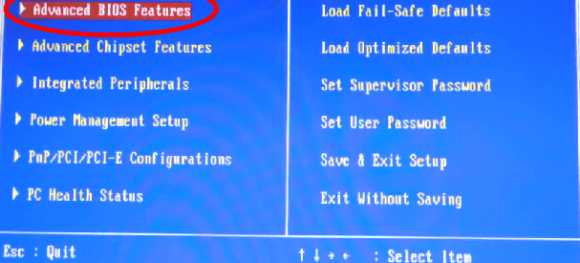
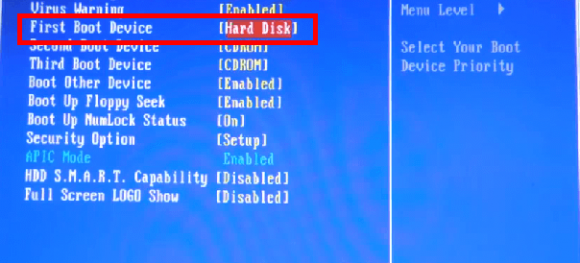
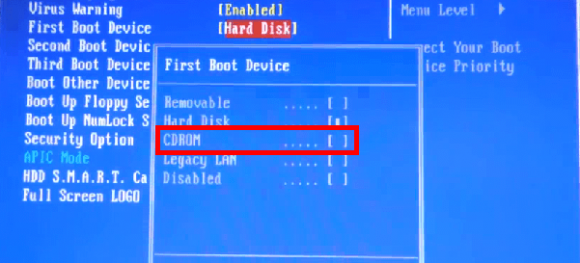
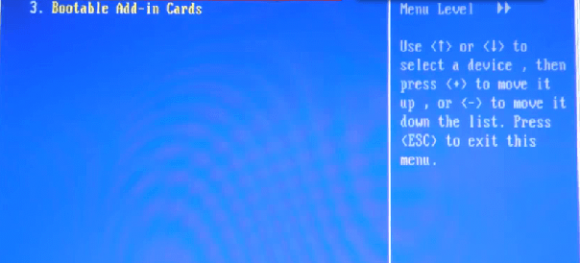
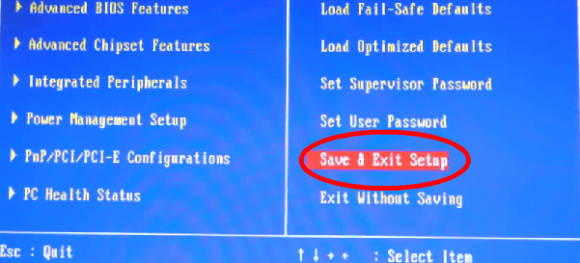
The procedure for setting up booting from a DVD / USB flash drive in BIOS AWARD or Phoenix is somewhat different. Here, in the BIOS main menu, you need to find the Advanced BIOS Features section, and in it find the First Boot Device item, which is responsible for prioritizing boot devices. Being on the First Boot Device, press Enter and in the menu that opens (list of devices), select the CD-ROM or, if available, a USB flash drive. If there is no flash drive in the list, switch to the first item Hard Disk Boot Priority, press Enter, select our flash drive in the list, move it to the top of the list. To save the settings, press Esc twice, and then Save and Exit Setup and confirm the saving of the parameters with the Y key.
Setting up boot from CD / DVD / flash drive in UEFI
Setting boot priority in UEFI is easier, and not just because you can use a mouse. Most UEFI interfaces have a Boot Priority panel at the bottom of the window, which displays all devices connected to the computer, including flash drives and removable HDDs. To install a boot from a particular device, just drag it with the mouse to the beginning of the panel, and then save the new settings when you exit UEFI.
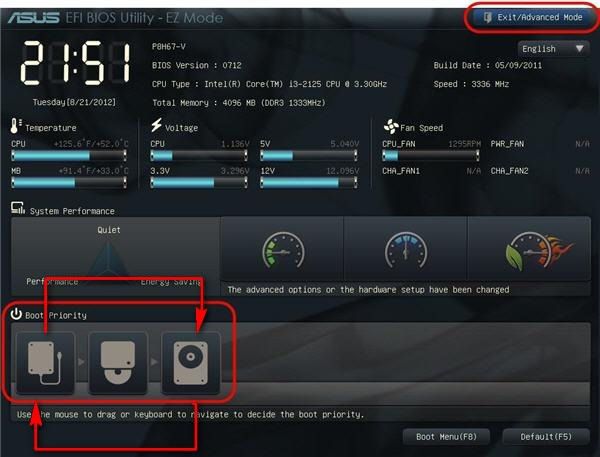
You can also click the "Exit / Advanced mode" button, go to the Boot tab in the window that opens, select "Boot Option # 1" in the Boot Option Priorities list and set a USB flash drive, hard drive, CD-ROM or other connected to computer device.

The new settings are saved when exiting UEFI or by pressing the F10 key.
Have a great day!