Creating HDR in Photoshop's RAW converter
Hello everyone!
Photoshop in the Creative Cloud family uses Adobe Camera RAW as a built-in filter. It is constantly being improved and acquires more and more new and interesting features. So in version 9.1 of this application, interesting features appeared for creationHDR images and stitching panoramas.
A very interesting direction in photography is the creation of HDR images. The abbreviation HDR comes from High Dynamic Range and means "high dynamic range" in English.
In the material about the main stages of RAW conversion, I tried to tell in detail about the tonal range of the scene being shot and the dynamic range of the photosensitive element of the camera.
In short, the point is that when shooting a real high-contrast scene, our camera is not able to capture the entire wide tonal range.
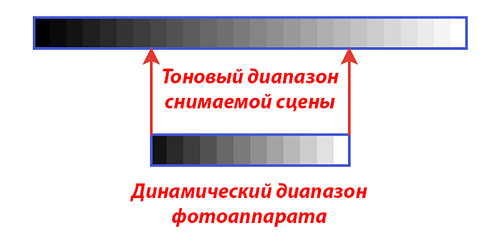
In this case, an unpleasant moment arises - the dark parts of the photo, the tonality of which did not fit into the dynamic range of the camera, will turn black, and the light parts, which are lighter than the camera can fix, will be lightened to bright white. All detail in these areas disappears.
In such cases, you can compromise and take a picture with properly exposed shadows or highlights, depending on what is more important, or you can use the capabilities of specialized programs or Photoshop, which allow you to create images with a high dynamic range - HDR images.
There are three techniques known to me that expand the tonal range of an image.
Mixing frames shot with different exposures in Photoshop, one shot exposed in light areas, and the second in dark areas. After that, Photoshop opens both frames in the same document on different layers, a layer mask is applied to one of them and on it, for example, for an image with detailed shadows, normally displayed light areas from another image are shown.
tone compression. The point is that monitors, and even more so photographic paper, have an even smaller breadth of the tonal range than cameras. To convert pictures to a format that can be displayed on the specified media, i.e. into an 8-bit or 16-bit image, and this technique exists.
Well, the actual creation of HDR itself - images with a dynamic range greater than in conventional 8/16-bit images. The boundary at which HDR starts is 13.3 exposure stops (brightness range 1:10,000)
What is needed to create HDR images?
We need to take several frames in which the necessary real scene will be captured, but each frame will have its own part of the tonal range, that is, individual pictures will be exposed to different areas in terms of brightness.
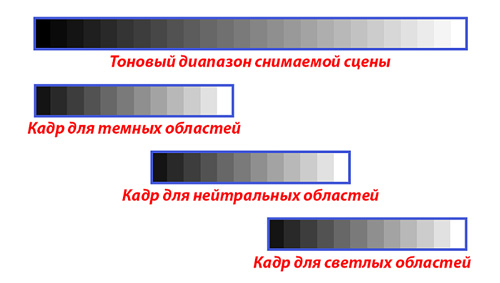
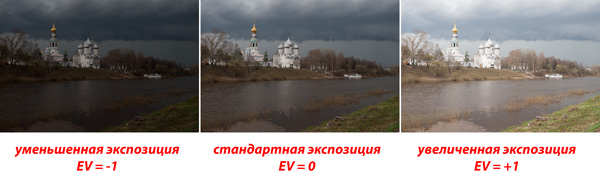
In modern cameras, there is a shooting function with automatic exposure bracketing. In this case, taking into account the special settings of the camera, at least three frames are taken - the main one, this is a frame with a normal exposure, and the rest are automatically fixed with an exposure of a certain number of steps in "plus" or "minus", for example +/- 1 EV.
To demonstrate the processes in this material, I borrowed photographs of my very good friend, a Photographer with a capital letter, a professional landscape painter - Oksana Ermikhina. Oksana often uses the HDR method in her work, you can easily find her excellent work on the Internet. The only thing is that she uses a specialized program Photomatix, and we will consider the principle using the example of the Camera RAW application in Photoshop.
So, we need to combine three images with different exposures into a single whole.
It is best to use the HDR method of creating images on RAW files, as they contain the maximum information recorded by the photosensitive element of your camera. Open them in Camera RAW.
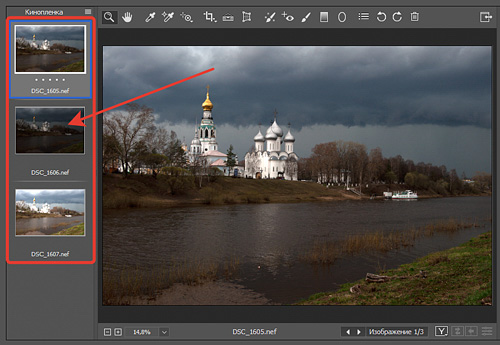
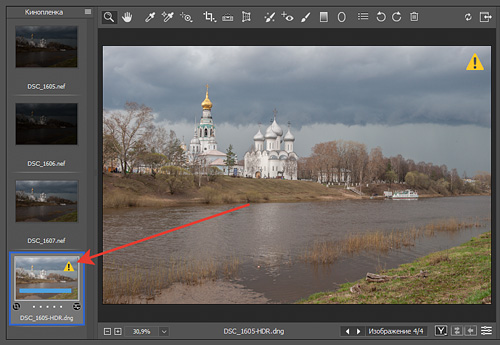
After that, press the key combination " Ctrl + A»Or left-click on the icon with lines in the upper right part of the Filmstrip window and select the line "Select All" in the menu that appears.

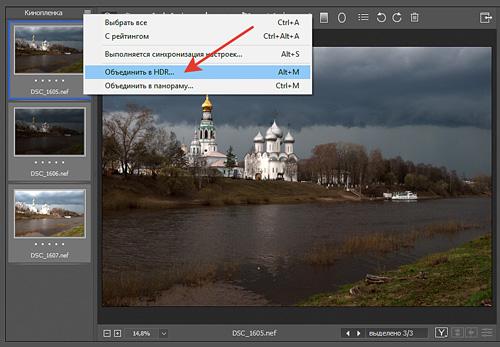
The process of merging images and generating a preview preview is started.
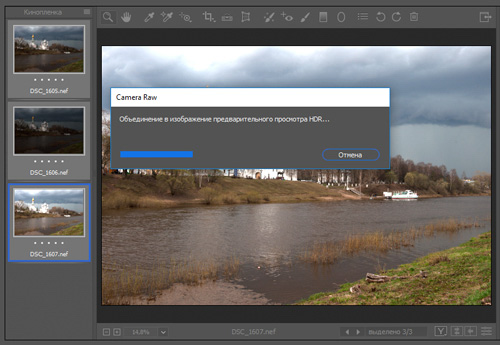
Upon completion of this operation, a preview window for the combined images appears.
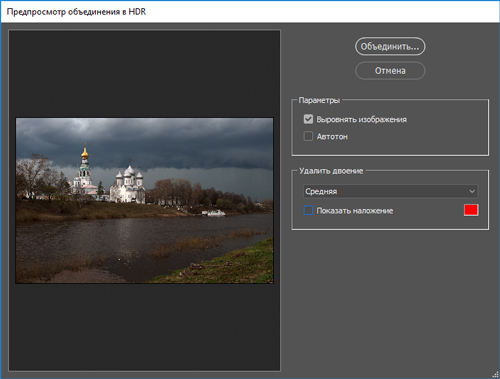
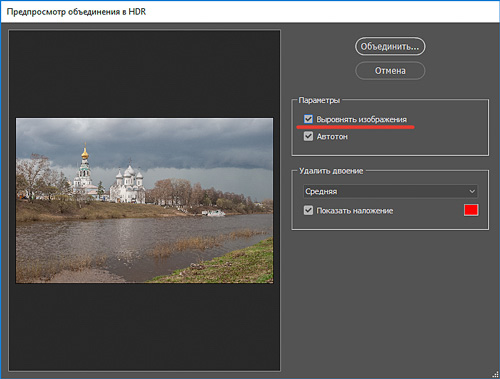
The settings are minimized, but the main tasks here can be controlled. The Deskew Image option allows you to eliminate possible movement in the frame. If you turn it off, then with the “Remove ghosting” function turned on, the program will show which parts of the image were shifted during the shooting process.
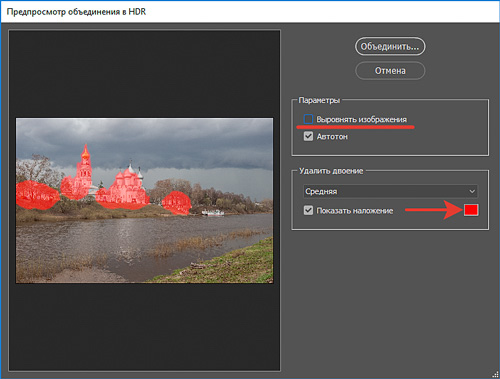
By enabling the Align Image command, this module eliminates mismatched elements in the image using a special algorithm. It does not always cope with the task and then retouching is required, but this is mainly due to the movement of large objects in the frame.
The Auto Tone option helps you automatically equalize the brightness and contrast of the resulting image.
Without using the "Autotone" function.

With its application.
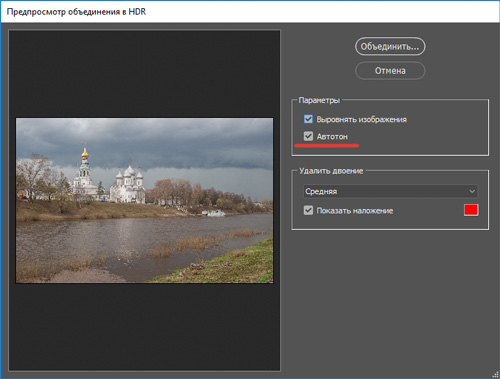
You want it, turn it on, you want it, don't. That in the first case, that in the second you will still be able to make a correction in the future.
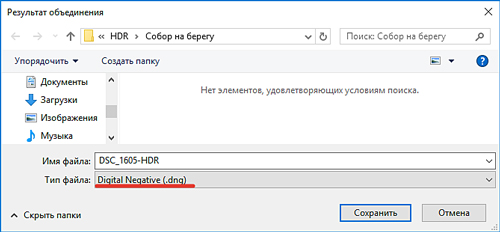
Click the "Combine" button. The program asks where to save the linked file. Saving takes place in the DNG (Digital Negative Specification) format, an open format for RAW image files used in digital photography.
In the process of assembly and saving in the application, the final HDR image is formed.
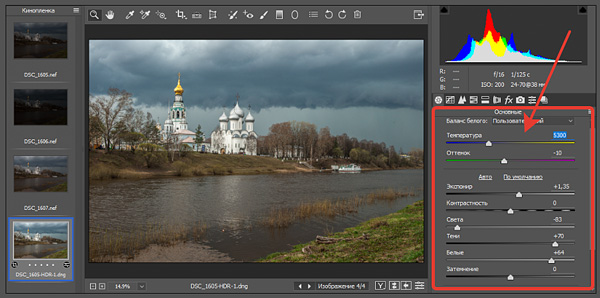
After working with the adjustments on the “Basic” tab, we get the following picture.
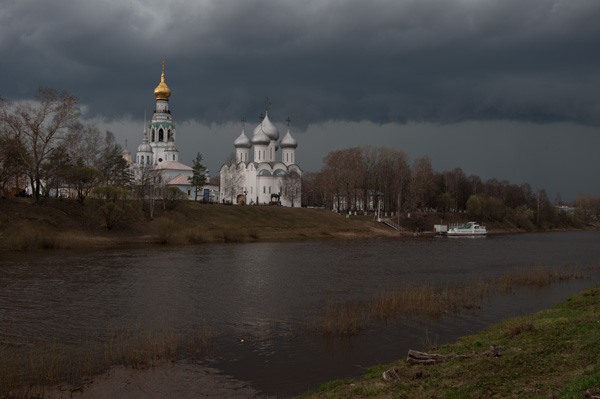
Let's see - this is how we had a normally exposed photo at the exit from the camera.
And this is what we got as a result of assembling an HDR image by combining three frames taken with exposure bracketing.
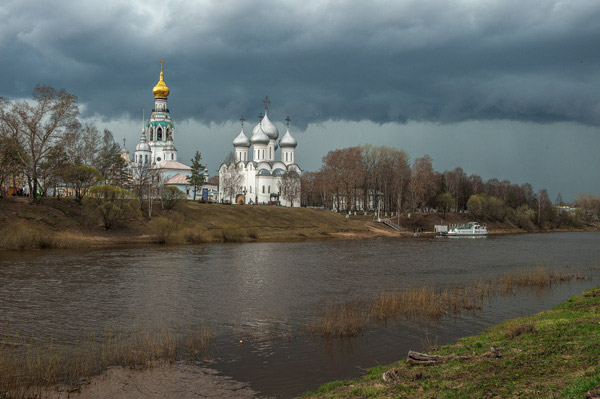
In principle, you can say that you can achieve such results simply by resorting to the Highlights and Shadows adjustments in Camera RAW. In principle, YES, but this is if the tonal breadth of the scene being shot is not so large, that is, the difference between light and dark areas of the image can be fit into the dynamic range of the image displayed on the monitor using a converter. But in this case, the creation of HDR takes place, because when raising the brightness in the shadows using an ordinary conversion, it will cause a sharp increase in noise, and the HDR creation method frees you from them.
Due to ethical reasons, I, unfortunately, cannot provide you with the RAW files of the author, but I think you can easily check the effectiveness of this method on your own works.
CreationHDR it's very simple and effective!
Happy creative success!
If you don't want to miss interesting photo editing tutorials, subscribe to the newsletter.
The subscription form is below.