Photoshop: How to Convert Raster to Vector
In this tutorial, we'll talk about how to convert a bitmap image into a vector form in Photoshop. Of course, Photoshop is primarily designed to work with raster images, and the vector in it is some kind of addition in the form of paths with a vector layer mask that is superimposed on the object and creates a vector shape. In such a vector form (Shape), the outline will be vector, and the fill will be raster.
In this lesson, we'll cover the following steps:
Creating a Document and Drawing an Object
First, let's create a new document of any size and layer.
Now let's draw any image. Take the tool brush (Brush) with unblurred edges and full opacity. Let's draw some simple geometric figure, for example, as shown in the image.

Selecting a bitmap object
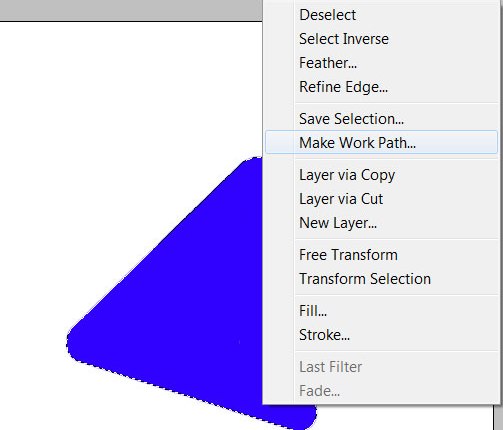
To translate a raster image, you must first select it with any tool of the Select type. Now select the drawn object either with the help of the Wand Tool, or click on the layer with the left mouse button while holding down the Ctrl key.
Convert the selected object to a vector path (Path)
Using any tool of the Select type, call the context menu. To do this, point the tool at the selected object and press the right mouse button. In the menu that appears, select "Make Work Path ...".
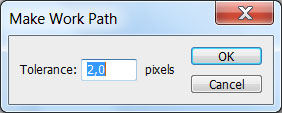
A window will appear where you will need to enter the tolarence parameter, which determines how many control points the vector shape will contain, the more there are, the smoother the vector object will be, but the quality of the control points will be low.
Create a vector mask for a layer from a vector path
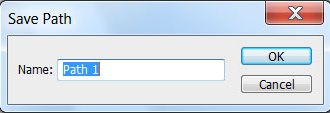
Go to the Paths tab, where the vector path we just created should appear.
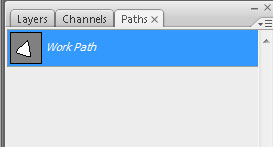
Double click on it to give it a name.
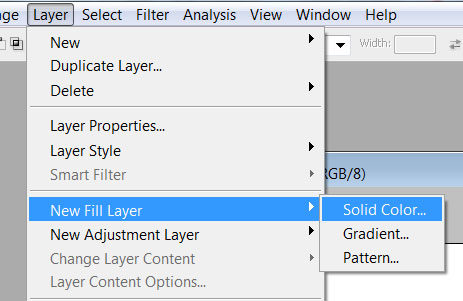
Then select "Layer -> New Fill Layer -> Solid Color..." from the main menu. You can name the new layer something, then click "ok". Choose a color for the future shape in the color selection dialog.
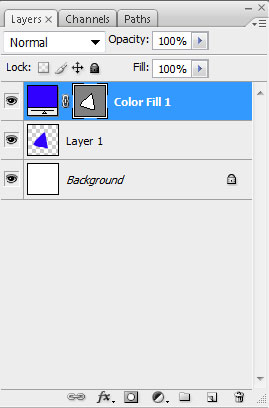
A new vector mask layer should now appear in the Layers tab.
How to Save a Vector Object to the Vector Shapes Library in Photoshop
You will then be prompted to name the new vector object. Click "ok", then check the new object in the library using the Custom Shapes Tool.
If the tutorial on converting raster to vector was useful for you, then share it on a social network (icons below).