Create your own handwriting
I was very inspired by the idea of creating an outline for the lazy:
But I did not like the fact that it is necessary to use some foreign font.
Imagine the situation: you regularly turned in written work during the academic semester, and at the end you turn in a summary written in a completely different handwriting. Not good...
There are many articles on the Internet on the subject of creating your own font, but I never found an article that would explain all the nuances of this craft. I put everything together and I want to give you an accessible manual on this topic.
So, let's begin.
We will need: a pen (black gel), a sheet of paper, a scanner, the program "Font Creator 9.1".
1) Take a piece of paper and a pen. We write on it all the characters that you would like to see in your personal font (for example, I took Russian and English languages, numbers, punctuation marks as a basis). We write lowercase and uppercase letters in such a way that you can then select them with one rectangle (this will save you a lot of time).
Here is an example of my hieroglyphs. Some letters I wrote too close and then I had to spend extra time to remove unnecessary pieces that fell into the rectangle. You need to write all letters in the same size (if you write in different sizes, then in the end in your font they turn out to be of different thicknesses). Writing example:
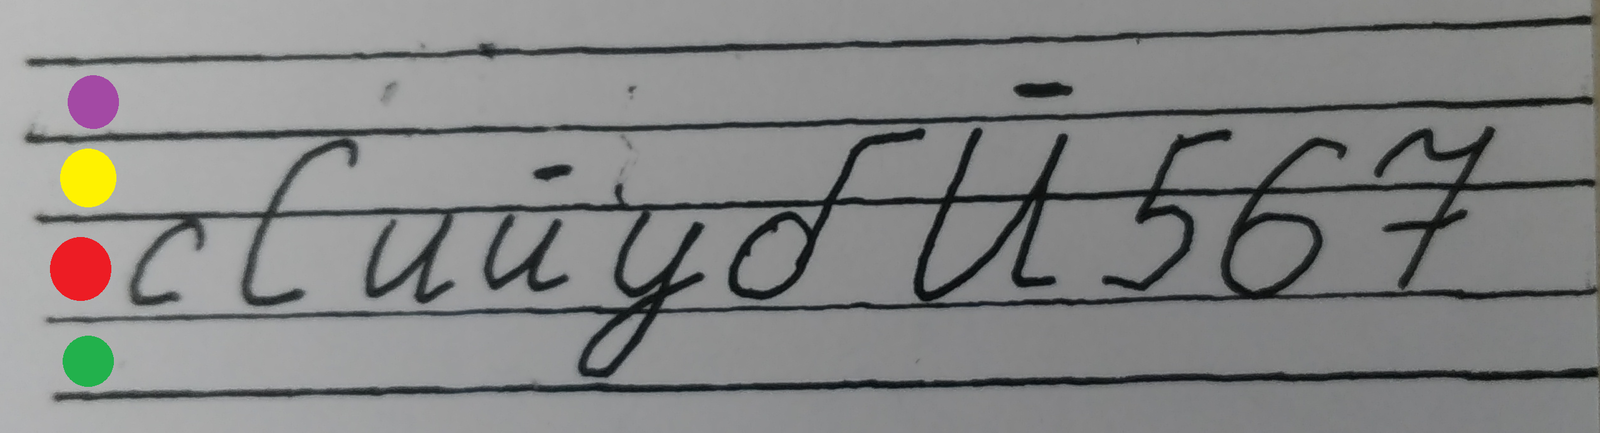
Red line - lowercase letters, Red + yellow - uppercase, green - lower tail of the letter, purple - upper tail of the capital letter (Y, YO).
The first part is over.
2) Now we need Font Creator (you can download it from the official site (the program is shareware), but I downloaded from the well-known Icelandic xD tracker (because there is a localization there)).
At this stage, there are two options: take a ready-made font as a basis (download from the Internet and change it) or create your own from scratch (using a template).
If you take a ready-made font, then know that you can’t just rename it and you will have to replace it with the one that you already have in the system. This did not suit me and I started making it from scratch (at the end there will be a link to my font. You can take it as a basis and your work will go many times faster).
I will describe the method of creating a font from scratch:
1) Open the program; 2) Execute the "tools-options-browse" command (here you can select the font that you will use as a template);
3) Run the "file-new" command. In the window that opens, set the "font family name" (At the end of the work, you will receive the "name.ttf" file, but the font in the system will be called exactly as you called it at the creation stage in the "font family name" line).
4) You can also choose a style (in case you want to create your own font in printed and handwritten letters), but we need to choose "regular".
5) If you enable schemes, then the numbers and most of the characters will be substituted from the template font. We do not need it - turn it off.
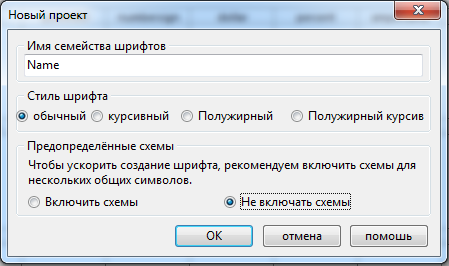
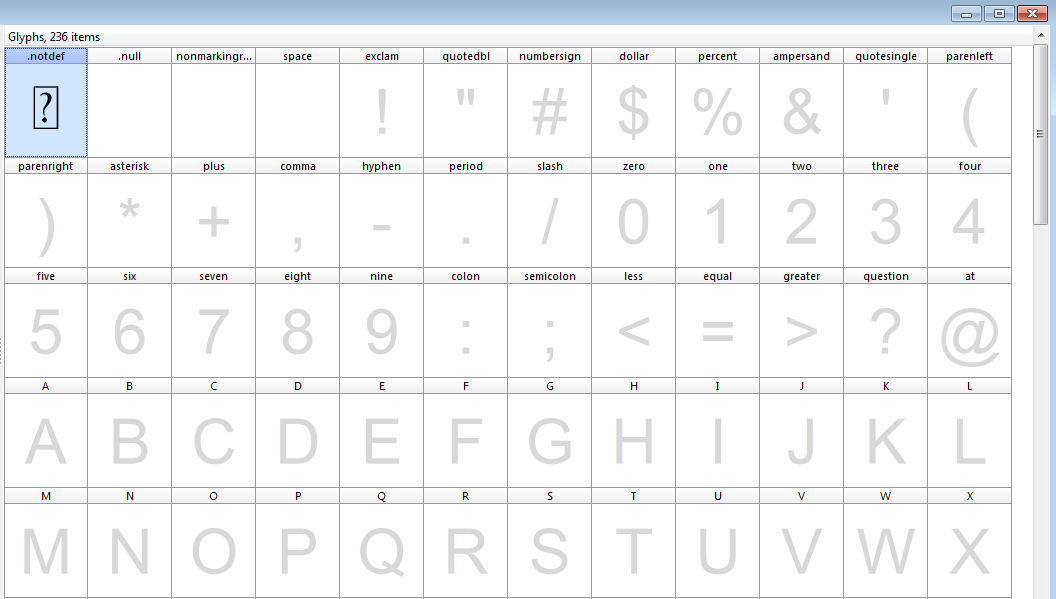
3) Created. We get this window: