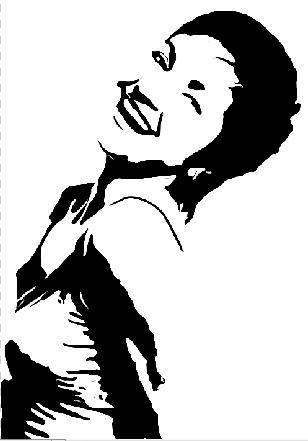
Vector drawing from photo
In this tutorial, I'll show you how to make a black and white vector drawing from a color photo without using the Pen tool.
Step 1. Open the photo in Photoshop.
I will make a reservation right away that photographs in which the figure of a person is on a white background are suitable for completing this lesson. If you do not have one available, then before starting the lesson, the existing photo must be prepared.
Using the selection tools, separate the figure from the background and copy the selection onto a new layer. Rename this layer "shape". Create a new layer, fill it with white, rename it "background". Move this layer in the layers panel so that it is below the "shape" layer. Merge the "background" layer with the "shape" layer. Rename the resulting layer to "Base".

Step 2 Next, we'll apply an Isohelium adjustment to the Base layer to get a black and white silhouette. It is quite possible that the first time you will not be able to ensure that all the details you need are visible on the silhouette. Therefore, we will make several copies of the “Base” layer so that on each, using different settings for “Isohelia”, we get a silhouette with the necessary details.
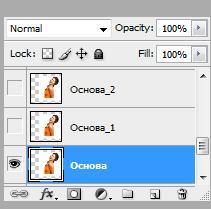
After making two or three copies of the "Base" layer, turn off their visibility. Make sure you only have the Base layer active.
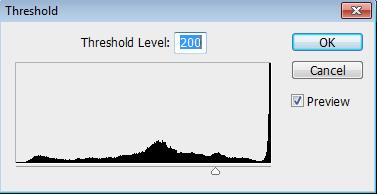
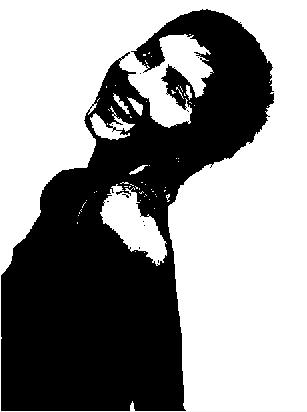
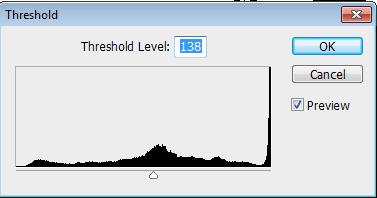
Step 3 Apply (Image - Adjustment - Threshold). I used the following settings to get the base of the silhouette:
Step 4 Now we will apply a Diffusion filter to the layer to smooth out the jagged edges. Filter - Stylize - Diffusion(Filter - Stylize - Diffuse)
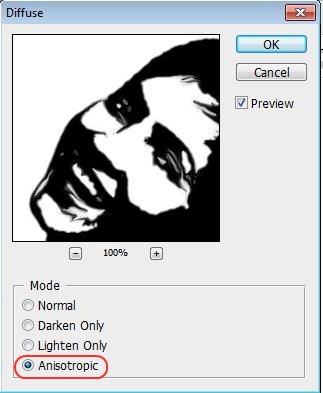
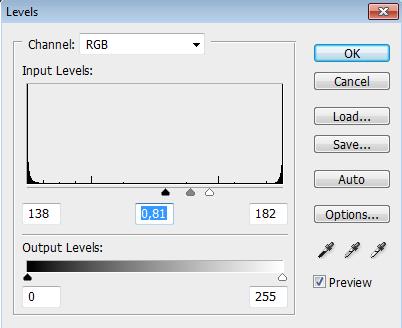
Now, to make the edges of the image sharper, let's go Image - Correction - Levels(Image – Adjustment – Levels), move the right and left sliders closer to the center. To make it easier to control the result, zoom in to 300% before applying the adjustment.

Again repeat the steps with the "Diffusion" filter and the "Levels" correction
Step 5 Turn on visibility for the "Base_1" layer. Apply Image - Correction - Isohelia(Image - Adjustment - Threshold).

Step 6 Repeat step 4 for the "Base _1" layer.
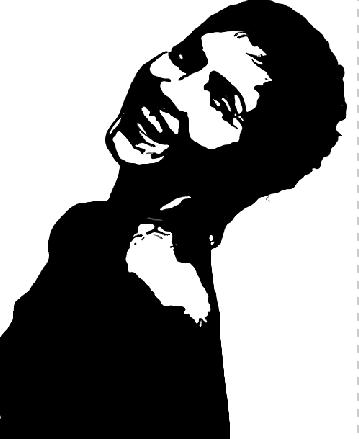
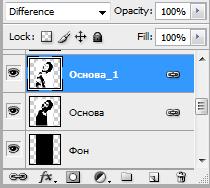
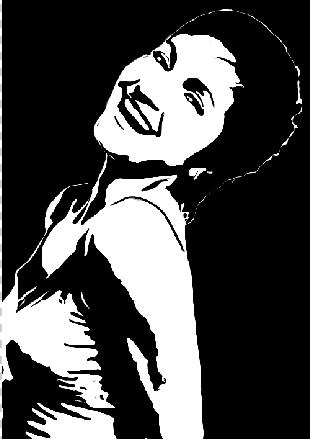
Step 7 Create a new layer, fill it with black, move it in the layers panel below the "Base" layer. Change the blending mode for the "Base_1" layer to " Difference(Difference). Here is what happened at this stage.
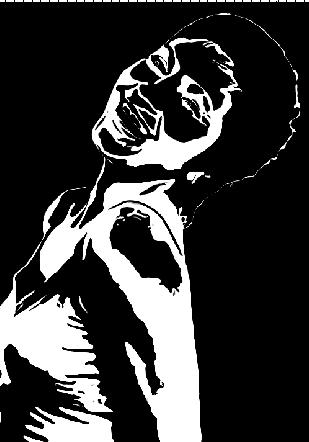
Step 8 The girl turned out to be quite ugly, but it's all fixable. Make the Base layer active, add layer mask. With the help of an eraser, we erase the “terrifying” areas on the girl’s face.
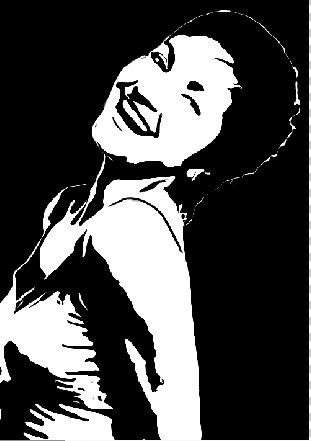
Already much better. However, in my opinion, the left eye let us down a bit.
Step 9. Turn on the visibility for the "Base_2" layer, apply Isohelia so that a clear outline of the eye appears. Repeat step 4. Using the tool " Lasso» Select the area with the eye and add a layer mask.
If you are satisfied with the result, then glue the layers.