How to send a screenshot?
Good hour! In this short article I want to give several ways how you can send a screenshot to other users using image hosting. And, of course, I will single out the most interesting hostings for exchanging pictures.
Personally, I use both options described in the article, but more often the second option. Usually the necessary screenshots lie on the disk for weeks, and I send them only when someone asks, or I post a small note somewhere, for example, like this article.
1. How to quickly take a screenshot + send it to the Internet
I recommend that you definitely try the program for creating screenshots ( Screen Capture, you will find a link to the program a little higher in the article, in a note) and simultaneously sending them to the Internet. You don't even have to do anything: just press the button for creating a screenshot (set in the program settings), and then get a link to the downloaded image on the Internet!
Where to save the file: on the Internet?
In addition, the program is completely in Russian, free of charge, and works in all the most popular Windows operating systems.
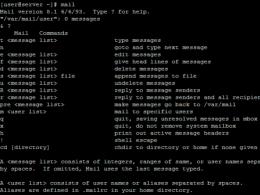
2. "Manual" way to create and send a screenshot
1) Take a screenshot
We will assume that you have already made the necessary pictures and screenshots. The easiest way to make them is to click on the button "Preent Screen"And then open the program"Paint"And insert your picture there.
It is also desirable that the screenshot is not very large and weighs as little as possible. Therefore, convert (or better yet, save right away) it to JPG or GIF format. BMP - can be very heavy, if you send a lot of screenshots, someone with poor internet will have to wait a long time to view them.
2) Upload images to some hosting
Take the popular image hosting service Radikal as an example. By the way, I would especially like to note that the pictures are stored here indefinitely! Therefore, your screenshot uploaded and sent to the Internet will be able to be viewed in a year or two ... as long as this hosting is alive.
radical
To upload an image(s), do the following:
1) Go to the hosting site and first of all press the button " review«.
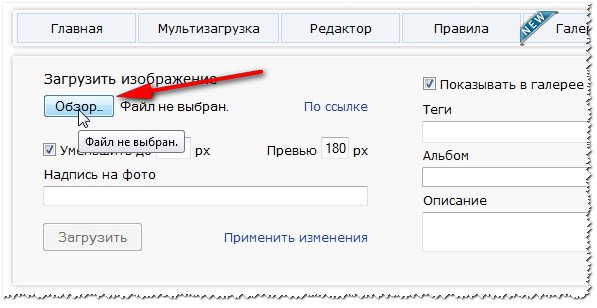
2) Next, you need to select the image file you want to upload. By the way, you can upload dozens of images at once. By the way, pay attention to the fact that "Radical" allows you to choose various settings and filters (for example, you can reduce the picture). When you set up everything you want to do with your images - click the " download ".
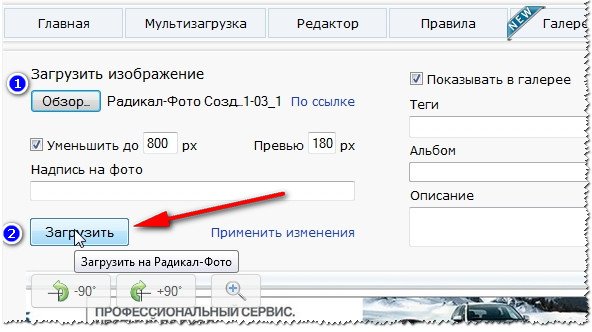
3) You just have to choose a suitable link (in this regard, by the way, "Radical" is more than convenient: there is a direct link, preview, picture in the text, etc., see the example below) and send it to your comrades in: ICQ , Skype and other chats.
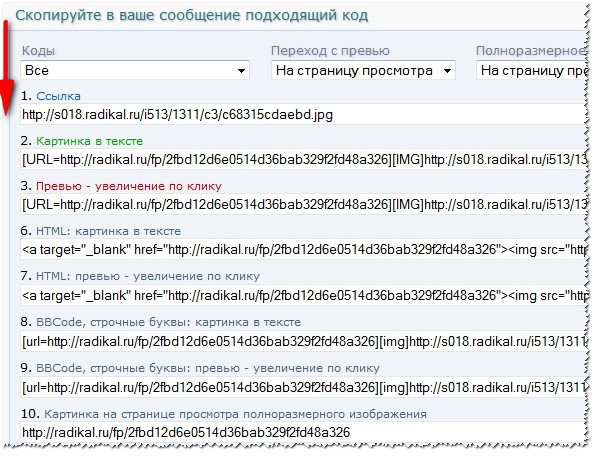
Note. By the way, for different sites (blogs, forums, bulletin boards) you should choose different options for links. Fortunately, there are more than enough of them on Radical (on other services, as a rule, there are no less options too).
3. What image hosting should I use?
Basically, any. The only thing is that some hostings delete images very quickly. Therefore, it would be more appropriate to use the following ...
1. radical

Excellent service for storing and transferring pictures. You can quickly publish any pictures for your forum, blog. Of the notable advantages: no need to register, files are stored indefinitely, the maximum size of a screenshot is up to 10mb (more than enough), the service is free!
2. imageshack
![]()
Good service for sending screenshots. Perhaps, the fact that if the picture has not been accessed within a year, then it will be deleted, may alert. Overall, pretty good service.
3. Imgur