sync data in google chrome
We talked about what browser synchronization is and in what case it can come in handy. Today we will consider the case of data synchronization in the Google Chrome browser.
The developers of this browser have long wondered about the means of synchronizing user data. This issue is considered resolved starting with version 4 of Chrome. No additional tools, extensions, or add-ons are required to sync to Chrome.
The built-in synchronization tool allows you to keep up to date on all user devices information about installed applications, extensions, as well as themes and browser settings.
Those of you who have been using Google products for a long time probably already know that the management of all services is tied to a Google account. For those of you who have never used Google services before, you will need to create your own account.
To do this, type in the address bar of the browser google.ru, in the upper right part of the window you will see the “Login” button. Click and select the “Register” link in the window that appears. There shouldn't be any further problems.
Set up synchronization in Google Chrome
- 1. Launch the Google Chrome browser, open a new tab and in the upper right corner you will see an invitation: “Do not miss the opportunity - Sign in”. Feel free to click on this link.
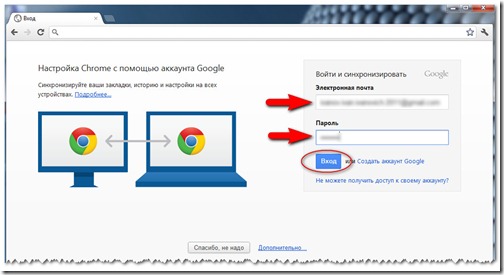
- 2. Next, in the window that opens, you will need to enter your Google credentials: email address and password. Click on the “Login” button.
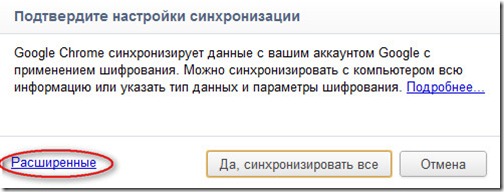
- 3. By default, the Chrome browser will sync all items. To change the synchronization settings (for example, if you do not want all your settings to be transferred to another device), in the next window, click on the “Advanced” link to specify specific points for synchronization with another computer or device.
- In the drop-down list, select "Select objects to sync". And tick off the synchronization options that suit you.
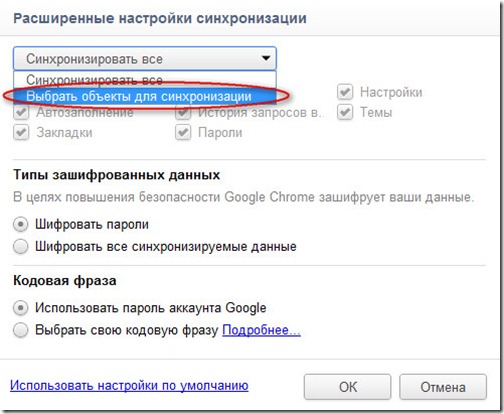
To complete the synchronization, click on the “OK” button.
- 4. To set up synchronization on another computer, you need to do the same thing that we just did and specify the same Google account. Data synchronization in Chrome is configured.
Deleting sync data
Friends, I want to warn you that all synchronization data is stored on the Google server. There is nothing terrible in this, but for security reasons I recommend that you uncheck the box next to the “Passwords” item in the “Advanced Sync Settings”.
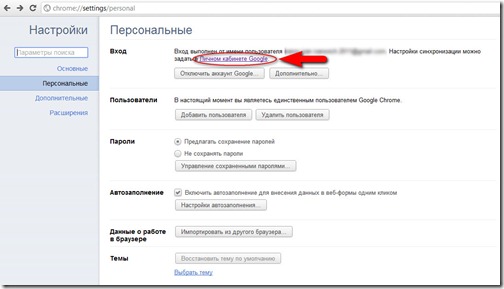
- So, if you decide to delete your synchronization data, then you can do this only in your personal Google account. It is not possible to remove them directly from the browser. To go to your personal account, go to your browser settings, go to the “Personal” tab and click on the link provided.
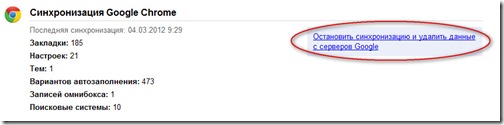
- In the window that appears, click on the link “Stop syncing and delete data from the Google server”.
Expanding synchronization capabilities - freshstart plugin
Google offers a pretty handy sync tool with a lot of features. But synchronization of open tabs is still not implemented. For me, for example, this is a necessity number 1. I'm used to launching a browser that immediately opens for me the resources that I visit every day - these are several tabs that may contain your favorite sites.
- 1. You can solve the problem of tab synchronization using the “FreshStart” extension. I suggest installing it from the Chrome Web Store. To do this, go to your browser settings –> “Tools” –> “Extensions” –> at the end of the list of extensions, click on the link “More extensions” –> in the store search bar, enter the name of the extension “FreshStart”.
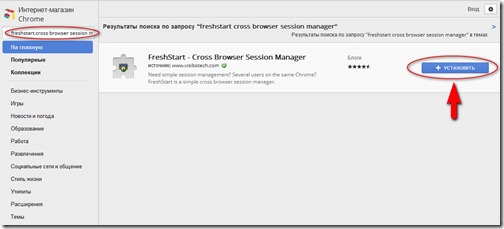
- 2. Next, click on the “Install” button and once again confirm your intentions to install the add-on by clicking on the “Install” button.
The principle of the add-on is very simple: the application saves sessions in a folder that is added to the browser bookmarks. And when using the built-in synchronization tools of the Google Chrome browser, we also synchronize saved sessions.
- 3. After installing the add-on, click on the “FreshStart” icon, a window will open showing options for saving and restoring sessions. It should be noted that all sessions are saved only at the request of the user.
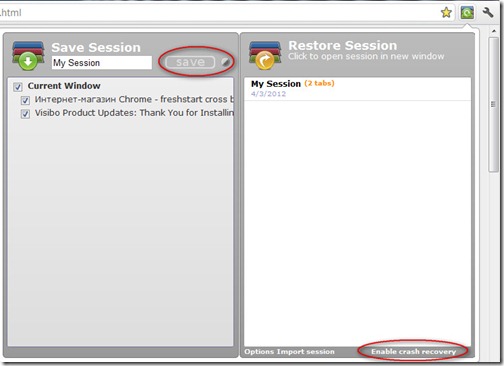
Enter the name of the session, mark those open tabs that you want to save for synchronization, and click the “Save” button.
- 4. Automatic saving of sessions occurs only when the “Tab Disaster Recovery” function is enabled (this function is disabled by default). To enable it, click on the link at the bottom of the “Enable crash recovery” add-on window.
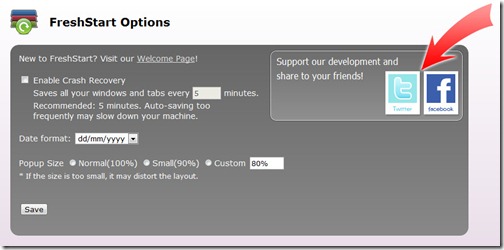
Everything is simple here: check the box next to “Enable Crash Recovery”, specify the frequency of saving sessions and click the “Save” button.
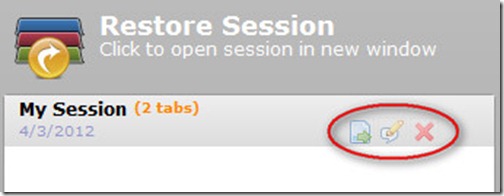
- 5. Now install the extension on another computer, enable Crome bookmark sync as mentioned before. And the saved sessions will appear in the right list of the extension in the “Restore Session” section. Click on the session “My Session” (in my case, the saved session is called that), and the saved tabs will open in a new window.
- 6. Before opening a saved session, you can edit it. To do this, hover over the session and click on the “Edit” button.
The titles of the saved pages will open. You can edit this list and save the results by clicking on the “Save” button. Tab sync is complete. Use on health.
Write if something doesn't work.