How to convert hdd to ssd. How to install an SSD as a boot disk
(Solid State Drive). AT this device There are many positives, but there are also some negatives. After switching from magnetic hard HDD to a drive with no moving parts, your computer will take on new life. You will immediately notice a performance increase of several times. For example, the system will boot almost instantly, the same with applications. Many graphic programs and heavy games will open faster than they did with the HDD.
At correct use SSD drives, you will feel an increase in the speed of your computer several times, let's get the most out of this device.
Using an SSD as a System Disk
To effectively use an SSD, you need to consider that it can be installed as a system disk, in other words, it will have Windows or another OS on it. Since the system often accesses the disk on which it is installed, when using an SSD, the access time will decrease several times.
Although SSDs are very fast devices, they are limited in size. The price per gigabyte is very high, you can see for yourself if you go to any store that sells SSDs. Many users cannot even afford the 250 GB version.
Another disadvantage is the decrease in disk performance due to the volume filled. Such is the technology. Therefore, I advise you to leave at least 30% or 40% of the total volume.
Even if you do not fill the disk with some files yourself, the system itself can do this without your knowledge. For example, when downloading files from the Internet, they are saved in the "Downloads" folder located on system drive. If this is not followed, sooner or later the disk will be full.

As a recommendation, I suggest installing only the operating system and a few important programs on the SSD, everything else can be stored on a regular hard drive. This solution is the most optimal, due to the low volume of the SSD, in any case, you will not be able to store large files. May you have one more HDD 500 GB or more.
In the case of a laptop, there is an option to replace the internal hard drive with an SSD. If you have a disk drive, you can instead. If there is no drive, then, of course, you can replace the existing HDD with a faster, but less voluminous SSD, although you will have to use flash drives as an additional storage drive. This method has the disadvantage that you can forget the external drive somewhere at any time.
Software porting
We figured out all the nuances of storing data on an SSD. Let's move on to transferring programs to another disk. And then the question arises, how to do it? If we move some programs from one disk to another, they will no longer work correctly. With some software, this can be done, of course, but there are too many exceptions.
I want to say that Windows still allows you to transfer programs without consequences, for this there are "symbolic signs" that are created to indicate to Windows where the installed program actually is. For example, you have a program or game installed on C:\ProrgammFiles. We take this software from there and transfer it to an SSD with the same name, then the path will look like this: H:\ProrgammFiles. Now we're running command line and use the mklink command. You need to enter the following:
| mklink /d C:\ProrgammFiles H:\ProrgammFiles |

Now it turns out that the program is on the C drive, but the system will think that it is on the H drive.
Moving system folders
There are so-called libraries that store files of one type or another, for example, the folders "Music", "Video", "Downloads", "Documents". These folders are system folders, but their location can be easily changed.
The folders are usually located at C:\Users\Username. Here we find these folders, click on each right click mice and go to "Properties", go to the tab "Location". Click on the button "Move" and select the desired disk.

Cleaning garbage on SSD
We figured out how to transfer files to a new drive. I would like to note that over time, the disk will fill up more and more, and you are unlikely to do anything about it. An example is various temporary browser files - cache, driver files from a video card, for example, Nvidia, they are saved in the Nvidia folder, which is located on the system drive.
As a cleaner of all garbage and temporary files, the program is well suited. Obsolete entries in , empty folders and leftovers from remote programs will be destroyed with this utility.
last moments
In general, who does not know, there is another point at which users refuse SSD, it's the number of rewrite cycles. The lifetime of a solid state drive is very limited, after the overwrite limit is reached, the drive will stop working. Of course, manufacturers try to get rid of this problem by increasing the rewrite cycle each time. Now SSDs may well work for 5-6 years uninterruptedly, I think there is nothing to worry about.To reduce disk wear, you can restrict some software to use the disk, or specify a different one as a buffer.
There is an opinion that it is not needed for an SSD, and it is, in no case should it be carried out, as this will shorten the life of the disk. It's just that this operation involves multiple read/write cycles, which is very dangerous.
I think this is where I will end this article. Now you know how to properly use an SSD, how to transfer files from one drive to another, and how to increase the life of a drive.
By size, SSD drives can be divided into two unequal groups: 2.5” and 3.5”. 3.5-inch ones are almost never found in stores (only hybrid solutions). You can additionally purchase a special container for installation in the case system block computer or just put it neatly inside and fix it with 2-sided tape wherever you want: the SSD drive does not heat up, does not vibrate, and the working position does not matter to it. You will also need a SATA interface cable to connect the device to motherboard. To power an SSD drive, a standard flat connector on the power supply (SATA Power Connector) is usually used. Description of power supply connectors.
Transfer Method operating system(OS) from the old HDD to the new one is described. In the link to the article, our option is also considered: transferring the OS from the IDE or SATA drive to an SSD drive using special program Paragon Drive Copy 11 Professional and Paragon Migrate OS to SSD 2.0 included in it (there is a link to the program), it is necessary, since most of the utilities for creating backups saves the clone in accordance with the old logic of sectors (the next paragraph discusses the preparation SSD drive for OS transfer alternative way if you don't want to use Paragon Drive Copy 11). After transferring the system to an SSD, you will need to change the boot sequence in the BIOS. We set the SSD as the second device, and the CD / DVD as the first. After that, the operating system should boot. If you plan to install the operating system from scratch, then you will not need to transfer the OS.
Preparing an SSD for OS Migration (Alternate Method)
 Acronis Disk Director - This program will help you perform any of the hard disk operations described below. (Attention! A small feature of this program is that you must press the "perform operation" button after changing the disk settings [marked with a finish flag]).
The SSD must first be initialized in order to create the MBR (Master Boot Record). You can do it with the above program. Next, you need to partition the SSD drive and create an active partition on it. On Windows 7 active boot partition can include as little as 100 MB. So we'll use the section you just created. In the next step, you will need to reduce the original size of the partition to 100 MB (and not a byte less). It will be quite difficult to do this using Disk Management, so I again recommend Acronis Disk Director 11.
AT free space hard drive you need to create partition C, which will host the operating system. This partition must not be active and must not be primary (because the previously created 100 MB partition already includes the operating system loader). After that, create drive C from the remaining disk space. It can be a simple logical partition. Also on your old HDD there may be more than one partition, but several, which imposes certain restrictions due to discrepancies in free disk space. Some information, including the factory reset section, can simply be burned to DVD.
After all the preparatory procedures are completed, you can proceed directly to copying the operating system. Next, we will work with the hard disk image (system image). There are many programs for image processing (choose) or you can use standard windows tools 7 - (pretty easy, but a little more time). Control Panel\All Control Panel Items\Backup and Restore - Create a system image (in the left column).
Now you need to copy the system image to an external hard drive (you will probably need to assign a drive letter to the 100 MB partition so that the program can identify it), and then to the SSD drive (using boot program for processing disk images). Restore section by section. Thus, you will have to do the recovery for the 100 MB partition and the C drive.
Attention! Majority free programs for imaging, they cannot reduce the size of the original partition in order to rewrite it to the allotted space on an SSD, which has a very limited amount of data, even if the amount of data written corresponds to the allotted space. In this case, the C drive on the HDD must be reduced to the appropriate size. For this work, I again recommend Acronis Disk Director, since it is more difficult to achieve the same effect using only the seven.
The amount of data on your HDD on the C drive must not exceed the capacity of the created C drive on the SSD. If the original partition contains a lot of user data, then you can simply try to transfer it to another hard section disk or even write them to optical drives. When the system is written to the SSD, right-click on the user folders on the disk and include them in the appropriate library. With this approach, you will not need to deal with copying your folders later.
Now change the boot sequence in the BIOS (Boot section). We set the SSD as the second device, and the CD / DVD as the first, or vice versa. After that, the operating system should boot.
Attention! Before booting the operating system from the SSD, it is recommended to install in BIOS mode AHCI. It's best to do this before you change the device boot sequence, and then set the appropriate settings in Windows 7.
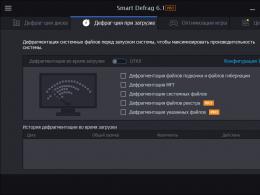
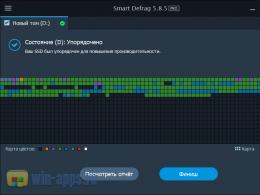
Defragmenting partitions on an SSD does not make any sense and moreover: it is very harmful. In the case of a laptop, go to Services, find Disk Defragmenter in the list, right-click on the entry, the Properties window will open. In it, just disable this service.
In the case of a desktop computer, you can disable defragmentation only for the SSD drive so that those working in HDD system did not lose speed.
As long as the defrag service is disabled, you will not be able to resize the partition. This process requires this service to work.
Hibernation - Most of us do not use hibernation, but prefer standby. However, the file still takes up precious space on your SSD, and its size depends on the number of random access memory on your computer. To get rid of this misunderstanding, enter the following at the command line:
powercfg -h off
If you need to return everything to initial state, then enter:
powercfg-h on
Copying user folders to the hard drive
This process is very simple. Create a partition on the HDD. Create appropriate folders on it (Documents, Music, Photos, and so on). The name can be anything, the system will rename them anyway.
Open File Explorer and right-click on, for example, the My Documents folder on the left. Go to properties and click on the Location tab. Click Move and select a folder on the HDD where you would like to store your documents.
Attention! You need to select a folder directly on the partition. You cannot select the root directory, otherwise there will be confusion.
(speed, fault tolerance, low power consumption, etc.)
Our reader Mikhail Ivanovsky noticed that even if the selected laptop model does not have an SSD, you can easily install it yourself. At the request of the editors, Mikhail wrote a simple and understandable guide for installing an SSD for a laptop.
For those who prefer to watch, we have prepared a video version of this article:
While Windows was loading, did you manage to forget why you turned on your laptop at all? So it's time to change something. And this “something” is not necessarily the entire laptop.
Causes slow loading may vary, but they all affect the speed of the system and installed programs. Only one thing can be said for sure - a system installed on a good old hard drive (HDD) is, in principle, not capable of breaking records. But do not despair and stock up on glycine!
If earlier few could afford a laptop with an SSD drive, today such models are becoming more affordable. Alas, manufacturers are not yet in a hurry to install them on all laptop models, since this option will still noticeably affect the price. Not everyone is ready to overpay for a laptop with an SSD, especially if the purpose of use does not go beyond the usual limits.
Especially for those who want to enjoy all the benefits of the system on solid state drive, but at the same time does not have the desire or opportunity to purchase a laptop in a top configuration, we have prepared this guide. With it, you will see that it is not at all difficult to install an SSD with your own hands (easier than assembling a chest of drawers from IKEA).
Moreover, the increase in laptop performance and the pleasure of the work done are incomparable with the effort expended.
There are several installation options. It all depends on your needs, as well as on the size and configuration of the laptop. Consider the most common case when the SSD is installed in the regular place of the native hard drive (HDD), and that, in turn, in place of the optical drive. This configuration is recommended because the interface for connecting an optical drive is not always able to provide the SSD with the required data transfer rate.
Whether we like it or not, CD and DVD drives in portable computers are becoming an atavism and will probably soon disappear altogether (as once happened with floppy disks and dinosaurs). Do you remember the last time you inserted a disk into your laptop? But the drive takes up space, periodically buzzes, consumes electricity, and even heats up.
So, here's what we need to upgrade:
- Standard size 2.5” SSD
- Adapter for HDD\SSD 2.5” for laptop drive
- Utility to transfer the system and programs from HDD to SSD
We only note that it is reasonable to use an SSD first of all to place an operating system and programs on it, and only then to store data. Therefore, it is logical to determine the volume based on the current load on your C drive, and take into account that for effective work An SSD will require about 25% of free disk space, so it’s definitely not worth taking it “back to back”. Most users will be quite sufficient volume from 80 to 120 GB.
Having decided on the volume, budget and based on reviews in online stores, choosing an SSD is not difficult.
With adapters, things are even easier. Their purpose is to provide a comfortable placement of the SSD in place of the optical drive. You can take any adapter for the size of our SSD (2.5 ”) and the thickness of the drive (as a rule, it is 12.7 mm, but in thin laptops it can be 9.5 mm). From time-tested options, you can choose Espada adapters.
Adapter
The installation process in general view looks like that:
- Turn the laptop over and remove the battery
- We find the cover with the disk storage marking, unscrew the screw that secures it (may be hidden by a plug), remove the cover and carefully remove the HDD, having previously disconnected the cable with wiring
- We install our SSD in place of the HDD, insert the cable, put the cover back in place and tighten the screw
- We install the HDD into the adapter and fasten it with screws from the delivery set
- We find a screw (may be hidden by a plug) with the marking of the drive and unscrew it. In most laptops, this is all that keeps optical drive
- We open the tray with a needle (the hole next to the button) and, holding the laptop with one hand, carefully remove the optical drive with the other

We take out the drive
- We remove the front panel with the button from the tray and move it to the adapter so that the surgical intervention does not affect the appearance laptop

Adapter with bar

Everyone is here
- We insert the adapter with the HDD into the place of the drive and tighten the screw
- Do not forget about the stubs, if any
- Turn on the laptop
Install, follow its simple instructions and voila! Our SSD is ready to go. It's time to arm yourself with a stopwatch and, with bated breath, note the system boot time. Although the difference "before and after" will be noticeable to the naked eye. The system performance index will increase significantly, if not in the overall assessment, then in the “Main hard drive” column for sure - from 5.9 (the maximum possible index for an HDD) to 7.9 (the maximum performance index in principle).
In conclusion, it is worth mentioning one more important point. Since the principle SSD work has its own specifics, in order to extend its service life and greater reliability, it is recommended to perform several optional, but useful settings systems. Windows 7 will make friends with the SSD without any problems, but taking a few minutes to set it up, you are guaranteed to extend its life.
Tips for optimizing the system can be easily found, for example,. At first, we just wanted to convince you that SSD installation anyone can do it. We hope we succeeded.
Successful upgrades!
Mikhail Ivanovsky
Would you like to propose new theme or publish your text on "We are ESET"? Write to us:
With readers of "KV" the experience of buying on eBay using a Visa plastic card. Now it's time to talk about my experience in creating a solid-state hard drive based on the CompactFlash-miniIDE adapter from the Chinese manufacturer noname and a four-gigabyte CompactFlash card.
A bit of water has flown under the bridge since I repaired my Dell Latitude LS, and in my old Compaq 3250 work computer, the hard drive died. The repair problem turned out to be that for such an ancient laptop (Pentium120, 1996 release), it was impossible to find a 4 or 6 GB hard drive (the BIOS 3250 did not understand a larger volume of the disk).
An intermediate solution to the problem was found simply: a 540 MB laptop IDE hard drive was removed from old stocks, a system with a minimum of necessary programs, and additional memory is implemented using a 4 GB CF card connected via a CF-PC Card Type II adapter. Everything would be fine, but the good old 540 MB hard drive turned out to be extremely noisy for a laptop.
Hoping to find SSD hard a small disk to replace a noisy colleague, I turned to the Internet. A quick search among stores on shop.open.by turned up nothing, so I had to turn to eBay.com.
There were no solid-state hard drives at an affordable price, however, during the search, a Chinese seller of various adapters from standard memory cards to miniIDE and IDE interfaces was found. Among the adapters was a CF-miniIDE adapter for 2USD. Noticing that only a few minutes were left before the end of the lot, without hesitation, he pressed the "Place Bid" button and turned out to be a happy buyer of this device.
The problem of payment surfaced a little later, when I discovered that the Chinese seller only accepts PayPal, and my Visa International will not help me, since PayPal basically does not work with citizens of Belarus.
For some time I had to forget about my purchase, but the eBay service carefully reminded me of the need to fulfill the obligations of the buyer. After a little googling, I found an office WMBelarus.com, which performs intermediary services, including for buying on eBay via PayPal.
I filled out an order form on the reseller's website, reluctantly gave them my account password, paid for the order via WebMoney, and a few hours later received an email with a successful PayPal transaction number. This number was entered into the payment conflict resolution field between the seller and the buyer, after which I received a joyful message that the purchase was on its way.
A week later, I received a notification from the post office that the parcel can be picked up. On the envelope with the adapter there were stamps with the time of sending and arrival of the parcel. It turned out that the parcel went from China for a day and was checked by our customs for about 5 days.
After a little fiddling with the miniIDE-IDE adapter and the CF-miniIDE adapter, I managed to connect a 4 GB CF card to a desktop computer. Shamanism consisted in removing one extra leg on the CF-miniIDE adapter, due to which the adapter refused to be inserted into the block (this fact indicates that the Chinese have already overcome the threshold of maximum reduction in the cost of devices - with two thousand legs they could save almost a kilogram of copper: ).
The card was immediately identified as a PATA hard drive, which made it possible to format it as a DOS boot drive under the FAT32 system without any problems. The flash drive was also flooded with the Windows95 distribution.
The system ran great big computer, however, the old laptop refused to work with the newly minted SSD hard drive. Using the "scientific poke" method, the flash drive was inserted into the Dell Latitude LS, where it also worked "with a bang."
For me, what happened turned out to be a bit of a surprise, in search of a solution to the problem, I came across an interesting fact on the Internet: CF cards in their composition have controllers that are not quite compatible with old versions of IDE, similar to those in large hard drives. And the higher the speed of the CF card (mine is marked as 133x), the fewer devices that support it.
Despite partial failure, I tested my solid state hard drive. Under Windows95, the speed of installation of the system and its operation turned out to be a little slower than on a regular hard drive. When working with many small files or loading large homemade SSD HDD, it began to "slow down" noticeably.
Concluding a small digression into the world of homemade solid state hard drives, I want to note the amazing silence that accompanies the work of the Dell Latitude LS with an SSD HDD. If it were not for the hard drive activity LED, then sometimes one could think that the computer "frozen". For those readers who dare to repeat my experiment, I advise you to choose a memory card with the maximum available speed for your quiet hard drive. I wish good luck and direct hands to the experimenters!
Dmitry SPITSYN

