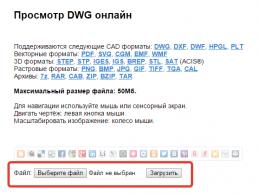
1c exchange between different servers setting. Organization of exchange with the base of the branch (retail store) in the distribution network via XML (universal exchange)
Exchange plans in 1C 8.3 is a configuration metadata object used to implement data synchronization in the 1C 8 system.
An exchange plan can be compared to a directory, where elements are infobase nodes. However, there are many nuances in working with exchange plans, we will talk about them below.
Usually, the exchange in 1C is built using special exchange rules, which are formed using the configuration.
As previously noted, the exchange plan is very similar to the usual one, and therefore we will consider only the main differences in the exchange.
How to work with the exchange plan
The exchange plan can store information and changes to the elements from the exchange plan, and also stores information about the number of the current message. In general, the scheme of work is as follows:
- We change the data (directories, documents, etc.) in the database - the exchange plan remembers the changes. Either auto-registration or program code(for example, the ExchangePlans.RegisterChanges method).
- When the time comes, we get a list of changed elements - the ReadChanges() method, unload this data.
- When uploading / downloading, to avoid collisions, we check the message numbers of the exchange plan. If they do not match, we cancel the data exchange; if they do, we remove the registration of changes and increase the message number.
Get 267 1C video lessons for free:

Distributed infobase
If this flag is set in the settings, then this exchange plan is a distributed infobase (DIB).
- territorially distributed system based on the same configuration 1C 8.3. RIB, in addition to data changes, can also transfer configuration changes, which is very convenient, for example, when updating a configuration release.
Composition of the exchange plan
The setting with which the developer manages the set of objects to be exchanged:

As part of the exchange plan, there can be 3 states of the object:
- Not included in the exchange plan- accordingly, in no way can you configure data exchange for this exchange plan for such an object.
- Auto-registration Deny- this means that it is necessary to register changes for this node only by program code according to some condition, as a rule, . The ExchangePlans.RegisterChanges() method is used.
- Auto-registration Allow- if this checkbox is set, then any changes to the element will automatically be included in the list of exchange plan changes.
Exchange plans and performance 1C
Due to the system features of the implementation of exchange plans, it is not recommended to abuse the uploading of changes according to exchange plans. The matter is that at reading of changes all tables of changes are blocked. Those. when unloading, the exchange plan does not allow writing new changes, and therefore blocks the elements themselves - directories, documents, etc.
There was a need to set up an exchange between the 1C databases of the central company and trade branches. RIB didn't fit, due to sensitivity to configuration changes, especially dynamic updates. And also due to the fact that an exchange is required according to certain rules: all information must go in one direction - from the center to the branch. Those. if someone changes the item reference in the branch database by accident, this should not fall into the central database.
From central base uploaded to the branch:
- catalog,
- prices only for certain types of prices,
- orders from the online store.
In the central database and in the branch, trading is carried out from different legal entities. persons, the management of the branch is carried out independently.
The customer base in the center and in the branch is maintained independently, only those customers who have passed through the online store are common. Those. the clients of the central database should not go to the branch, and also the clients of the branch should not go to the central database. But some of the customers passing through the online store must go through the central database. The problem arises if the client registered in the branch database, and then decided to order something through the online store. In this case, when unloading from the center to the branch, it should not be duplicated, but an existing client should be picked up.
Based on these requirements, it was decided to try the exchange through the EnterpriseData format.
Quick reference to the exchange in EnterpriseData format
The exchange manager module is a 1C configuration module that actually implements the exchange conversion rules. It will be located in external processing, which we will connect to the exchange plan node.
PKS - property conversion rules
Create an exchange plan
For convenience, let's create a subsystem "ECom_Exchange with Branches". All new objects will be added to this subsystem. Changes to standard modules will be transferred to the extension (when connecting the extension, you will need to uncheck the " safe mode", since server modules will be affected).
We copy the exchange plan "Data Synchronization Via UniversalFormat", we call new plan exchange "ECom_Exchange with Branches".
In the settings for the composition of the exchange plan, do Actions - Turn off everything, and then add directories:
- TypesPrices
- Nomenclature
and documents:
- Customer order
- SettingPricesItems

We go to the manager module. In the GetExchangeFormatVersion procedure, you need to change the name of the exchange plan in the query.
It is also convenient to add the ability to debug the exchange manager module (external processing), how to do this is described here:
The DefineSettings procedure determines how our exchange plan will appear in the sync settings menu.
Procedure DefineSettings
Procedure DefineSettings(Settings,SettingId = "") Export Settings.Warn ON ExchangeRulesVersion Mismatch = True; Settings.PathToRulesSetFileOnUserSite = "https://users.v8.1c.ru/distribution/project/Trade110"; Settings.PathToRulesSetFileInTemplatesDirectory = "\1c\trade"; Settings.Insert("Command Header to Create a New DataExchange", NSstr("ru = "Exchange with affiliates"")); Settings.Insert("Exchange Creation Helper Header", НStr("ru = "Exchange with affiliates"")); Settings.Insert("ExchangePlanNodeHeader", НStr("ru = "Exchange with affiliates"")); Settings.Insert("This isXDTOExchange Plan", True); EndProcedure
And also it is necessary to add our exchange plan in the procedure List of Exchange Plans in the general module Data ExchangeUTUP
Subsystem Exchange Plans. Add(Metadata. Exchange Plans. ECom_Exchange With Branches);
As a result, it will be possible to configure the exchange according to our exchange plan:

To start the exchange of standard tools, it is also necessary in general commands
- ConfigureTransportParametersMessageExchange
- Synchronize
- Composition of Data to be Sent
In the "Parameter type" property, mark our exchange plan

Copy typical event subscriptions:
- SyncDataViaUniversalFormatRegister
- SyncDataViaUniversalFormatRegisterDocument

We indicate our objects that are part of our exchange plan.
We copy the typical module Data ExchangeEventsUT, in the resulting module in the procedures we change the name of the exchange plan from Data Synchronization Via Universal Format to our ECom_Exchange With Branches.
In the created subscriptions, we specify handlers - procedures from our new module.
We will also add the ThisCentralBase() function to this module, which we will need in the future. We will consider the code of the node corresponding to the current base ("this node") to be equal to "CB" as a sign of the central base.
Function ThisCentralBase() Export
Function ThisCentralBase() Export Query = New Query; Query.Text = "SELECT | SELECT | WHEN ECom_BranchExchange.Code = ""CB"" | THEN TRUE | ELSE FALSE | END AS ThisCentralBase |FROM |Exchange Plan.ECom_BranchExchange AS ECom_BranchExchange |WHERE | ECom_BranchExchange.ThisNode" ; Selection = Query.Execute().Select(); If Selection.Next() Then Return Selection.ThisCenterBase; Else Return False; EndIf; EndFunction // ThisCenterBase()
Because this function will be called constantly, you need to cache it using the reuse module.
Creating Registration Rules
To create registration rules, we need the Data Conversion v2 configuration.
I used this article to study the issue:
Using the processing MD83Exp.epf, which is included in the Convert 2 distribution package, we need to unload the structure of our configuration into a file.

Then you need to load the resulting configuration structure into Convert 2.


We create registration rules.

We choose our configuration and our exchange plan.

And go to the registration rules settings.

We create registration rules for our objects:

Because we want to have a one-way exchange (only from the center to the branch), in the rules setting for each object, we need to add our filter to the "Before processing" handler:
Rejection = Not ECom_DataExchangeRetryThis isCenterBase();

We impose an additional filter on the "Customer's order" by organization and by the date of the start of unloading:

For the document "Setting item prices", we also add a filter by date. In addition to this, we add a filter by price type to the "When processing" handler.
UseCache = false; PriceTypes = Object.PriceTypes.UnloadColumn("PriceType"); QueryParameters.Insert("PriceTypes",PriceTypes); TekstZaprosa = "SELECT | ECom_ObmenSFilialami.Ssylka as references | FROM | PlanObmena.ECom_ObmenSFilialami.VidyTsenNomenklatury AS ECom_ObmenSFilialamiVidyTsenNomenklatury | Internal connection PlanObmena.ECom_ObmenSFilialami ECom_ObmenSFilialami HOW | TO ECom_ObmenSFilialamiVidyTsenNomenklatury.Ssylka = ECom_ObmenSFilialami.Ssylka | And (ECom_ObmenSFilialamiVidyTsenNomenklatury.VidTsenNomenklatury B (& SvoystvoObekta_VidyTsen)) | And (ECom_BranchExchange.ThisNode = FALSE)" ;
This handler, using a request, allows you to determine the list of nodes in which the object will be registered. For some reason, although our query parameter is called "PriceTypes", in the request we must write "Price_TypesObjectProperty".
We also apply a filter to the "Types of prices" directory:

Save registration rules to an external file:

The resulting XML file must be loaded into the "Registration Rules" layout of our exchange plan:

Note that when the configuration is running, registration rules are not taken from this layout at all, but from the rules stored in the "RulesForDataExchange" information register. And in this register, the rules are loaded just from the layout wired into the configuration - when creating the synchronization setting. This leads to the fact that if we have already created a synchronization setting, and for some reason we needed to change the registration rules - after changing the rules in the configuration layout, we need to update them also in this register:

Conversion rules
To create conversion rules, we need the Data Conversion v3 configuration. It is better to use a clean base. For example, when developing a conversion for the EnterpriseData 1.3 data format, for some reason it was necessary to set attributes (PKC) for some objects, which seemed to be not mandatory. It turned out that they are required in version 1.2, and the mere presence of a loaded description of this format in the Conversion database has already confused the logic of the program. Therefore, we take a clean database, and load everything into it "from scratch".
Very cool work with conversion 3.0 is described here:
We load the configuration structure from the file uploaded earlier (in Convert 2).

We unload from UT 11 the XDTO package EnterpriseData_1_3_8 to a file

Upload the resulting file to Convert 3

Creating a conversion

The exchange manager format version is specified depending on the configuration. For example, for UT 11.3 it is "1", for UT 11.4 - "2".
What is conversion? To unload and load an object, we need:
- Rule for sending data - here we can apply a filter on objects and apply different conversion rules (for example, different conversion rules are specified for folders of items and elements due to a different set of details)
- Conversion rule "from 1C to XML" - here 1C data is converted into data in the EnterpriseData format (for example, you can convert the "Implementation" document into the "Receipt" document)
- Rule for converting "from XML to 1C"
- Data retrieval rule
If the object participates in the exchange plan, it is necessary to create a rule for sending data for it. In our case, this is:
- Price types
- Nomenclature
- Customer order
- Setting item prices
How will the attributes of these reference type objects behave? For example, the attribute "Organization". Each "object" type in the EnterpriseData format (for example, Directory.Contractors) has so-called key properties. So, when we upload an order, we specify the "Organization" attribute in the conversion rules. When this attribute is unloaded, its key properties are also unloaded. We will not be creating sending rules for the "Organizations" directory, because this data rarely changes in a working system, we will simply write an algorithm that, when receiving an order, will correctly substitute the organization that already exists in the branch database.
So, we write sending rules for frequently changing objects, but we'd better unload "static" objects once (and again, if necessary) through a universal unloading-loading.
We create a conversion rule for sending the item.


Set up "property conversion rules". The point is. EnterpriseData is a data structure, essentially the same 1C configuration. Let's just say a little more simplified and universal. It should be suitable for different 1C configurations, so the composition and name of the objects differs from UT 11. Therefore, we need to register the correspondence - how the details are called in UT11, and as in EnterpriseData. There are so-called "key properties" - these are mandatory details for a given version of the format. They can be viewed in the "Format Object Tree":


So, we specify the property conversion rules for the nomenclature:

As you can see, we have several attributes of a "complex" type, for them it is also necessary to create "Object Conversion Rules", otherwise the following error message will appear in the upload: "The structure of the object "/Unit of Measurement" does not match the type".
Conversion rules for enums and other predefined (in the configurator) data are created on the tab:

For this (and some other) data, it is convenient for the rule to work both sending and receiving at once.

Specify the created rules in the PCS for the nomenclature:

Now let's create a conversion rule for the "Customer Order".

Let's add conversion rules for the "Products" tabular section. To begin with, we indicate the correspondence of the details in the PCS. It is necessary to check the box "Algorithm is used", because the values of the tabular part will not be formed "by themselves", you still need to write a small algorithm. When using the algorithm, we do not have to specify the details of the object from 1C, because values to upload to XML file will still be formed by the algorithm. You must also specify a property conversion rule for "complex" types.

Now we need to add the tabular part filling algorithm to the "On Submit" handler.

#Products area // Tabular sections Query = New Query; Query.Text = "SELECT | Goods.LineNumber AS DocumentLineNumber, | Goods.Nomenclature AS Nomenclature, | SELECT | WHEN NomenclatureDirectory.DescriptionFull = """" | THEN NomenclatureDirectory.Description | ELSE NomenclatureDirectory.DescriptionFull | END AS NomenclatureDescription, |ISNULL NomenclatureDirectory.Unit, VALUE(Directory.PackingUnits.EmptyRef)) AS Unit, | EXPRESS(""OwnProducts"" AS STRING(18)) AS Inventory Type, | Commodities.Quantity, | Commodities.Price AS Price, | Commodities.Amount, | Goods.VAT Rate, | Goods.VAT Amount |FROM | Document.Customer Order.Goods AS Goods | LEFT JOIN Reference.Nomenclature AS NomenclatureReference |ON Goods.Nomenclature = NomenclatureReference.Reference |WHERE | Goods.Reference = &Reference | And Goods.Canceled = LYING" ; Query.SetParameter("Link", DataIB.Link); DataXDTO.Insert("Goods", Request.Execute().Upload()); #EndRegion
In the conversion rules, when receiving an order, you need to specify an algorithm that performs the reverse operation

The algorithm fills in the ReceivedData.AdditionalProperties.Products, which are then automatically written to the "Products" tabular part of the loaded object.
ArrayStringProducts = New Array; Padding Rules = New Match; Filling Rules.Insert("Nomenclature", "Nomenclature"); Filling Rules.Insert("Quantity", "Quantity"); Fill Rules.Insert("Amount", "Amount"); Filling Rules.Insert("Price", "Price"); Fill Rules.Insert("VAT Rate", "VAT Rate"); Fill Rules.Insert("VAT Amount", "VAT Amount"); Filling Rules.Insert("Warehouse", "Warehouse"); If DataXDTO.Property("Products") And ValueFilled(DataXDTO.Products) Then For Each Row From DataXDTO.Products Loop DataStringString Structure = New Structure; For Each Filling Rule From Filling Rule Loop StructureToTransferValues = New Structure(FillingRule.Key, Undefined); FillPropertyValues(StructureToTransferValue, String); Value = StructureToTransferValue[FillingRule.Key]; If Value<>Undefined ThenStringDataStructure.Insert(FillingRule.Value, Value); EndIf; EndCycle; StringData Structure.Insert("Number of Packs", StringData Structure.Quantity); If DataXDTO.Property("Warehouse") Then StringDataStructure.Insert("Warehouse", DataXDTO.Warehouse); EndIf; ArrayStringsProducts.Add(StringDataStructure); EndCycle; EndIf; If ArrayStringProducts.Quantity() > 0 Then ReceivedData.AdditionalProperties.Insert("Products", ArrayStringProducts); EndIf;
Now we are implementing the following mechanism for exchanging counterparties (customers): when loading an order into the branch database, we look for existing client by phone (for example, a client bought something at a branch, registered, and then decided to purchase something in an online store, and the order ended up in the central database). If a client is found by phone, then we substitute him in the order, if not, we create a new one. To do this, we will need to transmit the customer's phone number along with the order. The phone is not included in the standard order fields in the EnterpriseData format; in order to transfer it, you can use the AdditionalInfo field, where you can write additional information. We will pass additional information in the form of a structure with the required fields. Through AdditionalInfo, you can pass both structures and tables of values. In the handler "When sending" in the rules for converting the order when sending

add code:
Handler text "On Submit"
StructAddData = New Structure; Request = New Request; Query.Text = "CHOOSE | PartnersContactInformation.PhoneNumber |FROM | Directory.Partners.ContactInformation AS PartnersContactInformation |WHERE | PartnersContactInformation.Reference = &Partner | And PartnersContactInformation.Type = VALUE(Directory.Types of Contact Information.Partner Phone)" ; Request.SetParameter("Partner", DataIB.Partner); Selection = Query.Execute().Select(); If Selection.Next() Then structAddData.Insert("PhoneNumber", Selection.PhoneNumber); EndIf; XDTO Data.Insert("Additionalinfo", structAdditionalData);
Accordingly, in the handler "When converting XDTO data" to the conversion settings when receiving

Adding code:
Handler text "When converting XDTO data"
If DataXDTO.Property("AdditionalInfo") Then If DataXDTO.AdditionalInfo.Property("PhoneNumber") ThenPhoneNumber = DataXDTO.AdditionalInfo.PhoneNumber; Request = New Request; Query.Text = "CHOOSE | PartnersContactInformation.Link AS Partner, | Counterparties.Link AS Counterparty | FROM | Directory.Partners.ContactInformation AS PartnersContactInformation | .View = VALUE(Directory.Types of Contact Information.Partner Phone)) | AND (PartnersContact Information.PhoneNumber = &PhoneNumber)" ; Query.SetParameter("PhoneNumber",PhoneNumber); Selection = Query.Execute().Select(); If Sample.Next() Then ReceivedData.Partner = Sample.Partner; ReceivedData.Account = Selection.Account; Otherwise PartnerObject = Directories.Partners.CreateItem(); PartnerObject.Name = DataXDTO.Counterparty.Name; PartnerObject.NameFull = PartnerObject.Name; PartnerObject.Client = true; PartnerObject.LegalPerson = Transfers.CompanyPrivatePerson.PrivatePerson; NewString = PartnerObject.ContactInformation.Add(); NewString.Type = Enumerations.ContactInformationTypes.Phone; NewString.View = Directories.Types of Contact Information.Partner's Phone; NewString.PhoneNumber = PhoneNumber; NewString.View = PhoneNumber; NewString.FieldValues = ContactInformationControlServerServiceCall.ContactInformationXMLOnView(NewString.View, Enums.ContactInformationTypes.Phone); PartnerObject.DataExchange.Loading = True; PartnerObject.Write(); ContractorObject = Directories.Contractors.CreateItem(); ContractorObject.Name = PartnerObject.Name; CounterpartyObject.NameFull = CounterpartyObject.Name; ContractorObject.LegalIndividual = Transfers.LegalIndividual.Individual; ContractorObject.Partner = PartnerObject.Link; ContractorObject.DataExchange.Loading = True; ContractorObject.Write(); ReceivedData.Partner = PartnerObject.Reference; ReceivedData.Contractor = ContractorObject.Reference; EndIf; EndIf; EndIf;
There are several interesting points in unloading item prices:
- the price setting document can contain several types of prices, and we need to upload only those that fall under the filter.
- In the EnterpriseData format, the item price setting document has only one price type. Those. one document in 1C should be uploaded as several EnterpriseData objects.
To implement the filter, we need somewhere to store the downloaded price types set in the settings of the exchange node. To do this, we need "Conversion Options":

As well as handling the "Before conversion" event:

In the data processing rules for the document "Pricing items" we need to disable the use of conversion "in the standard" version, and instead generate the XDTO object "on the fly":

To do this, we will refer directly to the XDTOServerDataExchange.SelectionObjectUnload method. Let's convert the document into an array of structures we need with one type of prices, and each of these structures will be uploaded separately through the conversion rules. It certainly looks confusing.
Handler text "When processing"
If ValueType(DataIB) = Type("Structure") Then Return; EndIf; Request = New Request; Query.Text = "SELECT | Item Prices. Price Type AS Price Type, | Item Prices. Item AS Item, | Item Prices. Price AS Price | FROM | Document. Item Price Setting. Items AS Item Prices | WHERE | Item Prices. Link = & Link | And Item Prices. Price<>0 | And Item Prices. Price Type In (& Item Price Types) | RESULTS ON | PriceType"; Query.SetParameter("Reference", DataIB.Reference); Query.SetParameter("Nomenclature Price Types", Exchange Components.Conversion Parameters.Nomenclature Price Types); GoodsTable = NewValueTable(); GoodsTable.Columns.Add("Nomenclature"); GoodsTable .Columns.Add("Price"); SelectionPriceView = Query.Execute().Select(BypassingQueryResult.By Grouping);PriceSettingSend Rule = Exchange Components.DataProcessing Rules.Find("Document_NomenclaturePricingSetting", "Name"); If Not PriceSettingSend Rule = Undefined Then While SelectionPriceType .Next() Loop If NOT ValueFilled(SelectionPriceType.PriceType) Then Continue; EndIf; DataIBStructure = New Structure("Date, Number, Reference"); FillPropertyValues(DataIBStructure, DataIB); SelectionDetails = SelectionPriceType.Select(); ItemsTable.Clear (); While SelectionDetails.Next() Loop StringProducts = TableProducts.Add(); FillPropertyValues(StringProducts, Selection Details); EndCycle; DataIBStructure.Insert("PriceType", SelectionPriceType.PriceType); DataIBStructure.Insert("Goods", GoodsTable); DataExchangeXDTOServer.SelectionObject Unload(Exchange Components, DataIBStructure, RulePricingSending); EndCycle; EndIf; UsePKO.Document_SetPricingNomenclature = False;
You need to add the "TypePrice" property to the conversion rule in the SDN. In this case, you must select the "Manual" property selection method.


Synchronization setup
You must set the value of the "Infobase Prefix" constant to "Security":

We create new setting synchronization

Let's set a filter in the settings by the date of documents, organization, type of prices:

To connect our external processing containing the exchange manager module, you need to specify the display of the "service information" tab in the form settings:

Let's create a second clean base (for the branch) from the cf-nickname of the central base. Also, do not forget to connect our extension. When creating a database, the reference books "Currency" and "Units of measure" are automatically created. In order to avoid duplication of these data when loading data from the central database, it is necessary to make identification in the conversion according to these directories not by UID, but by code.

Set the infobase prefix to "FL" and set up synchronization, similar to the central database.
Additional files with a cross-cutting example.
Files attached to this article:
- cf-file "Additional configuration objects.cf" for combining with the main configuration of UT 11, containing the developed exchange plan
- cfe file with configuration extension, for adjusting configuration modules
- xml file "Registration Rules.xml"
- epf file "ManagerDemo.epf"
How to install an exchange plan. In the configurator, we start the operation of comparing and merging with "Additional configuration objects.cf". Uncheck all objects:

Select "Actions - mark by subsystems of the file", mark only "ECom_Exchange with Branches"


Add the extension from the file "ECom_ExchangeDataWithBranches.cfe", uncheck security:

To adjust the registration rules, the attached file "Registration Rules.xml" can be loaded into Conversion 2. You must first load the configuration structure, as described.

To adjust the conversion rules, the attached file "ManagerDemo.epf" can be loaded into Conversion 3. First, you need to create a description of the conversion, as described.

V real life a rare company manages with one 1C base. The most common situation is two bases, accounting and salary.
The bases must be connected - the salary has been calculated, the accrued taxes must go to the accounting department for payment.
To connect several databases, there is Exchange 1C. How does he work?
What is Exchange 1C?
There is a network of shops and a central office. Every store and office has a warehouse. Goods are moved from warehouse to warehouse (mainly from the central warehouse to stores), and in stores they are sold.
The base 1C Retail is used in the office and the same base in each store. Bases in stores are subordinate to the base in the office.
The office creates documents on the movement of goods from warehouse to warehouse, prices are assigned. Documents are uploaded to the subordinate bases and the goods “appear” there.
In stores, documents are created on the sale of goods. Documents are uploaded to the office base and sales “appear” there.
This scheme is called distributed. information base(RIB). Procedures for "filling" documents - two-way exchange 1C. And the setting of this scheme is URIB or URIBD (management of distributed information databases).
Principles of Directory Exchange in 1C
1C directories (and the set of all directories "in the complex" is called NSI - regulatory reference Information) – usually should be the same in different databases. This means that even if there are several databases, the list of goods, warehouses, contractors is the same in different databases.
It is a common practice when in one database the directory is allowed to be edited, and it is copied (“migrates”) to the rest. As we discussed earlier, each 1C element has a unique identifier - GUID. Directories are usually copied along with their GUID, and thus are identical throughout the distributed information system.
Otherwise, when several initially existing databases are connected, or when directories can be created in different databases at the same time, their GUIDs will be different. There is a matching mechanism for this. V special register information, when exchanging 1C, information is recorded that an element from base No. 1 with GUID xxx is equal to an element in this base with GUID yyy. Initially, the existing elements that are no longer equal must be matched automatically (by other details, for example, by name or by TIN and KPP) or manually.
Principles of Document Exchange in 1C
Documents in 1C are posted by registers and after that they are considered "posted". This gives rise to understandable difficulties in the transfer.
One option is to transfer only the documents and post them again after uploading. This method is often used, but it may give rise to errors - the document may not be posted in the new database, since the conditions during posting may be different than they were at the time of posting this document in the original database.
Another option is to transfer documents and registers together. As we understand it, the question immediately arises - either we transfer all documents in general and then the entire register in general, or we are forced to choose to transfer only movements on transferred documents.
Let's say we need to transfer an element of the Nomenclature directory. This directory has 10 fields, of which 5 are strings and numbers, and 5 are links to other directories.
Accordingly, when transferring one element of the Nomenclature, we are forced to search and transfer also 5 elements of other directories.
Thus, when transferring one element of the directory or one document, 100 or more other 1C objects can be transferred by reference.
In fact, almost all configuration directories are said to refer to each other in one way or another.
1C exchange plans
Suppose we have created distributed base data and exchanged 1C. Goods are purchased at the central warehouse and prepared for shipment to stores. In 1C in the office they entered required documents movement of goods. It is required that they are loaded into stores.
What to do? Carry out a full exchange again 1C? Long and inefficient! It would be much better to calculate what exactly was added or changed by users to the office, so that only changes get into the stores.
For this, there are 1C exchange plans. The programmer creates a 1C exchange plan in advance to carry out 1C exchanges with some other database, for example, with our stores.

The 1C exchange plan notes, when users work with directories and documents, what has been added or changed since the last 1C exchange with this database.
Creation of URIB 1C
So, we will create a distributed database from scratch. Initially, we have a "parent" office base. From it we will select the bases of stores that will be subordinate to it.
In typical configurations, there are already standard 1C exchange plans. The types of bases for which they are intended are intuitively clear from the name:
- Exchange 1C with the site: exchange with the site 1C: Bitrix
- Exchange 1C UPP-UT or UT-Retail: typical exchanges with sister configurations
- Full - 1C exchange with a database based on the same configuration.
RIB - a distributed information base - can also be made on the basis of the 1C "Full" exchange plan. In the configurator, in this 1C exchange plan, the “Distributed infobase” checkbox should be checked.

The 1C exchange plan created in the configurator indicates that we are going to exchange with such a configuration. In the Enterprise mode in the same 1C exchange plan, you now need to specify specific databases based on this configuration.
Let's go to the 1C exchange plan (Operations / Exchange plan; they can also be in another menu, often in the Service / XXX menu).

In the list of databases in the 1C exchange plan, there is one with a green circle in the picture. This element stands for THIS BASE. The remaining elements denote OTHER bases with which 1C is being exchanged.
It is necessary that both the name and the code are filled in for all elements.

To create a "shop" subbase:
- Set the cursor in the list to the element of the 1C exchange plan, which we created as a “store base”
- Select the menu item "Actions/Create initial image".
As a result, one database will be created, with the initial data uploaded to it. This must be repeated for each element of the 1C exchange plan, except for the CURRENT BASE.

Theory of exchanges 1C
The 1C exchange theory is quite simple:
- One of the bases (more often the base of the center) initiates the 1C exchange according to the schedule or “on an event” (login to the base of a certain user, etc.)
- 1C exchange consists in unloading a file from the database
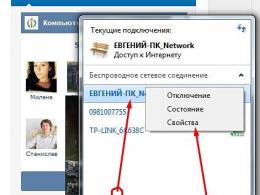
- The file must be moved to a place where the subordinate base can pick it up (usually a share or ftp, less often email)
- The slave database downloads the received file
- As confirmation that the information has been received, the slave base uploads a “response” file, which is uploaded back to the central base in the same way.
- Exchange session 1C completed.
There are other methods of 1C exchange, not through files, but, for example, through a direct COM connection between two databases. Its advantages:
- No "space to store and transfer files" required
- No need to re-upload confirmation
- Everything happens faster due to the first two points.
However, the limitation is clear - the bases must be in such proximity to each other in order to be able to initiate a COM connection.
Setting up RIB 1C
In the constants of typical configurations (Operations / Constants; or Service / Program Settings) - usually there is general setting exchanges 1C. This is a prefix in element codes and document numbers to easily determine in which database it was created. As well as an internal method for saving information about the place where directories and documents were created.

Now you need to configure how the process of periodic exchange of 1C information between the created databases will take place.
All RIB settings in 1C are in typical configurations, usually in the Service / Distributed infobases / Configure RIB nodes menu.

For each previously created "remote store base" element, you need to add a configuration element.

The setting specifies the 1C exchange method: file (share), file (FTP), file (e-mail).

Creating and configuring a distributed 1C infobase in a thin client
Let's see a similar setting in a typical configuration based on thin client– Trade management edition 11.
Settings (and creation from scratch) are located on the Administration tab of the interface. Item "Data Exchange".

Select "Create an exchange in a distributed infobase".

From the very beginning, 1C will prompt us to indicate how we are going to exchange information with the subordinate database. Here is the configuration option "via a file on the ball."

Here's a configuration option via a file on FTP.

The name of our exchange setting is 1C.

And immediately a proposal to create an "initial image" - that is, the slave database itself with uploading primary information into it.

Unlike the configuration on a thick client, both 1C exchange settings are in the same place.
Automated systems management in most cases consist of separate databases and often have a geographically distributed structure. At the same time, a correctly implemented data exchange - necessary condition for effective work such systems.
In this case, the initial setup of the exchange may require a number of actions, not only in terms of programming, but also consulting, even if we are dealing with homogeneous sources, as is the case with products based on the 1C:Enterprise platform. Why setting up a 1C exchange (or, as it is also called, data synchronization in 1C 8.3) can become the most time-consuming and expensive task of an integration project, we will consider in this article.
Data exchange in the 1C environment allows you to:
- Eliminate double entry of documents;
- Automate related business processes;
- Optimize interaction between distributed departments;
- Promptly update data for the work of specialists from different departments;
- "Demarcate" different types accounting.*
*In the case when the data of one type of accounting differs significantly from another, it is necessary to ensure the confidentiality of information and “separate” information flows. For example, data exchange between 1C UT and 1C Accounting does not require uploading management data to the regulatory accounting database, i.e. synchronization in 1C will be incomplete here.
If we represent the standard process for implementing the primary data exchange, when at least one of its objects is a 1C product, then the following stages can be distinguished:
- Coordination of the composition of the exchange;
- Definition of transport (exchange protocols);
- Setting rules;
- Scheduling.
Identification of the composition of the exchange 1C
Exchange objects can be conditionally divided into "source" and "receiver". At the same time, they can perform two roles at the same time, which will be called a two-way exchange. The definition of the source and destination occurs in a logical way, depending on the need or on functionality systems.*
*For example, when integrating "WA: Financier" - a solution for financial accounting and management of treasury processes, developed on the basis of "1C: Enterprise", WiseAdvice experts recommend it as a master system. This is due to the availability of control tools to comply with the rules of the application policy, and, accordingly, to ensure the effectiveness of the solution.
Further, based on the received and recorded requirements from the users, a list of data for exchange is created, their volume, requirements for the frequency of exchange are determined, the process of working with errors and handling exceptional situations (collisions) is prescribed.
At the same stage, depending on the fleet of existing systems and the structure of the enterprise, the exchange format is determined:
Distributed infobase
- RIB implies an exchange between identical 1C database configurations, with a clear master-slave control structure for each exchange pair. Being an element of the technological platform, the RIB, in addition to data, can transfer changes in the configuration and administrative information of the database (but only from the master to the slave).
Universal data exchange in 1C
- A mechanism that allows you to configure the exchange of 1C databases, both with configurations on the 1C:Enterprise platform, and with third-party systems. The exchange is carried out by transferring data into a universal xml format in accordance with the "Exchange Plans".
EnterpriseData
- The latest development of the 1C company, designed to implement data exchange in xml format between products created on the 1C:Enterprise platform with any automation systems. The use of EnterpriseData simplifies the improvements associated with the exchange. Previously, when a new configuration was included in the system, it was necessary to implement a mechanism for importing and exporting data, both for it and for existing systems. Now systems that support EnterpriseData do not need to be modified, having only one entry-exit point.
Definition of transport (exchange protocols)
The system based on the 1C:Enterprise 8 platform provides a wide range of options for organizing exchange with any information resources through generally accepted universal standards (xml, text files, Excel, ADO connection, etc.). Therefore, when determining the transport for data exchange, one should start from the capabilities of the database of a third-party system.
Synchronization of directories
The main principle of effective directory synchronization is the presence of one entry point. But if we are talking about working with directories that were historically filled out according to different rules, it is necessary to clearly define the synchronization fields to bring the exchange to a “common denominator.”*
*At this stage, it may be necessary to carry out work on the normalization of reference data on the side of the data source. Depending on the state of directories and their volume, the process of comparing elements, recognizing, identifying errors and duplicates, as well as filling in the missing fields and assigning synchronization fields, may require the work of a whole group of experts, both from the side of the integrator (the owner of the reference data normalization methodology) and from the side of the customer.
Setting rules
The ability to display data from source systems in receivers depends on correctly defined exchange rules. The rules presented in the xml format regulate the correspondence of the key attributes of the source-destination objects. The 1C: Data Conversion solution is designed to automate the creation of rules for the implementation of both a one-time exchange and a permanent one.
Ensures no data loss during exchange Exchange plan. This component any configuration on the 1C:Enterprise platform that fully describes the 1C exchange procedure: data composition (documents with "identifying" details) and nodes (receiver-transmitter infobases), as well as the activation of RIB for selected exchange directions.
Any change in the data entered in the Exchange Plan is fixed and receives the sign of "change". Until the changed data matches each other in the receiver-transmitter nodes, the flag will not be reset, and the system will send control messages to both nodes. After unloading the data and confirming their full compliance in both systems, the sign is reset.
Exchange schedule in 1C
To automate the regular exchange, the frequency of data upload is set. The frequency of exchange depends on the need and technical capabilities. Also, configurations on the 1C:Enterprise platform allow you to configure data exchange when an event occurs.
Having considered the standard process for implementing the exchange, let's pay attention to the factors that will require improvements at different stages:
- Non-standard, heavily modified database configurations;
- different versions 1C:Enterprise platforms;
- Not updated for a long time current versions configuration;
- Exchange objects that have been previously modified;
- The need for non-standard exchange rules;
- A very different set and composition of details in the available directories.
Since even standard actions for the implementation of the primary data exchange require expert knowledge, they are recommended to be carried out with the participation of 1C specialists. Only after completing all the above steps, you should proceed to setting up the exchange in the configuration. Consider the integration of databases on the example of "1C: UPP" and "1C: Retail" (according to the same scheme, the exchange with "1C: UT" is configured). Also, typical synchronization includes the exchange of SCP - SCP, which is typical for large-scale automation systems at the largest industrial enterprises.
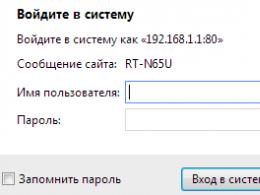
In the "Service" submenu, select "Data exchange with products on the platform ..." (selecting a direct exchange with "Retail" often threatens with errors at the level of COM objects). Pay attention to the official message " This opportunity unavailable."
 To solve this problem, you must select "Data Sharing Settings"
 ...and check the box. Further, the error message is ignored.
 In the data synchronization settings, select "Create an exchange with" Retail "...

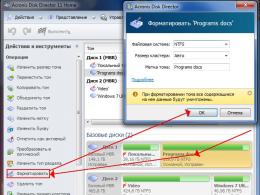
 Before configuring connection settings through a local or network directory, make sure that there is space on the disk for the directory. Although, as a rule, it does not take more than 30-50 MB, in exceptional cases it may require up to 600 MB. You can create the required directory directly from the configurator.

 When connecting through the network directory, we ignore the proposals to configure the connection via the FTP address and by e-mail by clicking "Next".
 In the settings, manually put down the prefixes - the symbols of the databases (usually BP, UPP, RO), set the rules and the start date for uploading data. The prefix will be indicated in the title of the documents to indicate the base in which they were created. If the upload rules are not edited, the default data will be uploaded according to all available parameters.

 We create an exchange settings file for Retail so as not to repeat our actions. If you need to send data immediately after setting up synchronization, check the box.
 To automate the exchange process, you need to set up a schedule.
 Retail menu.
 Check the box and select Sync.
 We make a “reverse” setting by choosing Managing a manufacturing enterprise.


Load the file with the settings created in SCP.
 We put a tick, the system picks up the address automatically.


We act in the same way as in the UPP.


Verification comparison of data (Manual comparison of data is recommended to be performed on preparatory stage, since these jobs can become the most time-consuming in the process of implementing the exchange). The comparison window is opened by double-clicking the mouse.

 In case of an error in synchronization, “Details…” will be replaced with “Never…”.
 “Details…” opens the registration log with updated information on the exchange.
 Ready.
Data exchange between 1C 8 application solutions is something without which it is not possible to build a full-fledged information space enterprises.
- Why are data exchanges needed and how to use them?
- Types of exchanges between 1C.
- How to set up data exchange between 1C databases?
You will find answers to these questions below.
There are usually two reasons for implementing exchanges:
The organization has a branch network
In this case, you just need to set up the exchange between different branches. For this, in the 1C 8.3 system, the enterprise has a mechanism. With which you can flexibly configure the exchange of information. For example, for branches, you can turn off the visibility of documents for other branches and at the same time the central office will see the documents of all branches. Another example is setting up an exchange between 1C Retail databases of an office and stores.
Separation by types of accounting
As a rule, this means that the organization maintains different records in different information bases. This separation allows you to filter "unnecessary" for another type of accounting information for different infobases. Example: so-called. “management accounting” will be introduced in the “Trade Management” database, where all transactions are reflected, and the management sees the full picture of events, and only the documents necessary for accounting and tax accounting are uploaded to the regulated accounting database “Enterprise Accounting”.
What are the exchange mechanisms between 1C databases?
Data exchanges can be classified in two ways: the mechanisms used and the transport used for the exchange.
1C data exchange mechanisms
As a rule, the exchange uses two mechanisms:
- Distributed Information Base (RIB)- a mechanism that allows you to configure data exchange between branches. The mechanism implies that absolutely identical database configurations are exchanged. The mechanism is able to transfer database configuration changes. The mechanism is implemented at the level of the technological platform.
- Universal exchange mechanism between configurations- the mechanism is a development of 1C for applied solutions. It is generic and based on . Data exchange is carried out using xml rules, which are created in a special configuration - . Using this mechanism, you can implement both a one-time exchange and a constant exchange between 1C configurations. The mechanism is implemented at the configuration level, you can build it into your configuration from the technological configuration.
Transport for data exchange
A fairly wide range of technologies can act as transport. Consider the main ones implemented in the universal exchange mechanism 1C 8.2:
Get 267 1C video lessons for free:
- Local or network directory is the easiest transport. One IB creates a file on the disk, the second one reads it and adds its own file.
- FTP resource- exchange, similar to the exchange through the catalog. The difference is that the exchange is carried out via the FTP protocol.
- Postal messages or E-mail- the exchange takes place according to the means Email. The configurations send each other mail messages and regularly check the mail address for new messages.
- Direct connection (COM)- the exchange is carried out through a direct connection of one base to another by means of .
- Internet (Web service)- The transport is a web service. One infobase connects to , the web service connects to the second infobase and transports the message. To implement such transport, you must have.
How to set up data exchange between 1C databases?
For the basics of setting up data exchange in 1C using the “1C Data Conversion” configuration, see the video for an example:
Scheduled 1C data exchange in 1C 8.2
If you need to configure automatic unloading on a schedule, just configure .
For client-server version
In the "Data exchange settings" reference book, on the "Automatic exchange" tab, you need to create a new scheduled task, where you can specify the schedule:

For file version
In the "Data exchange settings" reference book, on the "Automatic exchange" tab, you need to create a new scheduled task, where on the "Exchange by events" tab, specify the events on which the exchange will be launched. For example, when starting a specific user: