Report “Using the capabilities of the AUTOPLAY MEDIA STUDIO program to create electronic publications for educational purposes. Creating multimedia manuals using the AutoPlay Media Studio program using the example of the manual “Exploring our native land Autoplay media studio
DEPARTMENT OF EDUCATION AND SCIENCE OF KEMEROVSK REGION
state budget educational institution
secondary vocational education
"BELOVSKY TECHNIQUE OF RAILWAY TRANSPORT"
Anisimova Tatyana Vladimirovna,
teacher
USING THE PROGRAM FEATURES
AUTOPLAY MEDIA STUDIO
FOR CREATION OF ELECTRONIC PUBLICATIONS
FOR EDUCATIONAL PURPOSES
SPEECH AT THE REGIONAL CONSULTATION
Belovo
2013
Good afternoon, dear colleagues!
As an epigraph to my speech, I would like to quote the words of Pliny the Elder: “How many things were considered impossible until they were carried out.”
In my opinion, this is a very interesting software product.
Ethen the program for visual creation disk startup shells.
By disk autorun shell I mean a small program with a set of functions for viewing and working with the contents of the disk.
Of course, this is too narrow a definition of possibilities.AutoPlay Media Studio. Using it you can create electronic publications educational purpose, CD\DVD business cards, presentations, simple games, electronic photo albums, collections of video files with easy viewing, simple audio and/or video players, small catalogs of goods or services, and so on. And all this virtually without knowledge of programming languages. And if you have skills in working with programming languages, the capabilities of this program increase significantly. INAutoPlay Media Studiocollected a large number of visual tools and settings that will allow you to create programs “quickly and easily”. Especially if you use third-party specialized software to create graphic, video, audio, animation and other objects.
What opportunities does this software product provide to us, teachers?
The program already includes ready-made templates to design a menu with various buttons for launching programs, playing sounds, printing files, opening Internet sites.
You can also easily design your project using any content of your choice - music, video, flash animation, text.
Application created with using AutoPlay Media Studio, at the final stage will be presented in the form object model. This model consists of a group of individual pages, similar to how it is implemented on Internet sites. You can place any objects on these pages (graphics, text, video, Flash, HTML, etc.).
Any element of the project, be it an object or a page, can be assigned a specific action. The program provides hundreds of different actions that can be associated with objects.
You can also expand the capabilities of AutoPlay Media Studio using additional modules - plugins. With their help, you can automate some of the tasks that you perform in the program most often. For example, you can quickly create and manage animated menus, directory trees, and databases.
The ability to create autoplay windows of any shape using transparency masks. Such a mask can be graphic files in .jpg, .bmp, .png formats.
Opportunity CD-R recordings(CD-RW) directly from the program. The finished project can be presented as a self-extracting archive or saved as a separate folder on your hard drive.
Built-in spell checker. This option works with Label, Paragraph and Button objects. Full version The program contains a large number of plug-in dictionaries, with the help of which AutoPlay Media Studio checks spelling while typing.
You may thinkwhat is AutoPlay Media Studioas a program for creating presentations is not very convenient and too complex (compared to the one we are already familiar with Microsoft PowerPoint). But this is only because you have not yet started working with her.
Our work plan for the next 20 minutes is as follows:
Installing and launching the program on a PC (Appendix A. Presentation “Installing Auto Play Studio Media 8”)
Creation of the multimedia project “Visiting A.S. Pushkin" (Appendix B. Step-by-step instruction work on the creation multimedia project).
List of references and sources
INDIGOROSE.com – Development Tools software : [Electronic resource] /http:// www. indigorose. com/ products/ autoplay- media- studio/ video- tutorials // . – 20 13 . – 15 October.
ALEXIUS. com– detailed reviews program components:[Electronic resource] / http:// Alexius. com/ autoplay- media- studio // . – 20 13 . – 15 October.
RULINKS.org – website of available software:[Electronic resource] /// http://rulinks.org . – 20 13 . – 15 October.
Appendix A
Presentation « Installation Auto Play Studio Media 8"
Appendix B
Step-by-step instructions for creating a multimedia project
1.Find the program shortcut on the DesktopAuto Play Studio Media 8 and run the program for execution.
2.In the window that opens, click the button
3.In the new dialog box, select a templateBlank Project , and in the fieldName of your project Enter the titleVisiting Pushkin .
4.Press the buttonOK .
5. Click right click mouse on an empty area of the program's working field to call up the context menu and select the lineProperties
.

6.In the Page Properties dialog boxProperties
:
Page
1
In chapterPage
in fieldName
enterhome
.

7.In sectionBackground check the box, press the buttonReview Pushkin 1. jpg projectPushkin 1.jpg).
8.Turn on the radio buttonBy page .
9.In sectionTransition in fieldEffect Wipe .
10.PressOK .
11.In lineMenu
click the buttonProject
. From the drop-down menu, select the lineSettings
.

12.In the windowProject Setting install in sectionAre common check mark next to the wordMobile .
13.In sectionDimensions set width700 , height500 .
14.In sectionStyle set radio buttonStandard .
15.In sectionOptions check the boxCustomize icon .
16.Press the buttonReview and specify the path to the fileicons (6). ico (My documents For the project Visiting Pushkin iconsicons (6).ico).
17.Leave all other sections unchanged, click the buttonOK .
18.From the toolbar, select a toolABC
(
tooltipNew Label Object
).

19. You have an object on the surface of the project fieldNew Label .
20.Right-click on it and select the lineProperties .
21. In the label properties dialog box that appearsLabel Properties : Label 1 onfirst tabSettings In chapterAn object enter textVisiting Pushkin .
22.Press the buttonFont
Font
font typefaceGeorgia
, In chapterStyle
selectbold italic
, In chapterSize
select font size36
, In chapterEffects
check the boxSmoothed
, In chapterScenario
select from listCyrillic
. ClickOK
.

23.In sectionAlignment set radio buttonCentered , Orientation0 .
24.In sectionCondition of flowers on the listNormal set from paletteRed When you press select from paletteBlue
25.Selectsecond tabSettings , where in the sectionIdentification in fieldName: Object enter a wordHeading ; In chapterLocation don't touch anything; In chapterFeedback in fieldClue : enterProject title , in the listCursor selectArrow ; In chapterSounds from the listOn hover selectNo , from the listWhen you press selectStandard (actually, you can select any sounds from the sound library by selecting the line from the listChoose and then pressing the buttonReview ).
26.PressingOK . In the future, the mark can be moved around the working field as you like and wherever you want.
27. From the toolbar, select a toolNew object Button
, and from the folder that opensFile selection
select any button you like.
28.Move the object on the work field to the lower right corner and call the right-click context menu on it. In the context menu, select the lineProperties .
29. On the first tabSettings windowButton Properties : Button 1 In chapterAn object in fieldText enter textTo visit .
30.Press the buttonFont
and in the dialog box select from the list in the sectionFont
font typefaceGeorgia
, In chapterStyle
selectbold italic
, In chapterSize
select font size18
, In chapterEffects
check the boxSmoothed
, In chapterScenario
select from listCyrillic
. ClickOK
.
31.In sectionAlignment set radio buttonCentered , Orientation0 .
32.In sectionState colorsNormal set from paletteYellow (or any color contrasting to the main background of the picture),When you press select from palettePink (or any color contrasting to the main background of the picture and different from the previous choice).
33.Selectsecond tabSettings , where in the sectionIdentification in fieldName: Object enter a wordMenu button ; In chapterLocation Clue : enterGo to menu page , in the listCursor selectHand ; In chapterSounds from the listOn hover selectNo , from the listWhen you press selectStandard .
34.Select a tabFast action
. In chapterWhen
Objectis
Clicked
installAction selection
from the listShow
Page
; In chapterProperties
select from listPage to display
–
Next
.

35.PressOK .
36.It's time to add another page. To do this, click the button on the menu barPage and from the list of commands selectAdd . The following page will automatically open in front of youPage 1 , which in our project will serve as the menu of our project.
37.We will also assign properties for this page. Call the context menu of the right button on the working field of the page and select the lineProperties .
38.Next in the page properties dialog boxProperties : Page 1 In chapterPage in fieldName enterMenu .
39.In sectionBackground check the boxApply custom settings , press the buttonReview and specify the path to the image filePushkin 2. jpg (My documents For the project Visiting Pushkin Covers projectPushkin 2.jpg), turn on the radio buttonBy page , In chapterTransition in fieldEffect select from the drop-down listWipe . ClickOK .
40.Now let’s set up buttons for moving from the menu page to other project pages. They will contain audio and media content, as well as a button to return to the menu page.
41. Select a tool from the toolbarNew object Button
, select any button you like and call the properties of this object through the right-click context menu.
42.Move the object on the work field to the upper left corner and call the right-click context menu on it. In the context menu, select the lineProperties .
43. On the first tabSettings windowButton Properties : Button 1 In chapterAn object in fieldText enter textThe Tale of the Golden Cockerel .
44.Press the buttonFont and in the dialog box select from the list in the sectionFont font typefaceGeorgia , In chapterStyle selectbold italic , In chapterSize select font size14 , In chapterEffects check the boxSmoothed , In chapterScenario select from listCyrillic . ClickOK .
45.In sectionAlignment set radio buttonLeft , Shift left set value10 .
46.In sectionState colorsNormal set from paletteDark blue (or any color contrasting to the main button background),When you press select from paletteLight green .
47.Selectsecond tabSettings , where in the sectionIdentification in fieldName: Object enter a wordMenu button ; In chapterLocation don't touch anything; in the Feedback section in the fieldClue : enterGo to fairy tale , in the listCursor selectHand ; In chapterSounds from the listOn hover selectNo , from the listWhen you press selectStandard .
48.Select a tabFast action . In chapterWhen Objectis Clicked installAction selection from the listShow Page ; In chapterProperties select from listPage to display – Next (We’ll leave it this way for now, then change it if necessary).
49.PressOK .
50.Next, call the context menu of the right button on the already created and designed button, select the lineDuplicate . With this operation we duplicate the button with all its properties. Then you can change some properties of the duplicate button, but for now we will simply place the new button under the previously created one. And we do this 3 more times. Now our menu consists of 5 buttons.
51. Go to the properties of each of them one by one and on the first tabSettings change the text:
On the second button we writeThe Tale of the Fisherman and the Fish ;
On third -The Tale of the Dead Princess ;
On the fourth -The Tale of Tsar Saltan ;
On the fifth -The Tale of the Priest and his Worker Balda .
52. Align objects on the working field. It is desirable that they all be the same width, length and height, all located at the same distance from each other and at the same distance from the left edge of the working field of the project window. To align relative to each other, select all objects and press the buttonAlign in the menu bar and select the linePlace vertically .
53.Now it's time to create some project pages filled with context. To do this, click the button on the menu barPage and from the list of commands selectAdd . A new page will openPage 1 , which in our project will introduce us to “The Tale of the Golden Cockerel”.
54. Let's assign properties for this page. Call the context menu of the right button on the working field of the page and select the lineProperties .
55.Next in the page properties dialog boxProperties : Page 1 In chapterPage in fieldName enterCockerel .
56.In sectionBackground check the boxApply custom settings , press the buttonReview and specify the path to the image file2. jpg (My documents For the project Visiting Pushkin Covers project2.jpg), turn on the radio buttonBy page , In chapterTransition in fieldEffect select from the drop-down listWipe . ClickOK .
57.Now let’s configure the transition buttons fromCockerel to pages with audio and media content, as well as a button to return to the menu page.
58.On the toolbar, select the toolNew Object Image cat 3.jpg (for example, My documents For the project Visiting Pushkin Additional picturescat 3.jpg)
59.In the properties of this object, do this: selectsecond
tabSettings
, where in the sectionIdentification
in fieldName: Object
enter a wordLook
; In chapterLocation
don't touch anything; in the Feedback section in the fieldClue
: enterWatch cartoon
, in the listCursor
selectHand
; In chapterSounds
from the listOn hover
selectNo
, from the listWhen you press
selectStandard
.

60.Select a tabFast action
. In chapterWhen
Objectis
Clicked
installAction selection
from the listShow
Page
; In chapterProperties
select from listPage to display
–
Next
(We’ll leave it this way for now, then change it if necessary). ClickOK
.

61.On the toolbar, select the tool againNew Object Image and select the desired image in the folder, picture filecat 1.jpg (My documents For the project Visiting Pushkin Additional picturescat 1.jpg)
62.In the properties of this object, do this: selectsecond tabSettings , where in the sectionIdentification in fieldName: Object enter a wordRead ; In chapterLocation don't touch anything; in the Feedback section in the fieldClue : enterRead a fairy tale , in the listCursor selectHand ; In chapterSounds from the listOn hover selectNo , from the listWhen you press selectStandard .
63.Select a tabFast action . In chapterWhen Objectis Clicked installAction selection from the listOpen Document ; In chapterProperties in fieldDocument to open click the Browse button and select the document fileThe Tale of the Golden Cockerel (My documents For the project Visiting Pushkin Texts of poems The Tale of the Golden Cockerel). In chapterLaunch method let the radio button be turned onNorm . ClickOK .
64.Set a return button to the menu page. From the toolbar, select a toolNew object Button and select any button you like.
65.Move the object on the work field to the upper right corner and call the right-click context menu on it. In the context menu, select the lineProperties .
66. Onfirst tabSettings windows in sectionAn object in fieldText enter textOn the menu .
67.Press the buttonFont
and in the dialog box select from the list in the sectionFont
font typefaceGeorgia
, In chapterStyle
selectbold italic
, In chapterSize
select font size20
, In chapterEffects
check the boxSmoothed
, In chapterScenario
select from listCyrillic
. ClickOK
.
68.In sectionAlignment set radio buttonCentered , Orientation0 .
69.In sectionState colorsNormal set from paletteBlack (or any color contrasting to the main background of the picture),When you press select from paletteRed (or any color contrasting to the main background of the picture and different from the previous choice).
70.Selectsecond tabSettings , where in the sectionIdentification in fieldName: Object enter a wordReturn to menu button ; In chapterLocation don't touch anything; in the Feedback section in the fieldClue : enterGo to menu page , in the listCursor selectHand ; In chapterSounds from the listOn hover selectNo , from the listWhen you press selectStandard .
71.Select a tabFast action . In chapterWhen Objectis Clicked installAction selection from the listShow Page ; In chapterProperties select from listPage to display – Special page . In the Page Name section that appears, select Menu from the drop-down list. ClickOK .
72. Let's create a new project page and call it Cockerel 1. In the page properties, select the Cockerel 3 picture as the page background.jpg.
73. We will insert video content on this page. To do this, select the tool from the toolbarNew Video Object .
Greetings, dear friends!  I haven’t written for a long time - summer, vacation, gardening, preparations. Lately I have received a lot of questions, one of which is “How to create a product menu.” Many people are interested in the question: “which program is easier to use and how to work with it.” Personally, I have been using AutoPlay Media Studio for a long time. There are a lot of ways to create a menu, but I prefer the ones that take the least amount of time and are easy to use. Time is sorely short and you have to save on everything. It's no secret that everything you do yourself is much more effective than anything purchased from freelancers. I invested a piece of my soul and got results! I recently shared useful information on how to quickly and easily create a 3-D cover yourself. If you missed it, you can read and watch A simple solution + all the sources, which is enough for long time. Making an attractive cover is a great thing because... They meet you by their clothes.
AutoPlay Media Studio
This unique program to create a disc menu. It can be e-books, video courses, presentations, albums, etc. Basically simple program can satisfy all your fantasies when working and is a great tool for doing business on the Internet. If you want to create a collection of lessons, culinary recipes, fairy tales for children, photo albums, program reviews - everything can be solved simply.
It’s not a rewarding task to explain on your fingers and it’s better let’s watch the video
As you can see, there is nothing complicated. AutoPlay Media Studio is available to everyone and for any thematic niche. The question “How to create a product menu” disappears forever. Once again I want to repeat - AutoPlay Media Studio is one of the most popular programs. Use your imagination and create unique navigation menus. Download AutoPlay Media Studio you can follow the link below. But the program costs money, I don’t ask for money - just share with your friends, click on one of the social network buttons.
Without technical knowledge, you can give up your dream of earning income on the Internet. It is not theory that feeds you, but the ability to work with programs. You can constantly sit on webinars, hear about how you absolutely need to create something, but this won’t create anything on its own. The best principle: “Take it and do it!” - no one will do anything for you, not even lift a finger for “thank you”!
Step by step guide using AutoPlay MediaStudio! Create a professional menu in just one day - now it's possible! The best fundamental knowledge awaits you in the video course in simple language!
$CUT$AutoPlay Media Studio is a powerful visual package for quickly and efficiently creating an autorun menu that appears automatically after inserting a CD/DVD into the drive. The utility has an intuitive clear interface and is easy to learn, in addition, the delivery includes ready-made templates for designing a menu with a variety of buttons for launching programs, playing sounds, printing files, opening Internet sites, and so on, allowing you to easily make the CD interface the most friendly and beautiful. This package has a huge number of different features....
The program will create all the necessary files for autorun and its graphical shell. The user can only record the finished project on a storage medium. Even without programming experience, you can create your own software - comparable in properties and efficiency to software created by specialists using C++/Java.
What results will you get after studying the course:
You will learn how to install the program yourself and become familiar with its interface.
You'll become familiar with the Object toolbar, learn about all the page properties, and learn how to save a project
You will learn everything about the properties of objects, learn how to add objects and actions yourself
You will get acquainted with numerous tabs, learn their purpose and understand what a minification script is
You will study all the program settings and understand how to create ISO image and you can burn it to disk
Information about the video course
Name: Step-by-step guide to AutoPlay Media Studio
Released: 2015
Author: K. Degtyarenko
Genre: Educational
Duration: 04:30:41
Language: Russian
Content
01. Installation of the program
02. Program interface
03. Saving the project
04. Page properties
05. Object Toolbar
06. Adding objects
07. Properties of objects
08. Adding actions
09. Minimization script
10. File_Edit Tabs
11. Program settings
12. Align-Page-dialog-Object Tabs
13. Project Tab
14. Publish-View-Tools Tabs
15. Create an ISO image
16. Burn an ISO image to disk
File
Video format: MP4
Video quality: PCRec
Video: AVC, 1 492x876, ~1383 Kbps
Audio: AAC, 128 Kbps, 44.1 KHz
Archive size: 2.19 GB
Download Step-by-Step Guide to AutoPlay Media Studio. Video course (2015)
Download from turbobit.net
 Task: create an application for displaying photos with music. The application can be exited by pressing any key on the keyboard or mouse.
The creation logic will be as follows:
- Create a new project
- Set the background color of the work area
- Insert a special “Slideshow” object onto the page
- We connect the necessary photos to the “Slideshow” object and sound accompaniment
- We make it possible to exit the application by clicking the mouse or using the keyboard
- We make additional necessary settings
- We publish the project
So, let's start according to our plan.
Launch the AutoPlay Media Studio program and create a new, clean project.
Let's call the project "slideshow":
![]()
As a background working page Let's choose black color for the project. To do this, right-click on the “Page1” item, left-click on “Properties”:

In the window that opens, check the “Use custom settings” checkbox in the “Background” area and select “Solid color” - “Black”:

The next step is to insert the built-in “Slideshow” object onto our page with a black fill. To do this, in the top menu of the program, click “Object” - “Slide show” (this can be done using the context menu by right-clicking in any area of the page and selecting “Slide show”):

We stretch the frame that appears to fill the entire screen:

Now for the Slideshow object we need to add a photo and sound. Sound files can be immediately moved to the folders of the created project. And you can choose from anywhere on your computer or removable media. After publication, the program itself will automatically move the project files to the desired location. I pre-defined my files in the project folder. For those who are not yet familiar with the program, we note that by default, projects are saved in the folder “My Documents” - “Autoplay Media Studio 8” - “Projects” - “Project Name”.
So, how to add a pack with images?
Double-click with the left mouse button on the “Slide Show” object, in the “Slide Show Properties” window that appears, click “Add Folder”, mark it in Explorer the desired folder with images and then “Ok”:


As a result, we return to the “Slideshow Properties” window with a list of connected photos. Don’t forget to leave (or check if there are none) the checkboxes in the positions indicated in the figure. It seems that everything here is clear from the context: the duration of one image, autoplay, cyclic repetition and smooth transitions between photos. In principle, everyone determines all these parameters for themselves and they are not mandatory:

Well, now let's add sound to the settings of our slideshow. To do this, let's go to open window“Slide show properties” in the “Script” tab (1). In the “Script” tab, go to the “OnEnter” tab (2). Next, click “Action” (3). In the action wizard, select the “Audio” category (4) and, finally, “Audio Load” (5) in the “Select an action” section. Click “Next”(6):

In the Explorer window, we find the desired musical composition, and also set to “true” the parameters responsible for automatically starting playback and cyclic repetition. Click “Finish”.

In the “Slide Show Properties” window we can see the code automatically generated based on our actions. Click “Ok”:

Next, according to our plan, we must set the application to exit by pressing any key on the keyboard or by clicking the mouse. To do this, open the properties of the page on which our slideshow is located:

In the “Page Properties” window, go to the “Script” tab (1), and then to the “OnKey” tab (2). Click “Action” (3). In the action wizard, select the “Application” group (4) and select the “Application Exit” action (5). Thus, we indicated to the application that the slideshow should close when the key is pressed. Click “Next” (6).
 In the window that appears, click “Finish” and see a small script as the result of our actions. Go to the “On Mause Button” tab and perform the same actions as for the “On Key” tab, or simply copy the script. Thus, we indicate to the application that it should close when the mouse button is pressed. After completing all actions, click “Ok”.

Finally, we’ll make sure that the application opens in full screen. To do this, go to the “Project” menu, select “Parameters” and make settings according to the figure:


In the next window, determine the folder where the project will be placed and click “Build”:

As a result, we get a musical slideshow in the form of one file.
For those who did not understand anything from the instructions, we offer video instructions:
, , , )" I looked at most of the objects (supplied by default in the program distribution) that can be used in your project. In this part of the article I will look at General settings for the entire project.
Project Settings
AutoPlay Media Studio 8 project settings (picture below) are divided into five tabs.
- Appearance.
- Versions.
- Extended.
- Code signing.
- Subject.
The image above shows the tab Appearance project. On it you can set the name of your program, indicate the display of your program window on top of other windows, make the window moveable (you can move it with the mouse cursor), select one of twelve window sizes (from 320x200 to 1270x949 pixels) or set a custom size. You can choose one of five styles to display your program window.
- Standard. Window decoration (frame) in the style of the theme installed in the target operating system.
- With a border.
- Flat. No frame for your program window.
- Kiosk. Launch your program in full screen mode, filling the entire screen area unoccupied by your program with a solid color (the color can be specified).
- Mask. Like a mask in an object Video .
The image below shows examples of all five styles in the order in the list above.
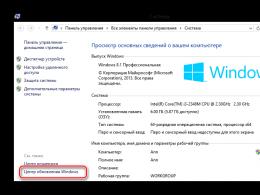
To improve the visual appearance of your program, you can set an icon for it, which will be displayed in the panel Windows tasks(picture below). You can select three modes to display your program icon in the Windows taskbar.
- Standard.
- System tray.
- Hidden. Your program icon is not displayed in the Windows taskbar.
The figure below shows examples of the two modes ( Standard, System tray) in the order listed above.
If desired, your program window can be made scalable by setting the minimum width and height. But this will require you, at the stage of developing and testing the project, to constantly monitor the behavior of all objects on the pages of your program when the window is scaled. You can also change the designs for everyone context menus(three styles) and objects X-button(six styles) in your program.
On the tab Versions(picture below) You can specify the version of your program, the name of the developer company and other data that will be displayed in the properties executable file Your program.

In the tab Advanced(picture below) You can set options for using the target computer's memory, indicate that your program uses text written from right to left, and set the rights with which your program should run in the target operating system.

When setting options for memory (RAM) use by your program on the target computer, three options will be available to you.
- Automatically. IN this mode When your program starts, it will track how much space it can take up in the computer's random access memory (RAM). This will increase the speed of your program if there is a lot of RAM available on the computer and not interfere with overall performance systems with small amounts of RAM.
- Maximum speed. When you select this mode, your program will place maximum amount their pages in RAM computer, thereby speeding up your work.
- Memory saving. When you select this option, a minimum number of objects from your program will be stored in RAM. This will reduce the speed of your program, but will require a minimum amount of RAM from the computer.
To control the level of access to the target operating system in AutoPlay Media Studio 8.0, you can specify one of three modes for launching your program.
- Like the current one. Your program runs with the same permissions as others running processes.
- Maximum available. Your program runs with the maximum available access rights that account, on behalf of which it was launched.
- Administrative access required. Your program will require administrator level access rights on the target operating system. I advise you to avoid using this option, since in some cases (in the absence necessary rights access), your program may not start at all. Using this option is justified only if access to the system registry or system directories.
Tab Code signing(picture below) will allow you to sign your program using (and having) a certificate (*.PFX) to confirm its security, authority, and so on.

On the tab Subject(picture below) you can set the theme of your program window (*.CJSTYLES).

An example of one of the themes included with Indigorose AutoPlay Media Studio is shown below.

If you want your program to have a top menu, then specifically for this AutoPlay Media Studio 8 provides settings for (picture below).

An example of a toolbar in an AutoPlay Media Studio 8.0 project is shown in the figure below.
When you test your program, the toolbar may appear as shown in the figure below.
You will be able to build multi-level menu(picture below) in the toolbar settings.

In the settings of the menu item (picture below), you can set the text of the inscription, set the menu item as a separator and set the ID of the menu item.

To set an action on a menu item for current page Your program will have to use a script (page) editor. And to the tab On the menu(picture below) set an action for each page, “binding” to the ID menu items. The figure below shows an example of setting an action for a menu. Figure taken from help system Indigorose AutoPlay Media Studio.

You can read a little more about how to customize the toolbar in the article “Autoplay media studio 8 lessons (part 2)”.
Audio
AutoPlay Media Studio 8 has the ability to set background music for your program. The following file formats are supported: *.WAV, *.OGG, *.RAW, *.AIF, *.AIFF. In the picture below you can see the options for background sound.

You can place files in a specific sequence or enable random playback. You can also set the list to repeat and set the volume. In the article “AutoPlay Media Studio Review (Part 2). Creating a disk shell » I looked at the object Button and wrote that you can assign a sound effect to hovering the mouse over a button and to clicking on the button. So in the audio settings in the tab Sound effects(picture below) you can change the files that will be used by default for your entire project. On the same tab you can set their volume.

You can read a little more about this tool in the article “Autoplay media studio 8 lessons (part 3)”.
Startup video
Before starting your program, you can play a video file or a file in *.SWF (Flash) format. This can be used as a screensaver. Settings Startup video are shown in the figure below.

You can specify full screen mode video window, set a custom size or apply the size of the video file itself. For the video file size, you can specify a scale (50, 100, or 200 percent), specify a custom size, or specify an option that will resize the video file to window size. When setting these options, it is advisable to know the approximate (or better yet, exact) screen resolution of the target operating system. This will reduce the number of cases when users of your program will display video incorrectly at startup. When testing your program, I advise you to use different hardware and software. Please note that if the target operating system does not have the required codecs installed or Flash player, then the video may not work.
You can set an option that will allow the user to skip video playback at startup. This is very convenient, especially if the user has already run your program. You can also set the border of the video window.
Dependencies
As a rule, when creating a program, you use “external” content: video, Flash, documents in different formats (*.PDF, *.DOC, *.PPT, and so on). This requires that the operating system in which your program will run has programs installed that allow you to open the required file formats. You can indicate on your program page that a particular software tool is required to view the content. You can even include (taking into account licensing specifics) the necessary software into your program and include its description and the ability to install it on separate page. Or you can set the dependency checking option in AutoPlay Media Studio 8.0. What does it mean? If you activate and configure these options, then when launched on the user's computer, your program will automatically check for the presence of one or another software necessary to view all file formats included in your program. If such a program is not on the user’s computer, then your program will not only notify you about this, but will give you the opportunity, for example, to download the required application from the Internet. Settings available for the function Dependencies are presented in the figure below.

By default, AutoPlay Media Studio 8.0.6.0 can detect the presence of ten software and their versions.
- Adobe Acrobat Reader 4.0+ or Adobe Acrobat 4.0+.
- Adobe Flash ActiveX Control.
- Internet Explorer ActiveX Control.
- Microsoft Excel Viewer 97+ or Microsoft Excel 97+.
- Microsoft PowerPoint Viewer 97+ or Microsoft PowerPoint 97+.
- Microsoft Word Viewer 97+ or Microsoft Word 97+.
- Mozilla Firefox ActiveX Control.
- QuickTime ActiveX Control.
- RealPlayer ActiveX Control.
- Windows Media Player ActiveX Control.
You can set the software's display name, minimum satisfying version, download message, download address, and other options. If necessary, you can change the text of messages about the absence of the required software (picture below).

Actions
AutoPlay Media Studio allows you to customize the actions of your program when it starts, ends, and when the window size is changed (if you have provided this). Also, as an action, you can set settings for the toolbar (your program), which will apply to all pages. Window Actions(picture below) is the script editor I have already reviewed.

Database
If you want to use a database connection in your program, then Indigorose AutoPlay Media Studio will provide you with this opportunity. AutoPlay Media Studio 8.0.6.0 supports five databases.
- MySQL.
- SQLite3.
- Oracle.
- ODBC.
- PostgreSQL.
Global functions
Window Global functions– this is the script editor I have already reviewed. All code entered into this script editor will be executed first for any page.
PC hardware and software:
- Processor – Intel(R) Core(TM)2 Duo CPU E8400 @ 3.00GHz.
- RAM – DDR2 4 GB (800 MHz). Available for OS and software 3.25 GB.
- Motherboard– Asus P5Q SE2.
- HDD (for storing the program project and saving the program itself) – Western Digital RE4 (WD5003ABYX).
- operating system – Microsoft Windows 7 Maximum SP1 (build 7601), x64.
- WinRAR 4.01 x64.
During the measurements, the “external” parameters of the process (running antivirus, load on the computer with other applications, and so on) were relatively the same for all three ways creating a program.
Creation method | Program creation time (seconds) | Program size (megabytes) | Startup time (seconds) |
|---|---|---|---|
For clarity, I will provide comparative diagrams.


As you can see from the diagrams above, the time to create a project is not too long, even in the case of packaging in *.ZIP. However, it can vary significantly depending on the hardware and software capabilities your computer, as well as the file formats (and their sizes) that you include in your program. For more convenient “transportation” of your program, it is better to use the method Save to ISO image. It will speed up the time of copying your program from/to external media (flash drive) due to the fact that it will be one large file, and not many small ones. Due to the fact that no compression is applied when saving in *.ISO, the time required to pack and unpack your program will be minimal. In addition, *.ISO file format is supported big amount programs. For example, WinRAR, Nero, Alcohol and so on.
In this, as in my other reviews, I tried to review the software as fully as possible so that you can decide whether AutoPlay Media Studio 8 is suitable for your purposes. Of course, if you have the opportunity to try the software in action, and In the case of Indigorose AutoPlay Media Studio 8.0 there is such an opportunity, you need to download trial version program and use it for test purposes. Especially if we are talking about purchasing the program for 2354 UAH. (08/21/2011).
As you can see, AutoPlay Media Studio allows you to create software products (electronic textbooks, CD\DVD business cards, presentations, simple games, electronic photo albums, collections of video files with easy viewing, simple audio and/or video players, small catalogs of goods or services, and so on). If the user has skills in robots in C, C++, Java, Visual Basic you can significantly expand the capabilities of the software created in AutoPlay Media Studio. If you have a great idea and approach the creation of a program comprehensively, creatively and with the involvement of different specialists (designers, photographers, video operators, copywriters, etc.), then you can create a high-quality, professional and competitive product.