We make a TV antenna. Do-it-yourself home TV antenna
When relaxing outside the city, sometimes, in addition to enjoying nature and fresh air, sometimes you want to watch your favorite TV series or an important football match. In contrast to the city, the coverage of villages with a high-quality television signal leaves much to be desired. In this situation, even the purchase of an antenna operating in a wide range of decimeter and meter waves does not guarantee a high-quality picture.
You can also try to assemble the antenna yourself, because a country house is the best place for experiments.

The simplest version of the antenna
As you can see in the photo, the antenna is the simplest wave receiver. For manufacturing, you will need two handsets and a television cable, as well as knowledge of the signal transmission range of the nearest television tower.

Typically, reception is carried out at frequencies from 50 to 230 MHz, forming twelve channels. For each of them, tubes of certain sizes are used. To receive a signal at a frequency of 50 MHz, the distance between the outer edges of the tubes must be within 271-276 cm. On channel 12, the same distance is 66 cm.

Information about the dependence of the length of blanks on the frequency of reception, as well as schemes for home-made antennas, can be easily found on similar thematic Internet resources.

To make an antenna in artisanal conditions, we present you a list of what you can make an antenna from:
- Two tubes made of steel, aluminum or any other metal alloy with a diameter of 8 to 24 mm. They must be the same in diameter, material and wall thickness.
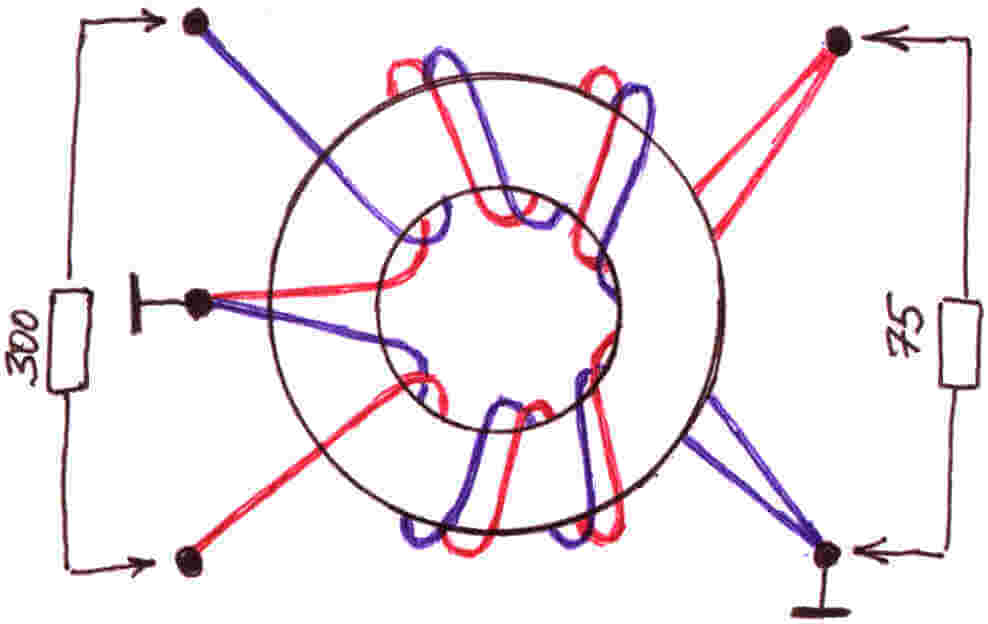
- The presence of a television broadcasting cable, designed for a resistance of 75 ohms. The length of the wire is cut at the connection point, taking into account the margin for sagging of 50 cm.
- Textolite blank or material from getinax (at least 5 mm thick).
- Fixture for installation of pipes on the holder.
- Bracket for the future antenna in the form of a metal pipe or corner. When installing the receiver at a low height, you can use a wooden stand.
- Soldering kit, silicone fluid to prevent oxidation and electrical tape.


Assembly principle
The workpiece selected along the length is divided into two equal tubes, which are crimped on one side. The tubes are fixed at a distance of 6-7 cm from each other, and their ends are attached to the textolite blank with clamps. The resulting structure is fixed with a rod in a vertical position.

To connect the cable, it is necessary to lay a loop designed for a resistance of 75 ohms. The middle conductors of the cable are stripped and twisted with flattened ends of the tubes, and the braid is connected using a copper wire. The connection of the rest of the loop and the cable going to the output to the television device follows the same principle.


The resulting loop and the remaining length of the cable, in order to avoid interference, should be securely fastened to a vertical rack. The required antenna installation height is adjusted locally, observing the change in the signal.

beer can antenna
It is one of the most popular ideas for homemade television signal receivers. Instead of tubes, in the absence of material, you can use simple beer cans.

For the manufacture of such a television receiver, the following parts will be required:
- two beer cans of 0.5 l;
- wooden or plastic blank 50 cm long;
- television cable RG-58;
- soldering iron, flux for aluminum soldering and solder;

To make a receiver from beer cans, follow the instructions below:
- Through the bottom of the can, in its center, a hole 5-6 mm in diameter is drilled.
- We lay the cable through the hole in the bank and bring it out through the neck.
- The bank is evenly fixed on the left side of the workpiece in a horizontal position.
- We bring the cable through the neck to a distance of 5 cm, cut the insulation by 3 cm, remove the wire sheath by 1.5 cm and solder it to the surface of the can.
- Solder the outgoing cable to the bottom of the second can.
- Attach the second jar to the first at a minimum distance using tape or other sticky material.

At the other end of the cable, a connector is installed to enter the TV. This version of the antenna is also suitable for digital broadcasting. If the TV supports a popular format (DVB T2), or there is a set-top box suitable for an old TV, then the signal can be received from the nearest relay tower. In this case, it is necessary to know the location of the repeater, in the direction of which the antenna should be directed to search for a signal.


This scheme is suitable for the manufacture of an antenna designed to receive meter wave channels. Only instead of half-liter jars, use a liter container.

In case you do not own soldering, there is another way to connect. Two beer cans are attached at a minimum distance from the workpiece holding the entire structure. At the end of the cable, carefully remove the insulation by 3-5 cm. Twist the wire braid into a bundle and, shaping the eyelet, put it on the self-tapping screw.

In the same way, put the eyelet on the self-tapping screw at the second conductor. Then attach the wires, using self-tapping screws, to each bank. In terms of long-term contact retention, soldering is much better than mechanical fasteners. Before soldering, it is desirable to carry out tinning of the surface.

Fastening with self-tapping screws, although it is reliable, but when moisture gets on the antenna, the contacts of the home-made device are oxidized, which will lead to signal loss.


Photo instructions on how to make an antenna


Super simple and super fast to make coaxial cable antenna for receiving channels digital television you can do it yourself in about 5 minutes. To do this, you will need absolutely nothing but the cable itself. And this is the main plus of this antenna.
No TV now.
This design will definitely help you out, for example, when you have just entered your home and have not yet managed to stretch the cable or install a stationary antenna. Of course, this is not the only example where this truly simple loop antenna.
Now in the comments someone will definitely write that there are antennas even simpler, such as a whip. For the manufacture of which it will be enough just to remove two insulations from the cable and everything will work. Of course, I agree with this, but the loop antenna that I will make from a coaxial cable will have much more gain, due to its directivity and resonantly closed circuit.
Making an antenna from coaxial cable
It looks like a version made of black cable.
And now the manufacture of the antenna in order. All we need is less than half a meter of coaxial cable of any color. I took white.

We retreat 5 cm from the edge of the cable and remove the top insulation.

Next, remove the insulation from the central core.

Now we twist everything together neatly and tightly.

Then, from the edge with the insulation removed, we retreat 22 cm and cut out a piece of 2 cm of the upper insulation and shielded wire with a rope, without touching the insulation of the central core.

Now we measure another 22 cm from the end of the cut and make a cut 1 cm wide only with the removal of the upper insulation. We do not touch the cable screen.

Next, take the end of the cable from which we started. And we wrap it very tightly at the last cut, forming a circle of the antenna.


With this, our antenna is ready to go. Of course, this is not necessary, but if you hang the antenna on the street, then it is better to insulate all the bare places of the cable with electrical tape. You can also add a rigid frame, but this is optional.
Antenna location
We direct the antenna to a repeater or television tower. The direction can also be chosen empirically by rotating the antenna.The best option would be if you place it outside the window, since the walls of the house jam the high-frequency signal very strongly.

Test showed excellent performance

In summer cottages, a television signal can rarely be received without amplification: it is too far from the repeater, the terrain is usually uneven, and trees interfere. For the normal quality of the “picture”, antennas are needed. Anyone who knows how to handle a soldering iron at least a little can make an antenna for giving with his own hands. Aesthetics outside the city is not given so much importance, the main thing is the quality of reception, simple design, low cost and reliability. You can experiment and do it yourself.
A simple TV antenna
If the repeater is located within 30 km from your dacha, you can make the simplest receiving part in design. These are two identical tubes connected by a cable. The output of the cable is fed to the corresponding input of the TV.
The design of the antenna for the TV in the country: it is very easy to do it yourself (to increase the size of the picture, click on it with the left mouse button)
What you need to make this TV antenna
First of all, you need to find out what frequency the nearest TV tower is broadcasting on. The length of the "whiskers" depends on the frequency. The broadcast band is in the range of 50-230 MHz. It is divided into 12 channels. Each needs its own length of tubes. Channel List on-air television, their frequencies and parameters television antenna for self-manufacturing will result in a table.
| Channel number | Channel frequency | Vibrator length - from one to the other end of the tubes, cm | Cable length for matching device, L1/L2 cm |
|---|---|---|---|
| 1 | 50 MHz | 271-276 cm | 286 cm / 95 cm |
| 2 | 59.25 MHz | 229-234 cm | 242 cm / 80 cm |
| 3 | 77.25 MHz | 177-179 cm | 187 cm / 62 cm |
| 4 | 85.25 MHz | 162-163 cm | 170 cm / 57 cm |
| 5 | 93.25 MHz | 147-150 cm | 166 cm / 52 cm |
| 6 | 175.25 MHz | 85 cm | 84 cm / 28 cm |
| 7 | 183.25 MHz | 80 cm | 80 cm / 27 cm |
| 8 | 191.25 MHz | 77 cm | 77 cm / 26 cm |
| 9 | 199.25 MHz | 75 cm | 74 cm / 25 cm |
| 10 | 207.25 MHz | 71 cm | 71 cm / 24 cm |
| 11 | 215.25 MHz | 69 cm | 68 cm / 23 cm |
| 12 | 223.25 MHz | 66 cm | 66 cm / 22 cm |
So, in order to make a TV antenna with your own hands, you need the following materials:

It would be nice to have a soldering iron, flux for soldering copper and solder on hand: it is advisable to solder all the connections of the central conductors: the image quality will be better and the antenna will work longer. The places of soldering then need to be protected from oxidation: it is best to fill it with a layer of silicone, you can use epoxy, etc. As a last resort, seal it with electrical tape, but this is very unreliable.
This homemade TV antenna, even at home, will be made by a child. You need to cut the tube of the length that matches the broadcast frequency of the nearby repeater, then cut it exactly in half.
Assembly order
The resulting tubes are flattened on one side. With these ends they are attached to the holder - a piece of getinax or textolite 4-6 mm thick (see figure). The tubes are placed at a distance of 6-7 cm from each other, their far ends should be at the distance indicated in the table. They are fixed to the holder with clamps, they must hold firmly.
The installed vibrator is fixed on the mast. Now you need to connect two "whiskers" through a matching device. This is a cable loop with a resistance of 75 ohms (type RK-1, 3, 4). Its parameters are indicated in the rightmost column of the table, and how it is done is on the right side of the photo.
The middle cores of the cable are screwed (soldered) to the flattened ends of the tubes, their braid is connected with a piece of the same conductor. It is easy to get the wire: cut off a piece from the cable a little more than the required size and free it from all shells. Strip the ends and screw to the cable conductors (it is better to solder).
Then the central conductors from two pieces of the matching loop and the cable that goes to the TV are connected. Their braid is also connected with a copper wire.
The last action: the loop in the middle is attached to the bar, and the cable going down is screwed to it. The bar is raised to the required height and “tuned” there. Two people are needed to set up: one turns the antenna, the second watches TV and evaluates the picture quality. Having determined where the signal is best received from, the do-it-yourself antenna is fixed in this position. In order not to suffer for a long time with the "tuning", look where the neighbors' receivers (terrestrial antennas) are directed. The simplest antenna for giving with your own hands is made. Set and "catch" the direction by turning it along its axis.
Watch the video on how to cut a coaxial cable.
;
Loop from a pipe
This do-it-yourself antenna is a little more difficult to manufacture: you need a pipe bender, but the reception radius is larger - up to 40 km. The starting materials are almost the same: a metal tube, a cable and a rod.
The bend radius of the pipe is not important. It is necessary that the pipe has the required length, and the distance between the ends is 65-70 mm. Both "wings" should be the same length, and the ends should be symmetrical about the center.

Homemade antenna for a TV: a TV signal receiver with a reception radius of up to 40 km is made from a piece of pipe and cable (to enlarge the picture, click on it with the left mouse button)
The length of the pipe and cable is shown in the table. Find out at what frequency the repeater closest to you is broadcasting, select the appropriate line. Saw off the pipe of the required size (diameter is preferably 12-18 mm, for them the parameters of the matching loop are given).
| Channel number | Channel frequency | Vibrator length - from one end to the other, cm | Cable length for matching device, cm |
|---|---|---|---|
| 1 | 50 MHz | 276 cm | 190 cm |
| 2 | 59.25 MHz | 234 cm | 160 cm |
| 3 | 77.25 MHz | 178 cm | 125 cm |
| 4 | 85.25 MHz | 163 cm | 113 cm |
| 5 | 93.25 MHz | 151 cm | 104 cm |
| 6 | 175.25 MHz | 81 cm | 56 cm |
| 7 | 183.25 MHz | 77 cm | 53 cm |
| 8 | 191.25 MHz | 74 cm | 51 cm |
| 9 | 199.25 MHz | 71 cm | 49 cm |
| 10 | 207.25 MHz | 69 cm | 47 cm |
| 11 | 215.25 MHz | 66 cm | 45 cm |
| 12 | 223.25 MHz | 66 cm | 44 cm |
Assembly
The tube of the required length is bent, making it absolutely symmetrical about the center. One edge is flattened and brewed / sealed. Fill with sand, and close up the second side. If there is no welding, you can plug the ends, just put the plugs on good glue or silicone.
The resulting vibrator is fixed on the mast (rod). They are screwed to the ends of the pipe, and then the central conductors of the matching loop and the cable that goes to the TV are soldered. The next step is to connect a piece of copper wire without insulation to the braid of the cables. The assembly is completed - you can proceed to the "configuration".
beer can antenna
Despite the fact that she looks frivolous, the image becomes much better. Checked multiple times. Try it!
Beer can outdoor antenna

We collect like this:
- We drill a hole in the bottom of the jar strictly in the center (5-6 mm in diameter).
- Through this hole we stretch the cable, we bring it out through the hole in the cover.
- We fix this jar on the left on the holder so that the cable is directed to the middle.
- We take out the cable from the can by about 5-6 cm, remove the insulation by about 3 cm, disassemble the braid.
- We cut the braid, its length should be about 1.5 cm.
- We distribute it over the surface of the can and solder it.
- The central conductor sticking out by 3 cm must be soldered to the bottom of the second can.
- The distance between the two banks must be made as small as possible, and fixed in some way. One option is sticky tape or duct tape.
- That's it, the homemade UHF antenna is ready.
End the other end of the cable with a suitable plug, plug it into the TV socket you need. This design, by the way, can be used to receive digital television. If your TV supports this signal format (DVB T2) or there is a special set-top box for an old TV, you can catch a signal from the nearest repeater. You just need to find out where it is and direct your own television antenna made from tin cans there.

Simple homemade antennas can be made from cans (from beer or drinks). Despite the frivolity of the "components", it works very well, and is made very simply.
The same design can be adapted to receive VHF channels. Instead of 0.5 liter jars, put on 1 liter. Will receive MW band.
Another option: if you don’t have a soldering iron, or you don’t know how to solder, you can make it easier. Tie two cans at a distance of a few centimeters to the holder. Strip the end of the cable by 4-5 centimeters (carefully remove the insulation). Separate the braid, twist it into a bundle, make a ring out of it, into which you insert a self-tapping screw. From the central conductor, make a second ring and thread the second self-tapping screw through it. Now, at the bottom of one can, you clean (with sandpaper) a speck to which you screw the screws.
Actually for better contact soldering is needed: it is better to tin and solder the braid ring, as well as the place of contact with the metal of the can. But even on self-tapping screws it turns out well, however, the contact is periodically oxidized and needs to be cleaned. As it “snows” you will know why ...
Do-it-yourself digital TV antenna
Antenna design - frame. For this version of the receiver, you will need a crosspiece made of wooden boards and a television cable. You will also need electrical tape, a few nails. Everything.
We have already said that to receive a digital signal, only a decimeter terrestrial antenna and the corresponding decoder. It can be built into TVs (new generation) or made as a separate device. If the TV has a signal reception function in the DVB T2 code, connect the antenna output directly to the TV. If your TV does not have a decoder, you will need to purchase digital set-top box and connect the output from the antenna to it, and connect it to the telly.
How to determine the channel and calculate the perimeter of the frames
In Russia, a program has been adopted, according to which towers are constantly being built. By the end of 2015, the entire area should be covered by repeaters. On the official website http://xn--p1aadc.xn--p1ai/when/ find the closest tower to you. It shows the broadcast frequency and channel number. The perimeter of the antenna frame depends on the channel number.

For example, channel 37 broadcasts at a frequency of 602 MHz. The wavelength is considered as follows: 300 / 602 \u003d 50 cm. This will be the perimeter of the frame. Let's calculate the other channel in the same way. Let it be channel 22. Frequency 482 MHz, wavelength 300/482 = 62 cm.
Since this antenna consists of two frames, the length of the conductor must be equal to twice the wavelength, plus 5 cm per connection:
- for channel 37 we take 105 cm of copper wire (50 cm * 2 + 5 cm = 105 cm);
- for 22 channels you need 129 cm (62 cm * 2 + 5 cm = 129 cm).
Assembly
Copper wire is best used from the cable that will go further to the receiver. That is, take the cable and remove the sheath and braid from it, freeing the central conductor of the desired length. Be careful not to damage it.
- for channel 37: 50 cm / 4 = 12.5 cm;
- for 22 channels: 62 cm / 4 = 15.5 cm.
The distance from one nail to another must correspond to these parameters. The laying of copper wire starts on the right, from the middle, moving down and further along all points. Only in the place where the frames come close to one another, do not short the conductors. They should be at some distance (2-4 cm).

When the entire perimeter is laid, the braid from a cable a few centimeters long is twisted into a bundle and soldered (wound if it is not possible to solder) to the opposite edge of the frame. Next, the cable is laid as shown in the figure, winding it with electrical tape (more often, but the laying route cannot be changed). Then the cable goes to the decoder (separate or built-in). All the antenna for giving with your own hands for receiving digital television is ready.
How to make an antenna for digital television with your own hands - another design - is shown in the video.
Digital television broadcasts in the decimeter wave range. Therefore, you can use almost any UHF antenna. But I needed simple, easily repeatable and strong UHF antenna range.
Such that it could be carried with you, and on occasion it was not a pity to give it to people for a small amount.
Based on the well-known eight“, with the difference that I used it without a reflector.
The material for the antenna web can be taken from any conductive, suitable section. It can be copper or aluminum wire with a thickness of 1 to 5 mm, a tube, a strip, a tire, a corner, a profile ... I took a copper wire with a diameter of 3 mm. Easy to solder, easy to bend when assembling, easy to align if bent.
The outer side of the square is 14 cm, the inner side is slightly less - 13 cm due to the fact that the middle of the two squares does not converge, about 2 cm from corner to corner.
So, if you are not making an antenna out of wire, then you measure it - the upper sides are 14 cm each, the sides are 13 cm each.
All sizes are approx. Don't be afraid to miscalculate or make a mistake. Our plans do not include the production of an antenna that meets all standards. We need a simple but workhorse. Surrogate, but reliable. Surrogate because:
1
. Personally, I couldn't stand the dimensions.
2
. The reflector is missing.
3
. I took the cable 50 ohm instead of 75 ohm, but with a thick braid. Friends usually used such a cable for car antennas for radio stations 27 MHz.
Nevertheless, the antenna works and is very good.
A digital signal has a feature, it either exists or it doesn't. When receiving analog television, different channels were shown with different levels of interference, and when removed, the snow level on the screen simply increased until the signal completely disappeared. In digital, the signal is almost the same on all channels, and if there is reception, then there are all channels.
I have tested this antenna on more than a dozen TVs in our region.
So. We measure a piece with a total length of 112 cm and bend the wire. The first section is 13 cm + 1 cm for the loop (for strength). The second and third - 14 cm each, the fourth and heels - 13 cm each, the sixth and seventh - 14 cm each, and the last eighth - 13 cm + 1 cm stiffening loop.
At the two ends, we clean 1.5 - 2 cm each, twist two loops for each other, and then solder the junction. This will be one cable connection pin. After 2 cm another. Where to solder the central core, where the braid is, does not matter.

Distance between solder joints 2cm
I took a cable about three meters. In most cases, it is enough if you are not doing it for yourself personally. Measure out as much as you need.
The cable was stripped from the side of the antenna by two centimeters, to the plug - 1 cm. If the plug is the same as in the photo. You can take any, stronger.

cable stripping
The plug was cleaned with a needle file and a scalpel.

After sealing, both soldering points are filled with glue from a gun. On the plug, first, hot glue is poured into the place of soldering and into a plastic cap, with a margin, the excess can then be removed. Then, while the glue has not cooled down, everything is quickly assembled. You can't gnaw through such a joint with your teeth. Reliable and flexible at the same time.
The soldering on the antenna itself is also filled with glue, but for the rigidity of the structure, a frame is taken - any cover, box, .... I took the cap from a 20 liter water bottle, of which I have accumulated a sufficient amount. If you are making an antenna, like me, for mass production, then it is better to use materials that are common, literally lying under your feet for better antenna repeatability. If the antenna is made in a single copy for quick riveting, then you can not fill anything at all.

It turned out such a design that can be stuck anywhere - on a cornice, on a curtain, on a window frame. To do this, you can carry a piece of wire, a couple of screws, a couple of pins ...

Antenna assembly
If the antenna is wrinkled during transfer, it is easily and without damage aligned. This is perhaps its most important plus.
I do not always carry such a design with me, but only when I receive a specific order for connecting a DVB-T2 digital television tuner. It fits easily with the tool in my backpack.
It is more convenient to make several antennas at once. Takes less time.
This is how my friend fixed the antenna, using it as an external one. The tower is about 9 km. Reception is confident despite the simplicity of the antenna.

So, imagine this situation: in the evening you decided to watch your favorite TV program, and suddenly the TV stopped showing - cable TV was turned off. Or another case: you arrived at the dacha, already prepared for the rest and found that you forgot to buy an antenna for the TV - not a single channel works. How to proceed in such a case? The answer is simple - you need to make an antenna for the TV with your own hands from improvised materials, because most likely the cause of the breakdown is in this device. Next, we will consider the simplest manufacturing options, which require a minimum of improvised parts and time.
Idea #1 - Beer cans in action!
This version of a homemade television antenna is the simplest and fastest to manufacture. Maximum amount channels that you manage to catch - 7, but this figure can vary significantly depending on the region, terrain features and distance to the TV tower.
To make a beer can TV antenna, you will need the following materials:
- 2 small self-tapping screws, also called "bugs" (not needed if you have a soldering iron);
- 2 prepared beer cans (empty, washed and dried)
- from 3 to 5 meters television cable(can be taken from a failed device);
- soldering iron and tin (for better fixing of contacts), availability is optional;
- screwdriver;
- wooden trempel (hanger);
- tape or tape.
Finding all the materials in the house will not be a problem, so having prepared them, we immediately get down to business.
In order to make a homemade antenna from cans, you need to perform the following steps:
- We prepare the cable. First, at a distance of 10 cm from the edge, you need to make a shallow circular incision and remove the top layer of insulation. Having opened access to the screen, we turn it into one bundle. After that, we cut off the middle insulating layer, exposing the copper core of the cable by a few cm. At the second end of the wire, there should be a regular antenna plug.
- Preparing banks. With containers that will act as a signal receiver, there will also be no difficulties. First you need to choose the optimal dimensions of beer cans. It is better to use liter ones, but if there are none, containers of 0.5 and 0.75 liters will do a good job.
- Let's make contacts. At this stage, the twisted cable screen is fixed on one bank, and the copper core itself on the other. Fixation is carried out with bedbugs using a screwdriver or a conventional screwdriver. However, it is recommended to fasten the wire not with bedbugs, but with a soldering iron. The result should look like this:

- We collect a homemade antenna for the TV. The signal receiver is ready, now we are making a supporting structure, which we have a trempel or an ordinary hanger. In no case should it be made of wire or metal. Using electrical tape, we fix the containers to the trempel (as shown in the photo). We draw your attention to the fact that the banks must be strictly on the same straight line, otherwise the homemade product will not work and stably catch the signal.

- Setting up a TV antenna. Now you need to experiment with the optimal distance between the banks, as well as the place where the device is suspended and its position, so that the homemade product catches many channels. We turn on the TV and determine exactly how the receivers should be located and where is the most suitable place for their work. This completes the technology for creating the device.

As you can see, the whole process is quite simple and does not represent anything complicated. The optimal distance is 75 mm between the ends of the cans, and the best place installations - near a window or on a remote mast. In individual cases, the distance between banks can be made larger or smaller.
Visual video instruction on creating a simple antenna from cans
Idea number 2 - Use wire
One more no less a good option, which is advisable to use in the village - a home-made antenna made of copper wire with an amplifier.
All you need to make is:
- amplifier (suitable from an old device, for example, an inoperative or disassembled antenna);
- two pieces of wire 180 cm each, it is advisable to choose thick and stiff so that the wind does not damage the device;
- a piece of metal (or wooden) plate 15 * 15 cm;
- electric drill with a set of drills (preferably a welding machine);
- small bolts;
- hammer;
- iron pipe;
- a TV cable of a suitable length with a plug (sold in radio stores, it is not expensive, you can remove it from a non-working device).
So, in order to make a copper wire antenna for a TV yourself, you need to follow these steps:

Pay attention - in the photo examples, both the amplifier, and the reflector, and the wire are covered with paint. Painting protects the structure from corrosion and other adverse factors, significantly extending the service life homemade antenna for TV.
Idea #3 - Home HDTV device
If the first 2 options worked at a frequency of no more than 270 MHz, then the following manufacturing method will allow you to enjoy a better picture, because. The signal range can reach up to 490MHz. The only detail that is unlikely to be found among household trifles is a matching transformer from 300 to 75 ohms. It will need to be purchased in advance from a specialized store, however, some plugs already contain this part.
Although there is an instruction on the net for making a homemade transformer, you can find and use it, this will significantly increase your skills in assembling homemade antennas.

From the materials you will need:
- Scotch
- Cardboard
- Stationery knife
- Foil
- stapler
- Scissors
- Marker
- Roulette
- Glue (pencil or PVA)
Having prepared all this school set, let's get down to business!
First you need to draw (or print on a computer) this diagram:


Now, according to the scheme, we cut out all the spare parts, including the necessary pieces of foil:


After that, you need to make a reflector with dimensions of 35 * 32.5 cm (height and width). Cover one side with foil.


In the middle we cut out two identical rectangles, which are necessary in order to fully assemble the signal catcher for a homemade TV antenna. The rectangle should be 3.5 cm long, its purpose is to maintain the distance between the reflector and auxiliary parts.


We glue the parts onto the rectangle, and when the glue sets, we drill holes for the TV cable.


We connect the transformer and cable using twists, adhesive tape or a soldering iron. A more powerful TV antenna is ready to use! It should also be noted here that this option homemade products are suitable only for indoor use, tk. paper will get wet quickly from outdoor use.
Assembling a digital antenna from a TV cable and a cardboard box
Another option powerful device made at home:
HDTV antenna from improvised means
Idea number 4 - Apartment option
There is another way to make a powerful TV antenna from improvised means, which is suitable for both outdoor and residential use.
To make the device, you will need the following materials and tools:
- 4-meter wire made of copper, with a cross section of 4 mm.kv;
- a board of arbitrary thickness, 55 cm long and 7 cm wide;
- wood screws;
- ruler or tape measure;
- simple pencil;
- screwdriver;
- soldering iron;
- antenna plug.
So, first, we transfer the drawing to the workpiece and drill holes in the board: 
Then we transfer the drawing data to the board and drill in the appropriate attachment points. 
Next, the copper wire must be straightened and cut into 8 equal pieces of 37.5 cm each. 
In the middle of each of the 37.5 cm pieces, insulation must be removed (as shown in the picture). To do this, use a sharp knife, stationery is perfect. 
We cut off 2 more pieces of wire 22 cm long and divide them into 3 equal parts, bend slightly and in these places, again, remove the insulation. 
We bend the prepared wire in bare places. We draw your attention to the fact that for those segments that are bent in half, the distance between the ends must be made 7.5 cm (the optimal value for receiving a signal from a home-made television antenna). 
Next, we attach a plug to the finished homemade product, and we already connect a television cable to it. 
 This completes the manufacturing process. We choose a suitable place and direction where the signal reception is best, and install the device.
We have tried to select the most simple instructions. We hope that now you know how to make a home TV antenna with your own hands! Please note that today on the Internet you can find many other options in which inventors come up with more and more new manufacturing options, using, for example, copper and aluminum tubes, disks, electrodes ... The choice of components for assembly is usually determined only by their availability, so do not be afraid to experiment and come up with your own, original manufacturing methods.
Related content:


