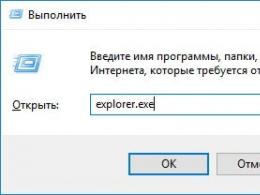
How to flash a Chinese phone into Russian. Firmware for Chinese phones
Before performing various actions on your device, we recommend that you read this article fully
The market for multifunctional gadgets that run on the Android OS is filled with relatively cheap Chinese products. Despite the low cost, they are often equipped with the latest hardware. However, the owners of these devices have a desire to update them software to a more productive one.
What do we need
— mobile phone Chinese-made, running on the Mediatek MT 6516 platform and using the Android OS;
- Personal Computer;
- firmware cable based on the pl2303 controller;
— USB — cable;
- Internet;
– required software:
1) driver for pl2303;
2) SP FlashTools firmware for Mediatek MT 6516 platform.
Operating procedure
1. Connect the firmware cable to personal computer and install required drivers, then in the section COM - ports device manager will appear virtual port from Prolific, room whom need to remember(it will be needed during the firmware of the phone).
2. Run the firmware program SP FlashTools.
3. In the list that appears, select Android.
4. In the field download agent, which is located below, you must select the file MTK_AllinOne_DA.bin, which is located in the folder along with the firmware.
5. Select a file MT6516_Android_Skatter.txt, also located in the firmware folder. It is a description of the firmware and shows the path and addresses file systems OS Android.
6. In the menu, select COM port number(see paragraph 1 of the instruction) and his speed(it can be set to the maximum value).
7. Before starting the firmware, you need to completely format the phone's memory, for which:
- press the button Format;
- in the window that appears, specify the end address of its memory (as a rule, phone models running on this platform have 512 MB of memory, so the end address will need to be specified as follows: 0x200000000);
- press the button "OK" and connect the firmware cable to the device;
- turn off the phone, for which we remove and replace its battery for a few seconds, and then hold it down for a few seconds power button, after which they will run sequentially on the screen red and green stripes, and a window will appear saying "Format Ok".
8. Click on the button Download, then turn off the smartphone and turn it on again by holding the power button for a few seconds, after which the firmware will start, which will be indicated by the appearance first red and then purple stripes.
9. After filling the purple strip, disconnect the firmware cable and connect the USB port, after which the system will detect a new device.
10. Install the drivers on the device, after which it will indicate the firmware process running yellow stripe. After a few minutes of work in this mode, the firmware will be completed. 
After the firmware is finished and the phone is disconnected from the PC, it must be turned off by disconnecting the battery, and then turned on again. The first launch after flashing may take up to 10 minutes.
How to flash Chinese Android?


Many buyers choose Chinese devices that have a more affordable price. Consider how to flash a Chinese Android to update its software. This requires a special firmware cable based on the pl2303 controller.
Firmware method
First you need to connect the cable to the PC and install the drivers. The pl2303 cable is a kind of interface converter capable of converting a USB port into a virtual COM.
So, for the firmware you need:
- Download the program SP FlashTool. After launching it, in the list that opens, click Android.
- Go to the field below to select the following files: MTK_AllinOnу_DA.bin, and MT6516_Android_Scatter.txt. In the latter, in addition to the full address of the file system, there is a description of the firmware.
- Select the COM port number and determine its speed. The user can safely choose the maximum.
- Before flashing, formatting should be done, clearing the internal memory of old files. This can be done after pressing the Format button.
- In the new window, you must select the memory address. All models developed on the MT6516 platform have a memory address of 0x200000000 and 0x100000000.
- After selecting the desired option, press the OK button and connect the firmware cable to the device. To format the device, the battery is distorted and then the power button is pressed for a few seconds.
- Successful formatting must be completed by juggling the battery again, as well as turning on the device. After pressing the Download button, the flashing process will begin. In this case, a red stripe will be observed on the screen, which will change to purple. Filling it out will indicate the need to disconnect the firmware cord and connect the USB cable. The PC will detect a new device, and a yellow bar will appear on the screen of the Android device. The longest part of the flashing process will begin.
- After it is completed, the user will see an alert indicating that the updated software has been successfully installed.
Now you know all about necessary programs and accessories for self firmware any Chinese Android.
In this article, we will address a popular question flashing Chinese phones at home. We will also try to make a cable for flashing at home on our own.
Let's first understand the terms, the knowledge of which we will need not only for general development, but also a deeper understanding of the content of the article.
Full (from English "full"), full flash , FF , – binary (binary, usually has the ".bin" extension) file, which in our case contains a complete image of the phone's memory.
There is also the concept Firmware " ("FW ") is the firmware version, but it is not very applicable to Chinese phones, because the word "Ware" is there, but "Firm" is missing.
It is customary to distinguish the following parts of a full flash (firmware):
EEPROM- a small block of settings for a specific Chinese phone;
MCU– the main firmware of the phone;
Lang Pack– a part containing language resources;
content- melodies, pictures and other parts of the design.
Fuls for Chinese phones differ from each other in a version that looks something like this:
"MTK_ROMINFO_v04M158N_PCB01_GPRS_MT6225_S00.ZZT_G580P09_5_1T09D0525_MB01.BIN"
To Chinese phone worked correctly, you need to install ( flash) exactly the same version. If poured " full"according to its version differs from that installed by the manufacturer, then the phone after such firmware may not work correctly, simply fail or won't work at all.
Before you start flashing your Chinese phone, you need to remember the following:
1. Everyone Chinese phone has its own set of microchips and dates of their manufacture. Specifically for this set, a particular phone has its own copy of the firmware (FullFlash, full flash, full). Therefore, two identical-looking phones can be completely different inside and, accordingly, with completely different firmware - with different fulls.
2. The USB cable from the Chinese phone kit is not suitable for firmware and, accordingly, they will not be able to fill in or merge the full for its subsequent Russification or any other manipulations.
3. Before starting all actions with the phone firmware, you must save a copy of the full firmware, i.e. do backup fulla.
Chinese phone firmware cable
The data cable that comes with Chinese cell phone not intended for flashing this phone. Despite the fact that when connecting, a request is issued with the choice of connection as a COM port, the possibility for firmware is not added by such a connection.
For firmware Chinese phone, as well as making a copy of the full (entire firmware) of the phone, you need to connect the phone through a real computer COM port, or via a USB cable, defined as a virtual COM port.
Self-manufacturing of a cable for flashing a Chinese phone
As they say, with a strong desire and an inquisitive mind, you can make anything at home at home. To create a flash cable, we need a beginner electrician's kit and the items listed below:
1. A plug, cut off or carefully soldered from the native USB cable from the kit (or from the headset, if you don't mind). Such a plug must be collapsible in order to be able to rearrange the contact pins in a different location;
2. Digital voltmeter (multimeter);
3. Any data cable for cell phone, which is defined on the computer as a virtual COM port (with a box in the middle of the wire, it contains a board with a controller). You can buy it in almost any store cellular communication, or on the radio market. On average, the cost of such a cable is 300 - 500 rubles.
4. Drivers for the selected data cable.
Let's start manufacturing. When you connect the purchased data cable to the computer, the Found New Hardware Wizard should start with a message about an unknown device found. If this does not happen, then the cable is defective or does not contain a virtual COM port card. This cable will not work.
Usually, when buying a cable with a virtual COM port, the kit comes with a driver disk for this cable (not for the phone, but for the cable). The absence of a disk again indicates that the cable is without a COM controller.
Before connecting the cable, you must install the drivers from the disk that comes with the cable.
It is necessary to unsolder the plug from the purchased cable. Among the remaining cable wires, you need to find a positive (+ 5V). One tester probe must be connected to one of the cable wires, and the other to the central heating battery. The USB connector of this cable must be connected to the computer, and no wires of the cable must be shorted. The wire that shows +5 Volts must be cut or insulated, it will not be needed for further actions with the firmware of your Chinese phone.
In order to connect a Chinese phone to a computer, you need to find only three wires - Rx,Tx And GND(usually black).
How to find Rx, Tx and GND on Chinese phone connector?
If it is possible to open the phone and get access to all the contacts of the system connector, this makes it easier to find the necessary contacts - Rx and Tx. Often on the phone board itself there are nickels with the corresponding signatures. From them you can ring the tester to the contacts of the system connector. If there are no Rx and Tx signatures on the board, then you need to do the following:
Remove the battery and ring the tester from the positive contact of the phone to the connector contacts, into which you first insert the plug from the headphones prepared earlier (cut off or soldered from the headphones or the native USB cable). The same steps must be repeated for the negative contact of the phone. This will reveal 2 contacts on the plug: positive and negative. To work, you only need a negative one, this is GND.
Note: in order to ring all the contacts of the phone connector through the plug, it is necessary to carefully rearrange the contact pins in the plug into adjacent grooves, because usually there are no more than three of them (just as many as you need for the firmware), but they are not in the right location for the firmware.
In order to find the other two contacts - Rx and Tx, you need to do the following:
1. Insert the battery into the phone and connect the plug to the connector.
2. Set the tester to the "Voltmeter" mode with a measurement of at least 2 Volts.
3. Install one tester probe on the negative contact (GND) of the plug.
4. Install the second probe of the tester in turn on each of the other contacts of the plug, except for the positive one. At the same time, on each contact, briefly press and hold (1-2 seconds) the phone's power button, but do not allow the phone to turn on. If the phone turns on during these actions, you must turn it off and continue measuring voltages. The voltage on the contacts rises smoothly at the moment you press the phone's power button and can be from 1.5 to 2.8 volts.
The voltages found at each contact should be written down on a piece of paper.
As a result of these actions, at least 2 contacts should be revealed, on which the voltage at the time the phone was turned on increased to approximately 2.8 volts.
Most likely these contacts are the missing 2 contacts - Rx and Tx.
All three pins found: GND, Rx and Tx. Now you need to connect the cable wires to the plug contacts. To do this, the wire (usually black) of the GND cable must be connected (soldered) to the GND pin of the plug. The remaining 2 wires of the cable (Rx and Tx) are connected to the remaining two pins of the plug (Tx and Rx) in any ratio.
Connecting a Chinese phone to a computer for firmware via a firmware cable
It is necessary to connect the manufactured cable for firmware to the USB connector of the computer, having previously installed the driver for this cable. If everything is set correctly, the computer will respond with the sound of connecting a USB device.
Open Device Manager, in the Control Panel through the Start button. Expand the "COM and LPT Ports" group, double-click on the Prolific USB-to-Serial Comm Port (COMx), where X is the COM port number and on the Port Settings tab, you need to set the port speed to 115200 bps. It is necessary to remember the set speed and port number (COMx). The computer now has a virtual COM port via the USB interface.
Now you have almost everything to programmatically manipulate your Chinese phone. It remains only to have the necessary software. In the near future on our site you will be able to access the files of new firmware.
This article is informational character. If you are going to perform any actions to change, update or remove software (firmware) from your phone, then you do them completely at your own peril and risk.
The site administration is not responsible for the consequences with your device, such as: possible loss of the contents of your phone's memory, failure of individual parts or the phone as a whole, as well as for possible losses due to the inoperability of your phone or SIM card.
Many buyers are attracted to Chinese-made Android smartphones and tablets, and this is not surprising. It is creations from the "heavenly" that have a low price, while providing the user with good functionality, and often even the latest hardware. But sooner or later there is a desire to reflash the device, that is, update the software version. In this short review, we will briefly consider this issue of interest to many.
Android firmware for Chinese tablet
So, the easiest option, if you need to update the operating system of your Android mobile device, is to look for the right firmware, for this, of course, you need to know exact model devices. Often this should not cause great difficulties, since the new models of Chinese mobile gadgets have enough good support, almost at the level of major world brands, in addition, there is a whole army of fans, which also creates high-quality unofficial firmware. Firmware for Chinese Android phones may contain a variety of changes, ranging from the modified user interface, and ending with significant changes in the core itself operating system. But what if you don’t have the newest device, and it doesn’t matter how you got it - and it’s not so easy to find a competent guide on flashing the very first Chinese Android devices, because at one time they were not so common and did not have such the same support. So, to update the firmware of Chinese tablets or smartphones based on the Mediatek MT6516 platform, which was once the most common, you will need a special firmware cable based on the pl2303 controller, drivers for pl2303 and the SP FlashTools flash driver for MT6516.
Firmware for Chinese Android phones
First, of course, you need to connect the firmware cable to the computer and install the necessary drivers. The pl2303 cable itself is an interface converter, that is, it is able to convert USB port to the virtual COM port, matching the voltage levels with the connected device. The necessary circuits, by the way, can be removed from the data cables from the old Samsung models or Siemens. So, after connecting the cable based on the pl2303 controller, an additional virtual port from Prolific will appear in the device manager in the COM ports section. You need to remember its number, as it will be needed during the process of flashing the Android device. A standard USB cable can also be connected to a computer - you will need it later.
We launch the SP FlashTools program. In the drop-down list on the top right, Android should have been selected. In the field, which is located a little lower and is called Download Agent, the MTK_AllinOne_DA.bin file must be selected, it is located in the same folder as the flash driver. You must manually select Scatter-loading, this file is called MT6516_Android_Scatter.txt, it is located in the firmware folder for your Android smartphone or tablet. This file is a description of the firmware, and contains the paths and addresses of all Android file systems.
In the menu, select the number of the COM port - the one that was assigned to the virtual port a little earlier. We select the port speed - it is quite safe to set the maximum. Before flashing, you need to do a full format internal memory devices. Press the Format button. A window will appear in which you need to specify the end address of the memory in the phone. For models based on the MT6516 platform, typical sizes are 512 MB - these have an end address of 0x200000000, or 256 MB - then the end address is 0x100000000. Press the "OK" button, connect the firmware cable to the device, distort its battery to forced shutdown and hold down the power button for 1-3 seconds. A red stripe will run first, then a green one, and we can see a window with the inscription “Format OK”. Bad blocks are allowed, so don't be alarmed if a few are found. Now you need to press the Download button, after which we again forcibly turn off the gadget by juggling the battery and turn it on by pressing the power button for 1-3 seconds. The firmware process has begun - at first we see a red stripe, after - purple. After the purple strip is completely filled, disconnect the firmware cable on pl2303 and connect a regular USB cable, which most often comes with a smartphone or tablet. The system will detect a new device in the system. Install drivers for it. If the program generated an error due to the fact that you did not have time to perform this action, do not despair. You need to do the above steps after formatting the phone. After connecting the usual USB cable the yellow bar will run. This is the longest phase of flashing a Chinese gadget on Android. The bar will run several times, after which you will see a message about successful installation firmware for Chinese Android phones.
How to flash Chinese Android smartphones or tablets. Chinese firmware Android smartphones this is a real art and sometimes confuses beginners, this instruction will help you understand the basics and upgrade successfully!
This manual is written for smartphones based on MTK chips (MTK6589, MTK6577, MTK6575, MTK6572) from MediaTek - OPPO, ZOPPO, STAR, THL, TCL, HUAWEI, LENOVO and others. If you decide to flash your Chinese Android, then be extremely careful, read the instructions several times, if you do not understand it, then it is better to postpone this venture for the future!
Necessary tools and other requirements for firmware
3. Download firmware
4. Charge your smartphone to at least 60% of its full charge
Firmware for Chinese Android smartphones
Firmware Installation Part 1
1. Unpack in the root of drive C: SP program Flash Tool
2. Unpack in the root of drive C: smartphone firmware
3. Run the SP Flash Tool by clicking on Flash_tool.exe
4. Press the button in the program, go to the folder with the unpacked firmware to the subfolder target_bin (or just in firmware) and select file XXXXXXX _Android_scatter_emmc.txt(where XXXXXXX is your MTK number, e.g. MTK6577). We do not close the program, proceed to install the drivers


Driver installation (alternative)
5. Unzip the folder with the drivers
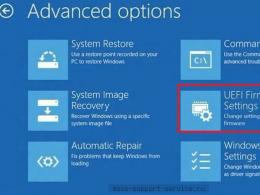
6. Open Device Manager on PC

2. Turn off chinese smartphone or tablet
3. Remove the battery and insert
4. Now we quickly connect the smartphone to the PC and install the drivers (for everything about everything 5 seconds)
On an unidentified device (yellow icon), click the update drivers button and specify the folder of the unpacked drivers, or rather MT65xx Preloader, if any warnings are displayed, continue the installation. If the drivers are not installed, repeat steps 3 and 4 again. If installed, proceed further.
Firmware Installation Part 2
5. Returning to the SP Flash Tool
6. Click on the Firmware -> Upgrade button and wait until the firmware is installed.

7. The appearance of this window means that the firmware is over

Recovery installation
If you need to flash only one partition (for example, recovery), uncheck the unnecessary ones, click Download

and agree to the warning

how to flash recovery