Smart status bad treatment. What does S.M.A.R.T mean?
Hello admin, question! A friend asked me to diagnose his hard drive, complaining about terrible brakes at work. I connected it"hard" to my computer, but when turned on, the computer gave an error:S.M.A.R.T. status bad backup and replace.
I pressed F1 and booted into the operating system, but could not do anything in it due to terrible freezes.
I read your articles about the Victoria program and decided to check this disk in DOS mode, I did bootable flash drive with the program, but in my BIOS it is impossible to switch the AHCI option to IDE, since there is simply no IDE. So I'm thinking, what other program can check the hard disk for bad sectors if the system does not boot?
Hello friends! You all know how a computer boots up.
First of all, the control is received by the BIOS firmware, which checks the functionality of all components. system block, including the hard drive.
Without exception, all HDDs have a built-in self-analysis system called SMART, and so it is SMART that tells the BIOS that the hard drive is faulty and this malfunction is critical. Loading error - S.M.A.R.T. status bad backup and replace, means literally: " The condition of the hard disk is not satisfactory, copy the data and replace the HDD", that is in simple terms, check do not check, but the screw needs to be changed. I do not envy if you are asked from this hard drive.
First, if the error "S.M.A.R.T. status bad backup and replace" prevents you from booting into the operating system, then press F1 and Windows will boot.

If this does not help, then find the option in the BIOS SMART Monitoring and set it to Disabled, after that save the BIOS settings and reboot, after rebooting you should enter the operating system.

If you still want to check the surface of such a hard disk for bad blocks, then you can do this with , but if you have new computer from the most modern motherboard, then it is quite possible that the motherboard interface does not support the outdated IDE mode, in which Victoria works, then we will use other programs.
To check the hard drive for the presence of bad sectors, in addition to Victoria, you can use: MHDD, as well as bootable media Live CD AOMEI PE Builder, with which you can boot into a special boot environment in which there are programs already familiar to you, according to our previous articles, for example: AOMEI Partition Assistant, AOMEI Backupper Standard, WinNTSetup and others. To search for bad sectors, you can use - AOMEI Partition Assistant Standard Edition.
For example, let's check my hard drive for bad blocks, we'll do it first directly in running Windows, and then in the boot environment.
We see that there are two hard drives in my computer, we can check any, for example, a second HDD with a capacity of 400 GB.
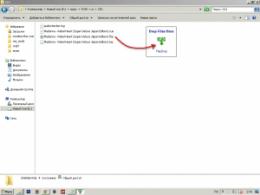
Right click on it and select Surface test.

To begin.

The test of the hard disk surface for bad sectors begins. The process itself is presented in an understandable graphic display. All good sectors are green, and bad sectors (bad blocks) are red.

At the end of the scan, it is easy to determine what condition your hard drive is in, if there are no red sectors, then the drive is in good condition,

If there is at least one red sector on the graph, then things are bad and you need to examine the HDD special program for diagnosing Victoria hard drives.
Sequence of actions in the presence of S.M.A.R.T. mistakes hard drive or SSD. How to fix disk and recover lost data. When you boot your computer or laptop, S.M.A.R.T. appears. hard drive or ssd error? After this error, the computer does not work as before, and you are afraid about the safety of your data? Don't know how to fix the error?
Actual for OS: Windows 10, Windows 8.1, Windows Server 2012, Windows 8, Windows Home Server 2011, Windows 7 (Seven), Windows Small Business Server, Windows Server 2008, Windows Home Server, Windows Vista, Windows XP, Windows 2000, Windows NT.
What to do with SMART error?
Step 1: Stop using the failed HDD
Receiving an error diagnostic message from the system does not mean that the drive has already failed. But in case of S.M.A.R.T. errors, you need to understand that the disk is already in the process of failure. A complete failure can occur both within a few minutes, and after a month or a year. But in any case, this means that you can no longer trust your data to such a disk.
You need to take care of the safety of your data, create backup or transfer files to another storage medium. Along with the safety of your data, you must take steps to replace the hard drive. HDD, on which S.M.A.R.T. errors should not be exploited - even if it does not completely fail, it can partially damage your data.
Of course, a hard drive can fail without S.M.A.R.T. But this technology gives you the advantage of warning you that a drive is about to fail.
Step 2: Recover deleted disk data
In the event of a SMART error, data recovery from the disk is not always required. In the event of an error, it is recommended to immediately create a copy of important data, as the disk may fail at any time. But there are errors in which it is no longer possible to copy data. In this case, you can use the recovery program data hard disk - Hetman Partition Recovery.

For this:
- Download the program, install and run it.
- By default, the user will be prompted to use File recovery wizard. Pushing a button "Further", the program will prompt you to select the drive from which you want to recover files.
- Double click on the failed drive and select the type of analysis you want. Choose "Full analysis" and wait for the disk scanning process to complete.
- After the scanning process is completed, you will be provided with files to restore. Highlight required files and press the button "Restore".
- Choose one of the suggested ways to save files. Do not save recovered files to a disk with an error.
Step 3: Scan the disk for bad sectors
Start checking all partitions of the hard disk and try to fix any errors found.

To do this, open the folder "This computer" and click right click mouse on disk with SMART error. Select Properties / Service / Check In chapter Checking the disk for errors.
As a result of scanning, errors found on the disk can be corrected.
Step 4: Reduce disk temperature
Sometimes, the cause of the “S M A R T” error may be the exceeding of the maximum allowable operating temperature of the disk. This error can be fixed by improving the ventilation of the computer. First, check if your computer is equipped with sufficient ventilation and if all fans are working properly.
If you find and fix a ventilation problem, after which the drive temperature drops to a normal level, then the SMART error may no longer occur.
Step 5:
Open folder "This computer" and right-click on the disk with the error. Select Properties / Service / Optimize In chapter Disk optimization and defragmentation.

Select the drive you want to optimize and click Optimize.
Note. In Windows 10, disk defragmentation and optimization can be configured to run automatically.
Step 6: Buy a new hard drive
If you are facing SMART mistake hard disk then, the acquisition of a new disk is only a matter of time. Which hard drive you need depends on your computer style and the purpose for which it is being used.
What to look for when purchasing a new drive:
- Disk type: HDD, SSD or SSHD. Each type has its pros and cons, which are not critical for some users and are very important for others. The main ones are the speed of reading and writing information, volume and resistance to repeated rewriting.
- The size. There are two main drive form factors: 3.5" and 2.5". The disk size is determined in accordance with the installation location of a particular computer or laptop.
- Interface. Main hard interfaces drives:
- SATA
- IDE, ATAPI, ATA;
- SCSI
- External drive (USB, FireWire, etc.).
- Specifications and performance:
- Capacity;
- Read and write speed;
- The size of the memory buffer or cache;
- Response time;
- Fault tolerance.
- S.M.A.R.T.. The presence of this technology in the disk will help determine possible mistakes its work and prevent data loss in time.
- Equipment. This item may include possible presence interface or power cables, as well as warranty and service.
How to reset SMART error?
SMART errors can be easily reset in the BIOS (or UEFI). But the developers of all operating systems We strongly do not recommend doing this. If the data on the hard disk is of no value to you, then the output of SMART errors can be disabled.
To do this, do the following:
- Restart your computer, and by pressing the key combination indicated on the boot screen (for different manufacturers they are usually different "F2" or Del) go to BIOS (or UEFI).
- Go to: advanced > SMART settings > SMART self test. Set value Disabled.
Note: the location of the deactivation of the function is indicated approximately, since depending on the BIOS versions or UEFI, the location of this setting may vary slightly.
Is HDD repair worth it?
It is important to understand that any of the ways to eliminate SMART errors is self-deception. It is impossible to completely eliminate the cause of the error, since the main cause of its occurrence is often the physical wear of the hard drive mechanism.
To repair or replace malfunctioning hard drive components, you can contact service center a special laboratory for working with hard drives.
But the cost of work in this case will be higher than the cost of a new device. Therefore, it makes sense to do repairs only if it is necessary to restore data from an already inoperable disk.
SMART error for SSD drive
Even if you have no claims to work SSD drive, its performance gradually decreases. The reason for this is the fact that SSD memory cells have a limited number of write cycles. The wear resistance function minimizes this effect, but does not completely eliminate it.
SSD drives have their own specific SMART attributes that signal the state of the disk's memory cells. For example, “209 Remaining Drive Life”, “231 SSD life left”, etc. These errors can occur when cells are degraded, which means that the information stored in them can be corrupted or lost.
The cells of an SSD disk in the event of a failure are not restored and cannot be replaced.
Some users personal computers or laptops, when you turn on your computer, you may see the message smart status bad backup and replace. In HP laptops, the same message has a slightly different look - smart hard drive error 301 but has the same meaning.
The reason for its appearance is a combination of two circumstances:
- S.M.A.R.T check included. hard drive;
- The S.M.A.R.T. hard drive has error messages.
What does Smart status bad backup and replace mean?
If you see this message on your computer or laptop, this means only one thing - the hard drive (hard drive) will most likely require replacement in the very near future.
The first thing to do in this case is to copy all the data that is important to you from your hard drive to any other medium, such as a flash drive, cloud or external hard disk.
The next step is to check that same S.M.A.R.T. which is kind of information system any hard drive that displays all the errors and problems that occur.
Most often, positional errors occur. The number of remapped sectors has exceeded the allowable value. In other words, a lot of bad blocks appeared on the hard disk.
Of course, you can continue to use the hard drive with such a S.M.A.R.T message. but storing important data on it is highly discouraged, since at any time it can completely fail, which threatens to lose all data or their costly recovery procedure.
How to remove Smart status bad backup and replace?
If you are not going to change the hard drive and continue to use it, then you can try to disable this message in the BIOS settings.
Often setting S.M.A.R.T. located on the initial BIOS screen, which shows all connected IDE and SATA devices.
How to remove Smart status bad backup and replace
Here you need to select your hard drive with the "Enter" key and turn off the S.M.A.R.T. check, putting it in the Disabled state.

Disable Smart status bad backup and replace in BIOS settings
Also, this setting can be located in the "advanced" tab


Disable smart hard disk error 301 hp
In any case, disabling this message is not a solution to the problem. The most correct thing is to change the hard drive, since if a message about a bad SMART state appears when you turn it on, then this will be the only correct way to eliminate it.
Share the article on in social networks! Help our site!
Join us on VK!
Winchesters Seagate Barracuda very popular among personal computer users. Many disks work out for 5-10 years and have excellent "health" at this age. By the word "health" I mean both the very functioning of the hard drive, its speed and stability, and the performance of its self-diagnosis and recovery system S.M.A.R.T.. Often, over many years of work, the indicators of the self-diagnosis system S.M.A.R.T. changed since the start of using the hard disk. In these indicators, the hard disk itself remembers such parameters as: the maximum temperature of the hard disk, the operating time of the hard disk (hours of operation), the number of on and off, the number of head parking, etc. However, the most undesirable indicators that may appear during long-term work hard disk is number of bad sectors.
Reasons for the appearance bad sectors are different. The main reason is time. Over time, a disk, even of very high quality, may appear areas with unstable reading of the recorded information, especially if this information was recorded a very long time ago, and the disk has not been used for a long time. Among the reasons may be the low quality of the hard disk platters themselves, poor assembly or the use of cheap materials in the manufacture of the HDD by the manufacturer.
However, there are times when bad sectors appear not because of the hard drive itself. I mean cases when the power is turned off at the time of writing information to the disk, or a defect in the SATA cable, or errors in the SATA controller on motherboard computer, or unstable operation of the PC power supply (voltage surges along the 5V and 12V lines). In these cases, the self-diagnosis system can find on the surface of the hard disk from a few pieces to several thousand so-called "software bads", i.e. areas where the information cannot be read, tk. checksums do not match the information itself that is written in these blocks. The diagnostic system often defines them as unstable or bad and changes the performance of the system S.M.A.R.T. not for the better. System S.M.A.R.T. can even replace these blocks with good ones and display them as Realocated (moved) in its indicators, although the blocks themselves can be very good. This happens quite often, but not always.
Below is a screenshot Victoria programs with indicators S.M.A.R.T. problem disk. You can see more than a thousand sectors already moved and hundreds preparing to be moved.
So what can we do to try and get back the S.M.A.R.T. back to normal? We can reset S.M.A.R.T. or move bad sectors to a hidden area of the self-diagnosis system, the so-called P(Slip)-list. This operation does not guarantee that after resetting the indicators, these indicators will not appear again after a few days or weeks. If the disk does have bad sectors, then the self-diagnosis system will identify them and mark them after some time of using the disk. So you most likely will not be able to make a "candy" out of a really "killed" hard drive.
V this manual outlined the procedure for resetting S.M.A.R.T. for hard drives Seagate Barracuda 7200.11, Seagate Barracuda 7200.12, Seagate Barracuda ES, Seagate Barracuda ES.2. On other hard drives Seagate Barracuda I haven't checked, maybe the procedure is similar.
First we need to get an RS232-to-TTL adapter. You can assemble an adapter based on the MAX232 chip as shown in the diagram:
Scheme note: If it is possible to connect to a stabilized voltage of + 5V, then the circuit can be simplified by throwing out the 7805 stabilizer with two binding capacitors.
Alternate RS232-to-TTL Adapter Schematic:
Alternatively, you can use the USB programmer on the CH341A as USB adapter in TTL. It will allow you to connect even to a computer without a COM port. The connection will be via USB, which is more convenient. you can have it in our store with delivery in Ukraine by delivery services.
Attention! Everything that you will do next is done by you at your own peril and risk. This can lead to both loss of information and damage to the hard drive itself!
1.) If the "SATA I operating mode" jumper is installed on the hard drive, then remove this jumper in advance, which switches the drive to SATA I operating mode.
2.) We connect the controller 232-to-TTL to the COM port. (If you are using a USB converter or programmer on the CH341A as 232-to-TTL adapter, the driver must already be installed beforehand. I will not describe the installation of the driver.)
3.) Launch the HyperTerminal program (included with Windows XP). If you have Windows Vista, Windows 7, Windows 8 or newer installed, HyperTerminal is not included in the standard distribution. You can download the English version of HyperTerminal from our website. Launch HyperTerminal and enter the name of the connection. Specify any connection name, I entered " 1 ".
4.) In the hyperterminal, select the COM port. I have COM3, you may have a different one. It all depends on how you connected the adapter. 232-to-TTL.
5.) Setting the port speed 38400 , flow control - No, the rest is default as shown in the screenshot below.
6.) Before Connecting the Controller 232-to-TTL to the hard drive, I recommend checking the operation of the HyperTerminal bundle and the adapter 232-to-TTL. To test the functionality, short the Rx and Tx wires together and type something on the keyboard in the HyperTerminal window. The window should display the entered characters - the “echo” of the terminal. Each character you enter should appear on the screen (return via Tx-Rx). If there is no “echo”, then your device is not working or the COM port is configured incorrectly. In fact, it looks like this: connect the cable - launch the terminal - configure it to desired port- trying to print something - silence in the terminal. So something is not working. If we close Tx-Rx - we try to print something - what we printed appears in the terminal. Conclusion - "echo" works and we are all ready for HDD connection disk.
7.) We connect the controller with three wires 232-to-TTL to the winchester. We connect Tx and Rx as shown in the photo (GND can be omitted, but in this case, extra characters - garbage - may appear in the HyperTerminal). I connected all three wires.
8.) We supply power to the hard drive. As a result, you should have a connection like this:
9.) In the HyperTerminal, we see a similar message:
Rst 0x20M
(P)SATA Reset
10.) Press once CTRL+Z and patiently wait for an invitation in the form of:
Note: To see a list of commands and descriptions for them for your hard drive, you must enter /C and "Enter" and then Q and "Enter". Do not forget to switch back to the mode after viewing the commands. T team /T.
11.) Recruiting /1 press "Enter" (go to level 1). Watching on the terminal:
F3 2> /1
F3 1>
12.) Recruiting N1 press "Enter" (clear SMART and unlock "CC"). Watching on the terminal:
F3 1> N1
F3 1>
13.) Recruiting /T press "Enter" (go to the root level). Watching on the terminal:
F3 1> /T
F3 T>
14.) Disconnect the hard drive power connector (everything else is on) for 10 seconds. The hard drive completely stops in 8-10 seconds.
15.) Turn on the hard drive power connector. The disk spins up. We see the message:
Rst 0x20M
(P)SATA Reset
16.) Click ctrl+z. Watching on the terminal:
17.) We type a command to transfer defects from the G (Alt)-list to the factory P (Slip)-list m0,2,3,22 and press "Enter". And then m0,2,3,22
F3 T> m0,2,3,22
Screw after a while (from half a minute to several minutes) will write a long message like this:
F3 T> m0,2,2,22
Max Wr Retries = 00, Max Rd Retries = 00, Max ECC T-Level = 14, Max Certify Rewrite Retries = 00C8
User Partition Format 4% complete, Zone 00, Pass 00, LBA 00004339,
User Partition Format Successful - Elapsed Time 0 mins 30 secs
18.) This item can be skipped. Now you can completely format the entire drive. The formatting process can take from half an hour to several hours. Recruiting m0,8,2,22 and press "Enter". Watching on the terminal:
F3 T> m0,8,2,22


