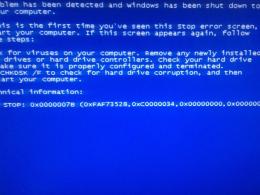
How to boot from a flash drive without using BIOS. How to set boot from a USB flash drive in different BIOS versions
Hello, friends! Today we will talk again about creating a bootable USB flash drive.
How to create a bootable USB device? For what purpose should it be used and with what program to write it down?
A brief overview of the five most popular and free programs to create a bootable flash drive.
Modern developments do not stand still, and yesterday's technologies are slowly but surely losing their relevance. So the once popular CDs and DVDs no longer seem to be such an unambiguous solution for storing, transferring information and working with it. High data reading speed, versatility and reusability are only a small part of all the advantages of a flash drive as a bootable medium over disks. Today almost all personal computers and laptops, if they are less than ten years old, support the ability to boot from USB devices. And in some cases (for example, a netbook), a flash drive may be the only boot device from an external drive.
By the way, new operating system Windows 10 will be the first OS to be officially distributed on a USB drive. And if you suddenly need to recover files from a flash drive, read about it. I also recommend paying attention to, which will help you escape from everyday work and cheer you up.
With the help of additional software, a flash drive can be used not only as a boot device for installing, reinstalling and restoring the operating system, but also for creating an emergency device (Multiboot). This is a kind of resuscitator, a tool from which you can boot at any time and cure your computer of viruses, restore system files or save important data. How to create such a flash drive, I described in the article "Creating a bootable Live CD / DVD / USB device and its use." You can familiarize yourself with this article.
Despite all the obvious advantages and the growing popularity of a flash drive as a boot device, there are not so many programs for creating it. Nevertheless, they are, and today I will introduce you to them in more detail, but first a few words about the preparatory stage.
Preparing a flash drive
We will need the flash drive itself, plus knowledge of some important aspects. First you need to make sure that the computer supports booting from USB devices. There is an erroneous opinion that if the bios (boot section) does not have the ability to select boot from usb (there are only floppi, hdd and dvd-rom options), then booting from usb is not supported. This is not true!
More precisely, it is not always so. The only right decision is to refer to the manual (user manual) of your motherboard or with the help of specialized software (as an option - AIDA64) to get a detailed report on the hardware used.
The second point is the size of the flash drive. Here everything will depend on what we write on it. For example, for creating Live-USB, installation disk Linux or Windows 7 is enough for a 4 GB flash drive. To create a bootable device with latest versions Windows, it is desirable to have a flash drive of at least 8 GB on hand.
The third point is the transfer of files from a USB flash drive. As a rule, the process of creating a bootable device involves its complete formatting. If the flash drive has important files, transfer them to another device in advance. To create a bootable flash drive and then work with it as a boot device, use USB port-2.0 (Windows 7 does not support USB 3.0).
How to create a bootable flash drive
Consider five various ways on the example of five free programs for Windows.
Small but enough functional utility with the telling name WinSetupFromUSB. Equally well suited for burning a bootable and / or multi-boot flash drive (up to 10 operating systems) and creating Live devices. Official site .
Of the shortcomings - the lack of support for the Russian language. Among the advantages, as I said, is its versatility. The utility can work not only with Windows distribution, but also suitable for burning a Linux installation disk.
The usual option for creating a bootable USB flash drive, for example, with a Windows distribution kit, provides for the selection in the appropriate columns of the flash drive itself, the option to automatically format the media and the ISO image of the operating system. The recording process starts after pressing the "Go" button. You can read more about the work of this program.
To create a multi-boot flash drive (several operating systems), you need to specify the path to the ISO images of operating systems. Paragraph Windows selection 10 is not available by default at the time of writing this article, but in reality everything is written and works, you just need to select the appropriate column with the available versions - Vista, 7, 8.
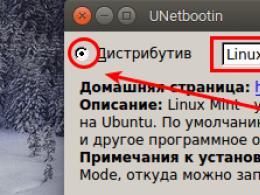
2. Rufus
Perhaps the easiest solution to create bootable USB drives. Everything is simple and intuitive. Suitable for work on systems that do not have an installed OS. Official site rufus.akeo.ie.
Of the main advantages - speed, simple interface, Russian language. An excellent solution if there is a need to create a bootable Windows flash drive 10 with UEFI support. By the way, I wrote in detail about how to do this in.
Distributed in the format of a regular installer and portable version. To create a bootable flash drive in the utility window, you must specify the path to the ISO image to be burned and click the "Start" button.
On newer systems that use UEFI instead of BIOS, in the menu "Partition scheme and type system interface» set to "GPT for UEFI computers".
Otherwise, the default settings will suffice. The option to format the flash drive is assigned by default.
3. Windows 7 USB/DVD Download Tool
This utility is official application from Microsoft. The interface is minimalistic, simple and clear, it is easy to work with it. Downloading from the official site wudt.codeplex.com.
Perhaps the name of the utility (Windows 7 USB) will mislead many that with its help on removable media you can only burn the distribution of Windows 7. However, this is not the case. In addition to the seventh version, Windows 8.1 and 10 distributions can be written to a USB flash drive.
Of the minuses - the utility is not Russified, however, a simple and intuitive interface is designed to level this drawback.
All that is required from the user is to insert a USB drive in advance, select the ISO image with the operating system and specify the path to the media (flash drive) to which this image should be deployed.
The principle of operation of this program is based on the standard tools of the Windows operating system - these are "diskpart", "bootsect / nt60", unpacking ISO to a USB flash drive. The program acts only as a graphical interface.
UltraISO is one of the best and most functional programs to work with disk images. A universal "combine" that supports almost any known format. Can work in tandem with Nero Burning Rom and integrates with virtual emulators. It will help if the image boot disk not in ISO format.
The program can convert other image formats into ISO files - NRG, MDF, MDS, IMG, CCD, etc. With UltraISO you can edit ISO files without unpacking them. The UltraISO interface has been translated into many languages, including Russian. For download, you are offered several editions of UltraISO, adapted to individual Windows versions, as well as a portable version of the program. Download link www.ezbsystems.com.
By and large, the program does not care what boot devices will be created with its help, with what operating system, what software and from what manufacturer. The writable ISO image must be opened in the program window, either using the "Open" command in the "File" menu, or using the browse button on the toolbar. You can also do this with the keyboard shortcut Ctrl + O.
Then, in the window that appears, if the program automatically selects the desired flash drive, you should click the "Burn" button.
Daemon Tools Ultra is a professional imaging tool. The program itself is familiar to many users by free version Lite, which allows you to mount virtual drives to read disk images. Its more functional version - Daemon Tools Ultra - among other features offers the creation of bootable devices.
Among the shortcomings, it is worth noting that it is paid, but to create a bootable USB flash drive on the official website of the program, you can download a free trial 20-day version. Official website of the program.
We go to the official website and download the program. During installation (installation), you need to select a trial license type.
The program works with a huge number of disk image formats and can be used both to create a bootable device with subsequent installation of the operating system, and to restore it (Live-disk).
To create a bootable flash drive in the main window of Daemon Tools Ultra, select the "Tools" menu item, and among its commands - "Burn boot image to USB. Or the hotkey combination Ctrl+B.
In the recording options window, specify the path to the image, make the MBR overwrite option active and click "Start".
When the flash drive is ready, it remains only to boot from it. The easiest way is to use the boot menu keys. The table below shows an illustrative example of such keys.
Of course, this is not the whole list of programs designed to create bootable devices, however, for the vast majority of users, the capabilities and functionality of the listed software will be enough.
For instance, Rufus program can be used as the easiest and fastest tool to create a bootable USB disk with one Windows distribution or to flash the BIOS from under DOS.
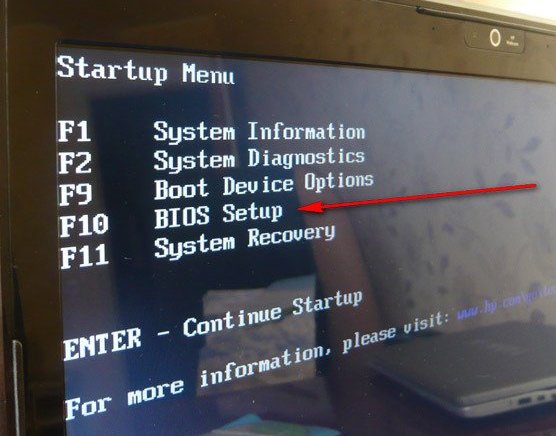
, as well as any other boot options, is configured in basic system I / O - BIOS. Each motherboard, without exception (and it is it that is equipped with a BIOS chip) has the ability to configure both boot and operating modes for almost all devices installed on it. The BIOS performs the so-called overclocking of the computer by increasing the overall frequency of the processor, bus and random access memory with a parallel increase in voltage. In the basic I / O system, you can even adjust the time automatic start your computer. However, in this moment we are only interested in one thing - BIOS setup, namely booting a computer from a USB flash drive.In the article “How to configure the computer to boot from a disk in the BIOS”, I already mentioned that today there are several main types of BIOS - “blue”, “gray” (this is the color of the background of the window of this system) and UEFI. All BIOS versions are launched according to the same scheme. When the computer boots up, a message like "Press DEL to run BIOS Setup" usually appears. As soon as you see it, on the keyboard, press the "Del" button several times. A little less often, the control button for starting the BIOS is "F2". 
Within 1-2 seconds, the I / O system will start. I'll start with the "blue" system. After its launch, a window will appear, representing a table consisting of two columns. In the left column, use the arrows on the keyboard (in this BIOS version, as well as in the "gray" one, parameters can be changed only under the control of the keyboard) select the menu item called "Advanced BIOS Features" and press "Enter". 
Since we are interested installing windows 7 from a bootable flash drive, you need to make sure that the menu item "First Boot Device" (which means "first boot device" in English) was set to " hard drive" (translated as " HDD"). Because a flash drive is a removable, but still a hard drive. 
If another parameter is set here, use the arrows to highlight this menu item and press "Enter". In the small window that appears, select "Hard Disk" or "HDD-0" (depending on the BIOS version) and press "Enter". The small window will disappear. 
Next, you need to select the menu item "Hard Disk Boot Priority" and press "Enter" 
If your flash drive was detected by the computer, in the list of all hard drives installed in your system unit, a flash drive should also appear. It may be called differently. Most often it bears the name of the company that produced it. For example, "Kingston 2 gb", "Transcend" and so on. You need to move it to the first position of the entire list. To do this, select it with the arrows and use the "+" and "-" keys on the keyboard to move the flash drive to the first position, that is, to the very top. Once you have done this, feel free to press the "F10" key and agree to save the new parameters by pressing the "Y" button on the keyboard, and then "Enter". After that, the computer will immediately “go” to reboot, and it will now boot from a bootable USB flash drive. 
For a BIOS with a gray window background, the setting will be slightly different. After starting the I / O system, a window will appear in which you need to select the “Boot” menu item with the right or left arrows. 
From the list that appears, we are interested in the “Boot Device Priority” menu item (translated as “boot device priority”). Select it and press "Enter". 
In the menu item "1st Boot Device" you must select "HDD: "name"". Name - this is the name of your hard drive, for example, Hitachi, Samsung or WD. 
Now back to the previous menu item. To do this, press the Esc key on your keyboard once. Use the arrows to select "Hard Disk Drives" and press "Enter". Here we will set the flash drive as the main bootable hard drive. 
Of the proposed hard drives, which also includes your flash drive, as I have already said, use the "+" and "-" keys to install the flash drive opposite the "1st Drive" item. Some BIOS versions use the F5 and F6 keys instead of the "+" and "-" keys. 
To save the settings, press "F10", select "OK" and press "Enter". 
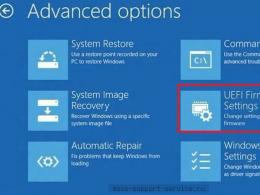
In conclusion, let's look at setting up a computer to boot from a USB flash drive in the UEFI BIOS (using the example of an Asus motherboard). I talked a little about this version of the I / O system in the article “How to configure the computer to boot from a disk in the BIOS”. Therefore, I propose to proceed with the configuration itself. After starting the BIOS, a window will open, as in the picture below. The system interface language is set in the upper right corner. I have "Russian". Let me remind you that in this version of the BIOS, all manipulations can be performed both with the keyboard and the mouse. So, left-click on the "Exit / Additional" button. 
Select "Additional mode" from the list that appears. 
Advanced mode will open BIOS settings. Here, select the "Download" menu item. 
When installing Windows from a bootable USB flash drive, you need to go to the menu item "Hard drive boot order". 
Now click on the button of the menu item "Boot option #1". 
From the entire list of hard drives, select your flash card. My flash drive is called "OCZ RALLY 2". We return to the previous menu item by pressing the "Esc" button on the keyboard or the "Back" button with the mouse. 
Now in the menu item "Boot option # 1" select the USB flash drive. 
To save your settings, click Exit. And in the window that appears, select "Save changes and reset." 
The computer will restart with the parameters you have set. After it, the installation of the Windows 7 operating system immediately starts, which you can learn about from the article "
Surely you have noticed that now in many articles on fixing various errors in Windows or restoring it, it is almost always recommended to use a bootable USB flash drive with installation files operating system or from a LiveCD. And only then they remember the use of the installation CD.
In principle, this is not surprising, since DVD drives have already faded into the background, and CD / DVD discs naturally followed them. For example, when assembling a new computer, few people additionally buy and install a DVD drive, by the way, in many PCs that are sold already assembled, the drive is also not installed. Well, I generally keep quiet about modern laptops or netbooks, in most models the drive has disappeared for a long time.
Just in this instruction, several examples of how to set the boot from a USB flash drive in different BIOS versions will be considered. In this article, you can find examples of how to early versions BIOS so for some modern UEFI versions from different manufacturers.
The procedure for installing boot from a USB flash drive in BIOS
Installing a boot from a USB flash drive in different BIOS versions may differ slightly, but in principle the algorithm itself is the same for everyone.
- We write down or with;
- We connect the prepared usb-drive to the computer. If you are going to install Windows, I recommend connecting the drive to USB 2.0, that is, to the ports that are colored black (blue is USB3.0). So, sometimes the system may refuse to start the installation due to the lack of drivers for the USB3.0 to which the device was connected;
- We turn on or restart the computer and enter the BIOS using the keys " Del" or " F2". If not one of these keys does not work, you can find options that can help you here;
- In BIOS, open the “Boot” section, where in the list of boot devices we move the USB flash drive to the first place;
- By pressing the "F10" key and saving the changed parameters, we try to boot from the device we connected;
In general terms, it looks something like this. Well, now let's specifically go through each BIOS version.
Booting from USB to Pheonix AwardBIOS
AwardBIOS is pretty old version BIOS, and today they come across very rarely, but still sometimes it happens.
So, having entered the BIOS, we need to go to the "" tab.


Initially, the hard drive will be in the first positions, or if you have several of them, then all will be displayed first hard drives and only then the connected usb device. Here you need to use the key " + » move the flash drive to the very first line.

Then we return to the previous menu by using the " Esc” and in the parameter “ Firs Boot Device» choose value « USB-HDD". (By the way, some versions of this BIOS may not have such a line, so you can try to select either USB-FDD or USB-CDROM).

Well, in the parameter " SecondBootdevice » expose « hard disk».
By pressing F10, save the settings and restart the computer.
Booting from a flash drive in another version of Pheonix AwardBIOS
Also, there are several more versions of Pheonix AwardBIOS, in which the principle of installing a boot from a USB flash drive is similar, but the menu itself is slightly different.
We'll start by checking if the USB controller itself is enabled:

Installing boot from usb flash drive:

By the way, I want to draw your attention to the fact that in this BIOS version there may be several more options for installing boot from a USB flash drive, for example:
- In some cases, it is enough just in the “Boot” section to select “USB-HDD” as the first device from which the computer will boot.
- Sometimes the flash drive can be found not in the settings hard drives, and in the "Removable Drives" subsection;
How to set boot from usb drive in AMI BIOS
AMIBIOS is another BIOS version that is often found on not the most recent mats. boards. In general, if once in BIOS it appearance will be the same as in the screenshot below, then to install the flash drive as a boot device, you need to follow these steps:

In this BIOS version, also, a flash drive can be found not only in " Removable Drives", but also in "", so be careful.
We set the boot from a USB flash drive in the UEFI BIOS Gigabyte
Now, let's move on to more modern types of BIOS, which can be found on later models of motherboards from various manufacturers.
Well, right now we will start with the UEFI BIOS on the Gigabyte motherboard.
So, going into the BIOS using all the same keys " Delete", " F2" or " Esc", Go to the tab" BIOS Features". Here you can see that booting from a flash drive will initially be available only in UEFI mode.
Well, since this option will not work for most, because the usual Legacy mode is more priority, we need to change the ego. To do this, go to the line " Hard Drive BBS Priorities.

IN " Boot Option #1» put instead hard drive, bootable flash drive, respectively in " Boot Option #2”, the HDD must be installed.

After that, in the previous menu you can select a USB flash drive as a boot device, but without the UEFI prefix.
There is another boot option, which, it seems to me, is much easier to use, but its trick is that it serves as a one-time boot from a usb drive, that is, the next time you reboot, you will again have to choose to boot from it in the same way.
In order to use it, you need to move to the tab " Save & Exit" and in " Boot Override» choose required device to boot the computer.

The beauty of this option is that it does not require any additional changes in the BIOS settings, and later you simply don’t have to bother with returning the boot settings to their original position. By the way, this option very similar to the same Boot menu, although in this case we will have to go directly into the BIOS.
Booting from a flash drive on ASUS motherboards
In BIOS on ASUS motherboards, there are also several options for starting a computer from a bootable USB flash drive with Windows.

On more modern motherboards, the principle is the same. Below I will show an example on the same ASUS.
After entering the BIOS, on the initial screen, we again need to use the mouse to move the priority device to the very top. Up because this menu moved to the right side and became vertical.

You can also use the boot menu, as I showed in the previous example.
Going into " AdvancedMode( F7)' and going to the tab ' Boot", you can change the download priority manually in the " Boot Option Priorities ».

Or just choose desired device start downloading from it in the section " Boot Override", which is still in the same "Boot" tab.

Booting from a flash drive in BIOS on an MSI motherboard
With regards to the motherboard in MSI, here we can set the boot from a USB flash drive in two ways.

In general, I hope that you will find an option that suits you, and that you will be able to set boot from a USB flash drive in your BIOS without any problems.
How to set boot from a flash drive in old and modern versions of BIOS
How to reinstall Windows or attempt to resuscitate the operating system using Live disks if the laptop does not boot from a USB flash drive? This does not mean rare devices that, in principle, do not support booting from USB media, but modern laptops that provide booting from a USB flash drive, but do not offer an understandable mechanism for setting the boot priority from the start. On the example of one of the tested Asus models, below we will understand the specifics of booting from a flash drive of modern laptops and consider common reasons why problems may arise with this case.
1. Setting the boot priority in the hard drive selection menu
Lack of prioritization BIOS boot flash drives are a problem not only for laptops, but also for PCs, and usually it is due to the fact that many programs for burning bootable media create a bootable USB flash drive according to the principle of arranging a hard drive. In such cases, the flash drive does not appear in the general list of setting the priority of boot devices, it must be looked for in a separate menu, where the priority hard drive is determined. In this menu, connected USB storage devices are listed as hard drives along with internal devices laptop storage - HDD or SSD. But even users who have previously encountered this nuance may not remember it, since they may be misled by the fact that in the BIOS UEFI flash drive listed as a device UEFI boot(with an appendix in front of "UEFI"). It appears, but upon loading a laptop from such a flash drive does not occur. If bootable flash drive not UEFI or we are dealing with a laptop based on a regular BIOS, the flash drive must be set in the hard drive priority menu. For example, in the tested Asus laptop, you need to go to the “Boot” section, in the “Boot Option # 1” column, install the hard drive.
1Then go down to the column "Hard Drive BBS Priorities".
 2
2 And choose a flash drive.
 3
3 In the general list of boot devices, the flash drive will not appear as a UEFI device, and it will boot from it.
 4
4 But it will be realized under the condition of the active compatibility mode with Legacy.
2. Enabling USB media support in BIOS Legacy mode
4. Switching the flash drive to a USB 2.0 port
Many modern laptops are equipped with a USB 3.0 port (with a blue pull tab). This is a great advantage when it comes to working with USB devices inside Windows, but when booting computers from USB sticks that do not have USB 3.0 drivers in the distribution kit, there can be problems. These distributions include official ISO images Windows installation 7 (and versions below), as well as builds of some, as a rule, old Live disks. A difficult way to solve such a problem is the integration USB drivers 3.0 to the distribution and repacking the ISO image. Simple and recommended - connecting a USB flash drive to USB port 2.0 on a laptop. Only the USB port on the laptop matters; the fact that the flash drive itself supports USB 3.0 does not play any role. Learn more about the differences between USB 2.0 or 3.0 ports.
Have a great day!
Friends, in this article we will find this most boot menu for laptops Acer, Sony, Samsung, MSI, Toshiba, HP, ASUS, Packard Bell and load the above devices from my Corsair Voyager flash drive, which contains the operating Windows system 7. Don't forget if you want to install on a new one windows laptop 7 or Windows XP, then connect the flash drive to the USB 2.0 port (black), if you connect the flash drive to the USB 3.0 port ( of blue color), then the installation of the system will end with an error, since in Windows Installer 7 no USB 3.0 drivers.

We will also analyze the BIOS of these devices in detail. Consider how to change the boot priority on these laptops, in case you and I cannot enter the boot menu. There is no need to be afraid of the BIOS, if you configure something in it incorrectly, you can always reset the settings to default.
Very important note: This note is useful to you if you new laptop any manufacturer (2013, 2014 with UEFI BIOS). If you have such a laptop, and you are reading these lines, then you want. To do this, naturally, the laptop needs to be loaded from .
Almost all laptops sold now have a UEFI BIOS, such a laptop just cannot be loaded from a USB flash drive, since there is a special protection in the UEFI BIOS - the secure boot protocol " secure boot"based on special certified keys (available only in Windows 8). The Secure Boot protocol will not allow you to boot your laptop from any boot disk or flash drive other than the installation Windows disk 8. In order to boot your laptop from a USB flash drive, the Secure Boot protocol must be disabled in the BIOS of your laptop, this is done very simply, read our article or.
Let's get back to this article. I think the information will be useful to many owners of laptops and netbooks. This article will also help if you want to boot from disk and don't know how to do it.
Let's start with Acer laptop, first of all, we connect our Corsair Voyager flash drive to the laptop, then press F12 at boot,

Then you need to select our flash drive in the boot menu that appears and click

If you are unable to enter the boot menu of an Acer laptop using the F12 key at boot, then the option is disabled in the BIOS. boot menu and it needs to be turned on.
Press when loading F2, the initial tab Information, go to the tab Main, see the parameter F12 Boot Menu, set it to Enabled,

Next, press F10 to save the settings, reboot, press F12 when loading and our boot menu appears, select our USB flash drive in it and press Enter, the USB flash drive is loaded.
If the boot menu of the Acer laptop still does not appear, then we go to the BIOS again (when booting F2), the Boot tab. We select our flash drive and put it in the first position using the F6 key, then press F10 to save the settings, reboot and boot from the flash drive.


We press F12 when loading the laptop and get into the boot menu, select our USB flash drive here, if you connected a USB flash drive to the laptop, its name will be here. Press Enter and if your flash drive is bootable, it will boot from the flash drive.

If for some reason you cannot boot a laptop from a USB flash drive using the boot menu, then you can enter BIOS and change the priority of the boot device there. We often press F2 when booting a Toshiba laptop and get into the BIOS of this laptop. The initial tab Main, go to the Boot tab (responsible for loading the laptop) and see our Corsair Voyager flash drive in sixth position. We select it using the keyboard and press F6, thus moving our flash drive to the first position, then press F10 to save the settings we have changed, the reboot occurs and the laptop is loaded from the flash drive.
Friends, if you have a new samsung laptop, for example, 2012-2013, then we read this article "", for all others this instruction is also suitable.
We press when loading Esc or F10, we get into the boot menu and select our flash drive. If the boot menu does not appear, then we go to the BIOS, press F2 or DEL when loading. In the BIOS tab Boot, select the first parameter Boot Device Priority

And we enter it, here we select our flash drive and use the F6 key to put it in the first position. Next, press F10 to save the settings and reboot, reboot, then boot from our flash drive.


and get into the boot menu. The drive is now selected as the first device, if your flash drive is connected to a laptop, then its name will also be present here, select our flash drive here and press Enter or F10, it reboots and further downloads from the flash drive.

If you cannot enter the HP laptop boot menu, then go to the BIOS, press ESC when loading, then F-10, get into the BIOS,
Go to tab System Configuration, then Boot Options, press Enter


As you can see, the laptop's hard drive is set to be the first device. Notebook Hard drive. If your flash drive is connected to a laptop, then its name will be here, select our flash drive and use the F6 key to move it to the first position. Next, we save the settings we have changed, press F10 to save the settings, the reboot occurs and the laptop boots from the USB flash drive.


If the boot menu is not available, press the DEL key at boot and enter the BIOS, then go to the Boot tab, select our flash drive and, without releasing Shift, press + , thereby moving our flash drive to the first position. Press F10 to save the settings, the settings are saved and the laptop is loaded from the USB flash drive.


Then go to the Boot tab, and set the Fast Boot option ( fast loading) to Disabled (disabled),


Once again we enter the BIOS and go to the Boot tab, set the Launch CSM (advanced boot) option to Enabled,

We go down below to the Boot Option Priorities and Boot Option # 1 options and enter it by pressing Enter, in the menu that appears, using the arrows on the keyboard, select the name of our flash drive and press Enter. Here we also put our Corsair Voyager flash drive in first place.


We press F10 to save the settings, reboot and our Asus laptop boots from the USB flash drive.
Also you can use boot menu Asus laptop, for this, in the initial phase of loading the laptop, often press the key Esc, you will get to the boot menu, use the arrows on the keyboard to select your bootable USB flash drive in it and press Enter.

How to boot a Packard Bell laptop from a flash drive

Press key while loading F12 and get into the boot menu of the laptop, there we simply select our USB flash drive and boot the laptop from the USB flash drive.
If F12 does not work when loading press F2, less often F6 and get into the UEFI BIOS of the laptop,

go to tab here Boot.
If before turning on the laptop you connected a USB flash drive to it, then it may not decide directly in this menu.
Set the Boot Mode option to Legacy BIOS.
And the option secure boot put in position Disabled.
Now the flash drive should be determined. Put the flash drive in the first position, save the settings and reboot. If the bootable USB flash drive is made according to our articles, then the download will be successful.