Adobe photoshop features. How to bring back deprecated undo keyboard shortcuts? Color Lookup Profiles
This is a new tool that allows you to remove unwanted elements from an image by simply deleting them.
The background under these elements will be drawn according to the content.
Select the part of the image that you want to fill. It will be better if the selection is slightly larger than the element you want to remove.
Click Ctrl+J to cut and immediately paste the selected object on a separate layer.
Load the selection again by left-clicking on the top layer while holding ctrl(in miniature on).
Hide the visibility of the top layer and select the bottom layer.

The selection needs to be expanded a little, since now we will use the function Content-Aware Fill(Filling taking into account the content of the image), discussed today in paragraph 1.
After creating a rectangular area on the image with this tool, a grid should appear.
If the grid does not appear, on the settings panel in the list Crop Guide Overlay(Frame Grid Overlay Mode / Overlay Options) select - Rule of thirds(Rule of Thirds / Rule 1/3).
⇐ . (previous page of the tutorial)
. (next page of the tutorial) ⇒
FGBOU VPO "Mordovia State
Pedagogical Institute named after M.E. evsevyeva"
FACULTY OF PHYSICS AND MATHEMATICS
DEPARTMENT OF INFORMATION SCIENCE AND COMPUTER ENGINEERING
COURSE WORK
in informatics
MAIN FEATURES OF THE GRAPHIC EDITOR Adobe PHOTOSHOP
full-time student
group MDI-110 A.A. Lukyanov
Speciality:050202.65 "Informatics" with an additional specialty050203.65 "Mathematics"
Work manager:
cand. ped. Sci., Associate Professor
E.A. Molchanova
signature date initials, surname
Grade __________________
Saransk 2014
Content
INTRODUCTION…………………………………………………………………………
1 BASIC INFORMATION ABOUTAdobePHOTOSHOP……………….…………
1.1 General characteristics …………………………………….. …………………
1.2 Key features………………………………... .... …………………
1.3 Applications ………………………………………. …………………
2 AdobePHOTOSHOP
2.1 Interface ………………………………………………………………………
2.2 WorkWithfiles ………………………………………………………………
2.3 …………………………………………………………
2.4 Basic tools………………………………… …………………
2.5 Filters… …………………………………………………… …………………
AdobePHOTOSHOP…………
CONCLUSION……………………………………………………………………...
LIST OF USED SOURCES……………………………………
V MANAGEMENT
Currently the market software is full of various programs and editors that allow you to process and edit digital photos. A person who does not understand very well the features of certain software tools, sometimes it is very difficult to understand this variety of software. But, right choice software tools for solving a specific task of processing photographs is one of the keys to success in obtaining finished photographs. Speaking about graphic editors, first of all, it should be noted that all digital images are divided into vector and pixel. In the first case, images are built from various geometric elements or primitives (segments, triangles, rectangles or circles). Therefore, vector graphics make it easy to manipulate the image scale without any geometric distortion, and therefore it is widely used for building fonts, hand-drawn images, in design and publishing work.But in the research work, all the material will be devoted to raster graphics.
Raster graphics editor- a specialized program designed to create and process images. Such software products are widely used in the work of illustrators, when preparing images for printing in a typographical way or on photographic paper, and publishing on the Internet. Bitmap graphics editors allow the user to draw and edit images on a computer screen, as well as save them in various bitmap formats, such as JPEG and TIFF, which allow bitmap graphics to be saved with a slight reduction in quality through the use of lossy compression algorithms, PNG and GIF , which support good lossless compression, and BMP, which also supports compression (RLE), but in the general case, is an uncompressed "per pixel" image description. In contrast vector editors, raster ones use a matrix of points to represent images (bitmap ). However, most modern raster editors include vector editing tools as an aid.
All this is reflected in the object and subject of the course work.
Object of study -graphics editorAdobephotoshop. The subject of the study is the mainfeatures, work with images, graphic editorAdobephotoshop.
The purpose of the course work is to study the theoreticalbasics of workgraphic editor, hisfunctionalityandreview the mainways.
To achieve this goal, it was necessary to solve the following particular tasks:
Learn the main characteristics;
Consider the main possibilities;
Identify areas of application;
Reveal the main functions;
Learn the features of workAdobephotoshop
Consider examples of tasksusing the basics of a graphic editor.Research methods: analysis of educational, special and methodical literature, study of the software packageAdobephotoshop, mastering the perfect skills of working withgraphics editor.
1 BASIC INFORMATION ABOUT Adobe PHOTOSHOP
general characteristics
AdobePhotoshop is a program for creating and processing raster graphics, in other words, a graphics editor. Raster graphics is any image that consists of individual pixels of different colors - photos in the camera, pictures on websites, sprites in games - in general, the bulk of all graphics are raster. All this Photoshop perfectly opens up and provides an incredible amount of tools for working with the image. By itself, Photoshop is just a collection of tools that come together. But everything is done so thoughtfully and accurately that a real working laboratory is created for an artist or designer. There are drawing tools - various brushes and fills, tools for inserting and working with text, for vector graphics ... Latest Versions even allow you to download 3D models in popular formats created in 3D graphics editors.
Key features
Photoshop allows you to quickly and efficiently edit a photo, create a montage, and even draw a picture from scratch. As a tool for an artist, it may not seem as convenient as graphic editors specially designed for this, but this is only at first glance. The program has all the necessary tools for drawing, ranging from the simplest pen, with a changeable and easily customizable "brush", to many color palettes, which allow you to "mix" colors in any proportion. There are also vector graphics tools, which can often make your work much faster and easier. And if you do drawing at a professional level, the program makes it easy to connect Graphics tablet and fully realize your fantasies.From the very first versions, Photoshop was conceived as an easily extensible program. This means that it allows you to easily connect different modules developed by third-party programmers, and there are hundreds and thousands of them. If there are not enough tools in the standard Photoshop kit, and they are usually quite enough for any requests, then you can use some exotic filters, brushes, palettes. All this is in huge quantities on thousands of sites on the Internet, and much can be downloaded absolutely free.
1.3 Applications
Photoshop is such a convenient and powerful program that today almost every person who is somehow related to graphics has this program on his computer. Web designers develop all site graphics in it, programmers - all the beautiful icons and game characters that delight our eyes, photographers - correct unsuccessful photos, removing “red eyes” and correcting brightness, contrast or color balance Photoshop is often needed and almost everyone needs it.In this regard, it is clear that knowing the basics of Photoshop for someone who uses a computer not only for games is just as important as being able to type text in Word. These two programs are one of the most necessary in the set of any more or less competent "user". And therefore it is required to master and this program. Fortunately, with its convenience, Photoshop has won such a love of users that thousands of sites dedicated to it have been created, hundreds of books have been written, both for beginners and professionals, and hundreds of hours of training videos have been shot. All this is easily accessible to everyone, moreover, with any level of training. Even someone who knows nothing about graphics at all can master it and learn a lot. You just need to try to get to know this program better and the world computer graphics can keep you busy for a long time.
2 MAIN FUNCTIONS, CAPABILITIES AND OPERATING PRINCIPLES Adobe PHOTOSHOP
2. 1 Interface
Drawing
1. Main panel. Here is all the functionality embedded inphotoshop. Starting with saving the file and ending with filters and arbitrary window settings.
2. Instrument settings panel. Responsible for configuring properties and settings used in this moment tool.
3. Currently open documents (files).
4. Working media switch.
5. Toolbar. Here are the main toolsphotoshop.

Drawing
6. Palettes. Additional information, options, settings, and also here is the layers panel. Palettes are highly customizable to the needs of the user.
2.2 Working with files inAdobephotoshop
Let's start with the simplest and most banal - creating and saving a new document. So we openedphotoshop, and the first thing to do in order to get started is to create a new document. This is done simply, in the menu File (File) -> New (New)
The same can be done with the keyboard shortcut Ctrl + N, which is much faster and more convenient. After that, such a simple window will open (Fig. 3).

Drawing
Here you can set the file name, width and height (width and height), as well as specify the units of measurement (pixels, centimeters, millimeters, etc.). Then you can set the resolution - it determines the quality of your future image. By default it can be set for example at 72 pixels/inch, but if you need to print an image in a large format, you will need to set this value to 120 or more (depending on how large the format will be).). Color Mode sets the image mode: RGB, CMYK, Lab, etc., while Background Contents sets the background fill color.
Now let's move on to the save procedure. The save function is located in the same menu File -> Save or Save As (Save as). Save as differs from Save only in that it will display a window with the save settings each time, while Save will ask only 1 time - the first (Fig. 4).

Drawing
If you want to save the current document with all layers and shapes, so that you can return to editing it later, you need to save the file in a native formatphotoshop.psd
2.3
Adjustment layers in Photoshop almost completely duplicate the menu Image (Image) -> Adjustments (Correction). With one caveat - adjustment layers apply effects and changes on top of the image without changing it. This feature is a huge plus, as you can always go back to a certain effect and correct it. Of course, if you use Image -> Adjustments, then to make any changes you will have to go back through the history and do everything again, because in the case of a normal image adjustment, all effects are applied directly to the image.
Figure 5
You can create an adjustment layer from the layers panel (Fig. 5).
2.4 Basic tools Adobe photoshop
Consider one of the main editor tools . brush tool inphotoshoplocated in the toolbar on the left (Fig.6).
If the brush is active, a menu will appear at the top quick setup brush, it looks like this (Fig. 7).
Figure 6
Figure 7
What settings does this menu offer us.
First, this brush type. Click on the arrow next to the brush icon, and we will see a list of brush types:

Figure 8
Figure 9
Select the Fuzzy Cluster Loose brush and brush it several times over the canvas (Fig. 9).
This is a brush in the form of barbed wire. Standard inPhotoshop has just over a dozen of these brush types installed. They are used quite rarely, but, nevertheless, some of them are quite interesting (Fig. 10).

Figure 10
If we click on the arrow in this menu, we will see a list of options (Fig. 11). Here we can select sets of brushes, each of which stores certain types, like those discussed above. By clicking on the Preset Manager, we will get to the set editor, in which you can change the current set of brushes inphotoshop(Fig. 12).

Figure 11

Figure 12

Figure 13
The Size parameter controls the size of the brush. We can change it by moving the slider, or by entering a value in the field manually. The Hardness parameter controls the hardness of the brush. We can also choose ready-made brushes from the window. Now let's look at the available options, they are opened by clicking on the arrow (Fig. 14).
Figure 14
At the bottom of the list are standard and downloaded brush sets. By clicking on the Preset Manager, we get into the brush manager (Fig. 15).

Figure 15
This shows the brushes that are in the current set. By clicking on the Load button, we can add brushes from another set to the current one. And if you select several brushes, then by clicking on Save Set, you can create your own set from them.
Now consider the opacity and pressure settings of the brush inphotoshop(Fig. 16).

Figure 16
The Opacity parameter sets the opacity of the brush (Fig. 17). A value of 0% corresponds to a completely transparent brush, 100% - completely opaque.
The Flow parameter sets the force of pressure on the brush: 0% - barely pressing, 100% - pressing at full strength.

Figure 17
Rectangular Marquee Tool (Rectangular selection). Creates a selection in the form of a rectangle. Useful when you need to select a square or rectangular area. For example, a simple building, a book, a box, and so on (Fig. 18).
Figure 18
Figure 19
Please note that if, when creating a rectangular selection, we hold down Shift key, then the selection will be in the form of a perfect square (Fig. 19).
Elliptical Marquee Tool (Elliptical selection). Creates an ellipse or circle selection. Useful when selecting round objects, such as the iris of the eye, for example (Fig. 20).
By analogy with a rectangular selection, if you hold down Shift, you get a perfectly even circle.
Figure 20
Single Row Marquee Tool (Highlight a single row) and Single Column Marquee Tool (Highlight a single column). These 2 tools create a selection of a single row or column of pixels. In this case, the width is 1px (Fig. 21).
Now consider the properties of the selection tools inphotoshop.
Figure 21
It must be said about the important properties that are inherent in all selection tools inphotoshop:1. Moving and transforming selections
For clarity, let's create a simple square selection (Appendix 1, Fig. 1). Now, by hovering the mouse over it, we can move it as we like, and a small rectangle icon will appear near the cursor (Appendix 1, Fig. 2).
Let's pay special attention to the fact that moving the selection is possible only when any of the tools of the Simple Selections tab is active. If, say, the Move Tool is active, then the already selected piece of the image will move, and not the selection itself (Appendix 1, Fig. 3).
2. Interaction of secretions
Like vector shapes, selections can interact with each other. And it's very convenient. Interaction settings are located in the top menu of the tool:
![]()
Figure 22
In the first New Selection mode (New Selection) Each new selection will reset the old one. This is the standard mode. But then things get much more interesting. In mode Add to Selection (Append to selection) each new selection will be added to the existing one. Let's see, these are 2 rectangular selections in modeAdd to Selection (Fig. 22). They merged into one. The next mode is Substract to Selection. This mode works exactly the opposite of the previous one. It subtracts each subsequent selection from the existing one (Fig. 23).

Figure 23
The last mode Intersect with Selection (Selection from the intersection) leaves a selection only at the intersection (Fig. 24).

Figure 24
The ability for selections to interact with each other is very useful in practice.
3. Blending
This is a rather important parameter that determines the blurring of the border of the selected area. It is set by the Feather parameter:
Let's take a look at the image cut without feathering (0px) (Appendix 1, Fig. 4) and with 80px feathering (Appendix 1, Fig. 5). The difference is obvious.
4. Selection style.
With the selection style inphotoshopyou can fix the size or ratio.
Fixed Ratio (Fixed ratio). If you set the ratio, for example, 10 to 20, then the selection will be created exactly in this proportion, we can only adjust the size (Fig. 25).
Figure 26
Figure 25
Fixed Size. Creates a selection with a predefined size (Fig. 26). These 2 options are useful when you want to make many selections in the same aspect ratio or size. Note that this setting is only available for simple selections (rectangle, ellipse, column, row).
We continue to studyselection of objects inphotoshop, and next in line is the Lasso tool group. There are 3 such tools in total:


Figure 27
LassoTool. This is a classic lasso. With its help, a selection of an arbitrary shape is created, and we draw it ourselves, just as we do it with a brush (Fig. 27). Lasso is designed for leisurely work. It is required to carefully display each bend. Besides, it requires some skill. However, if you master the lasso well, it will become one of the most powerful tools allocation inphotoshop. The lasso tool is especially useful when combined with other selection tools such as the Quick Selection Tool andMagic Wand Tool when you need to fix automation flawsphotoshop.Figure 28
Polygonal Lasso Tool. Polygonal lasso - the shape of the selection is created by straight lines. A very handy tool for selecting buildings and any other objects that do not have roundness (Fig. 28).
Magnetic Lasso Tool ( magnetic lasso ). Once a very popular and useful tool, now, after the introduction of the Quick Selection Tool, it is almost not used (at least by me). The principle of operation is that the boundaries of the selection seem to be attracted to the object that we want to select. The tool copes well with contrasting areas, but starts to err when the edges of the object are fuzzy or almost the same tone as the background. All that is required to select an object is to draw along its contour (Appendix 1, Fig. 6).
The magnetic lasso has special settings:
Width (Width) - the area of influence of the magnetic lasso. Specifies the precision of the selection. If you need a more precise selection, set a smaller width value. Expressed in pixels (px).
Сontrast (Contrast) - The higher the value of this parameter, the more contrast the image must be for selection.
Frequency (Frequency) - Determines how often the anchor points will be created. The smaller this value, the more points will be created. And, accordingly, the more accurate the selection will be. However, too many points are not recommended. Next, we analyze "Magic wand" and quick selection.
1. Quick Selection (Quick selection). The most advanced and convenient tool. Its name fully justifies. For a quick selectionphotoshopbetter not to think of it. Based on the same contrast principle as Magnetic Lasso, but the selection is made using a special brush (the size of which is adjustable). In this case, no special precision is required,photoshopitself will “adjust” the edges and most of the selection. You just need to start painting. desired area. For example, this selection took exactly 1.5 seconds (Appendix 1, Fig. 7).
While the same selection with a magnetic lasso takes about 15-20 seconds. Not to mention the rest of the tools we've reviewed.
The settings are pretty familiar:

Figure 29
Quick selection has 3 modes of operation: new selection, add to selection, subtract from selection. You are already familiar with these modes. Next are the brush settings. Here, too, everything is pretty standard: brush size and hardness, spacing, angle, and shape. With the size and rigidity, everything is clear. Spacing (Intervals) are used to determine the intervals between brush strokes, the smaller this value, the smoother the tool will work. Angle and shape are parameters that are practically not needed in everyday work, which set the angle of rotation of the brush and its shape.
2. Magic Wand (Magic wand). It works on the principle of selecting pixels that are similar in color and tone. It has a special parameter Tolerance (Tolerance), which determines the degree of similarity of the color of the pixels. The greater its value, the more pixels will be highlighted. For example, this selection was made with Tolerance 32 (Appendix 1, Fig. 8). And this is with Tolerance 120 (Appendix 1, Fig. 9).
The option Contiguous (Adjacent pixels) determines whether only pixels that are in close proximity to each other will be selected, or whether pixels along the perimeter of the entire canvas will be selected.
3. Refine Edge option
The Refine Edge option is available for any selection, and is a very important option. You can call it by clicking on the corresponding button:
![]()
Let's look at this parameter in action on a specific example. Open any image and select any object using any of the methods listed above 120 (Appendix 1, Fig. 10).
Click on the Refine Edge button, we will see the settings window. Now let's analyze it in a little more detail (Fig. 30).

Figure 30
Figure 31
At the very top is a group of elements View Mode (View mode). The parameters in this group are for your convenience only. View specifies the background against which to present the result (Figure 31).
Marching Ants (Marching ants) will show a preview on the original background.
Overlay (Overlap) will fill the background with a translucent red color.
On Black - on a black background.
On White - on white.
Black & White - makes the selection white and the background black.
On Layers (On layers) - a transparent background.
Reveal Layers (Open layers) - will show the image in its entirety.
Let's choose to display the result on a white background (Appendix 1, Fig. 11).
The Show Radius checkbox will show the radius of the current selection.
Next comes the most important parameter - Edge Detection. If you check the box Smart Radius (Smart radius) and set a value other than zero,photoshopwill make the edges of the selection smoother and more regular. For comparison, let's look at the selection without this parameter (Appendix 1, Fig. 12). Notice the angularity? And now the same thing, but with a smart radius of 1.5px (Appendix 1, Fig. 13).
Next are parameters such as smoothing (Smooth), shading (Feather), Contrast (Contrast) and Shift Edge (Moving the edge). Smoothing makes the edges of the selection softer, with feathering already familiar. Contrast has the opposite effect of anti-aliasing, i.e. makes the edges crisper and tougher. And Shift Edge allows you to move the edges of the selection in or out.
Decontaminate Colors (Clear colors) removes debris around the selection (white halo, background areas, etc.) (Appendix 1, Fig. 14).
Dismantled everything possible ways allocationphotoshop, and almost all of their settings.
Let's talk about image warping. Deformation is a change in proportions and position in space. Vphotoshopdeformation tools are in the menu Edit (Editing) -> Transformation (Transformation) (Fig. 32).
Figure 32
Let's immediately pay attention to 3 points - Rotate 180, 90 CW and 90 CCW. The first one rotates the image 180 degrees, the second one rotates it 90 degrees clockwise, the third one also rotates it 90 degrees, but counterclockwise.Flip Horizontal and Flip Vertical “reflect the image” just like you see it in a mirror (Appendix 2, Fig. 1).
Tool Scale (Scale) resizes the image:
Rotate (Rotate) allows you to expand it.
Skew (Bevel) deforms the image in the form of a parallelepiped (Appendix 2, Fig. 2).
Distort (Distortion) allows you to deform the image in such a way as to create a perspective effect (Appendix 2, Fig. 3).
Perspective (Perspective) - almost the same, only 2 points are scaled at once.
Warp (Distortion) - the most interesting type of deformation, you can move any part of the image (Appendix 2, Fig. 4).
Quick access to the deformation is carried out hot key ctrl+t.
Next, let's talk about working with text.Let's talk about working with text inphotoshop. The Type Tool is responsible for using the text, which has some varieties:

Vertical Type Tool - writes vertically.
HorizontalandVertical Type Mask Toolwritesmask.
To write something, you must first define an area for the text, for this select the Horizontal Type Tool (normal horizontal text), left-click on the canvas, and, without releasing it, create a rectangle.
Now we can write text inside this rectangle. Let's turn to the text tool settings.
The first button (Toggle Text Orientation) allows you to change the direction of the text (horizontal or vertical):
Figure 33
Then comes the list of installed fonts and the font style (bold, italic, etc.). Then the size of the text (according to the scientific size), which is indicated in points (60 pt) and the method of smoothing.
Next, we can see the usual alignment (left, right or center) and text color. To change the color of already printed text, you need to select it and double-click on the colored square, after which a color palette will appear.
The next option is a little more interesting - this is deformation:
Figure 34
Here you can set the shape according to which the text is deformed and the amount of deformation. It's worth noting that you can also run text along a vector path by simply selecting the text tool and dragging it to the raster line.
Well, the last thing is the settings for characters and paragraph (Fig. 35).

Figure 35
Here you can set the line and letter spacing (distance), stretch each individual character (use carefully, or don't use it at all), make all characters in the text uppercase, set superscript characters, etc. In the paragraph settings, we will find such standard things as indentation from the edge and a red line.
Now let's take into account the "healing brush" and the stamp.
The Healing Brush and Stamp are the main tools of a retoucher.
Both of these tools are used to restore part of an image using another part of it. How it works? Let's look at an example:
Let's say we need to remove a bucket of paint from an image. We take Clone Stamp Tool (Stamp), hold down the Alt key, the cursor takes the form of a sight, click on the place next to the brush lying in the bucket. Let's release Alt and click a couple of times in the place we want to erase (a brush in a bucket) (Appendix 3, Fig. 1).
As you can see, it has disappeared, and in its place is now the texture of the wall. Now let's try to erase the bucket itself. First, take a sample of the ledge of the wall, and replace it with part of the bucket.
The main rule of the retoucher is not to use the same sample more than 3-4 times, otherwise it starts to catch your eye. It is better to take samples more often, and from different places. We continue to wash the bucket (Appendix 3, Fig. 2).
The bucket was removed, but as you can see, there was a disaster with the texture: it disappeared, besides, the transitions between the light and dark parts of the wall are too obvious. What to do? The Healing Brush Tool will come to the rescue. The difference between a repair brush and a stamp is that it works much softer, and when used, it retains the texture and color of the surface. For example, when retouching faces in photographs, I always use the Healing Brush. The stamp is needed only for rough work, when you need to remove some object from the image. So, we take a restoring brush, and we begin to work with it by analogy with a stamp. The principle is the same (Appendix 3, Fig. 3).
Now the texture is more or less restored, and the transitions are softened. If you look from afar and do not know that there was once a bucket here, then almost nothing is noticeable (Appendix 3, Fig. 4).
This concludes the conversation about the healing brush and stamp.
Let's talk about fill and gradient.Fill is an important and at the same time simple tool:
![]()
Figure 36

It has one purpose - to fill the selected (or not selected) area with a given color. Filling is very easy to use, just select a color (Fig. 36).
and click on the canvas. Everything, the filling is done. The selected area is filled in the same way: select a color, select an area of the image and fill it (Fig. 37).
Figure 37
However, this tool has some settings (Fig. 38).
Figure 38
The first option allows you to choose from the drop-down list how to fill the area - with the foreground color or texture. Next comes the choice of blending mode. Then set the opacity of the fill. Actually, this is all you need to know about the Paint Bucket Tool (Fill).
Dodge/Dimmer (Dodge and Burn Tool)
Another couple of tools important for the retoucher, the purpose of which is to lighten / darken an area of the image.

Let's look at the main settings of these tools (Fig. 39).
Figure 39
As with any brush class tool, the Dodge and Burn can be resized and hardened. Then comes the Range parameter, which allows you to set which tones the tool will affect (light-highlights, mid-midtones, dark-shadows). Exposure sets the lightening/darkening strength. And finally, the Protect Tones checkbox sets the preservation of the tone of the image.
2.5 Filters Adobe photoshop
First, let's define what filters are inphotoshop. Filter is a tool for changing an image. Change can mean blurring or sharpening, styling, embossing, changing colors, and much, much more. All filters are presented in the corresponding Filter menu (Fig.40).
And, let's pay attention, in the presented screenshot, the standard filters are marked with a red frame, the blue ones are downloaded and installed additionally. We will only talk about standard filters. There are a lot of additional ones. Some of them are paid, others are not.
Photoshop Artistic Filters
This section contains 15 filters (Fig. 41).
Figure 40
All filters in this group are designed to simulate various drawing methods. Click on any of these filters and a detailed settings window will appear. In this window, we can not only configure the selected filter, but also switch to another filter from the current (or even from another) group. However, not all filter groups are presented in this window; some have their own interface.
Figure 41
We are now talking about filter groups such as Blur (blur), Noise (Noise), Pixelate (Pixelization), Render (Rendering), Sharpen (Sharpness), Video (Video) and Others (Other).3 EXAMPLE OF WORKING WITH IMAGES B Adobe PHOTOSHOP
Using the theoretical material, we will create an "Invitation" for new students to the institute at the Faculty of Physics and Mathematics, in a graphic editor. The first thing to do is create a new A4 document. Then fill the background with a gradient to get a similar background (Fig. 42) Insert the text we are interested in and to combine it with the background, set up its effects. Go to - Layer Style - Stroke and adjust the color and size of our stroke (Fig. 43). Next, we will insert several photos, placing them with different slopes. Then go to – Layer Style – Outer Glow and adjust the color and size of our glow. Now our photos are highlighted in purple (Fig. 44). Next, let's add some more effects to the top photos of our work and draw a glowing line. We take the tool - Pen (Pen tool) - and draw bends in the photographs.


Figure 44
Figure 43

Figure 42
Now select - Brush - set to "soft" - 2px. Back to - Pen and Clicking right click according to our bend, select - Stroke the contour, set - Brush, press - OK and our line is revealed in which we adjust - External glow, select the size and color - Yellow. It turns out like this (Fig. 45).


Figure 45
Figure 47
Figure 46
Now let's add some abstraction. Let's find a couple of sources (Fig. 46, 47). We paste them into our work and in the layer's paste options for the first image we set the parameter - Overlay (Fig. 48). On the second image of the abstraction, set the parameter - Point light (Fig. 49).


Figure 48
Figure 49
Thus, the work is completely ready and this is what happened (Fig. 49)
Figure 50
CONCLUSION
In this study, work has been done to explore the theoreticalbasics of workgraphic editor, hisfunctionalityandreview the mainwaysworking with images in practice.
Graphics editorAdobe photoshopis a huge setopportunities to help in working with any images and photographs. This is a very well thought out program. regular user as well as for an experienced designer. Its user-friendly interface allows you to adjust the work, saving a lot of time.photoshopallows you to work with very high-quality images that have a sufficiently large resolution, and allows you to save this quality after editing. It also allows you to open and save various image formats, which is very important for any design work in print. The available settings allow the user to set up a graphic editor for themselves, startingfromzoom in/out with the mouse wheel, ending with the color and size of the interface icons.
All this is easily accessible to everyone, moreover, with any level of training. Even someone who knows nothing about graphics at all can master it and learn a lot, as there are thousands of sites dedicated to graphics.Adobe photoshop, written hundreds of books, both for beginners and professionals, filmed hundreds of hours of training videos.
LIST OF USED SOURCES en
/
products/
photoshop family.
html « Adobe Photoshop. Official training course”, Translator: Raitman M. A. Editor: Obruchev V. Publisher: Eksmo-Press, 2013 - 432 p. DrawingDrawing Figure 4 Figure 3 Figure 6 Figure 5 Figure 8 Figure 7Video lessons and trainingAdobe
http://uroki-photoshop.com
Photoshop. 100 simple tricks and tips”, Lynette Kent, Publisher: DMK Press, 2010 - 256 p.
"Introduction to Adobe Photoshop. Theory, -
"Theory and practiceAdobe Photoshop"


Figure 10

Figure 9

Figure 11


Figure 12

Figure 14

Figure 13
Annex 2
Image Warping
Figure 2

Appendix 3
Healing brush and stamp
Picture 1
Figure 2


Figure 4
Figure 3

This material opens a whole series of articles on the basics of working in the most popular graphic Adobe editor Photoshop. Today we will get acquainted with the program interface and some primitive operations with images.
Introduction
Even if you are the most notorious newcomer to the computer world, you probably already know the word "photoshop". Among computer users, it has long become a household word and is used almost always when it comes to processing photos and images. For many, the term "photoshop" has become synonymous with such words as "photo processing", "photomontage", "photo editing" and others. But in fact, "Photoshop" is not a process, but an image processing program, the first version of which was developed and released by the American company Adobe Systems back in 1990.
To date, Adobe Photoshop is the most advanced graphics editor that is used to work mainly with raster images, consisting of colored dots (pixels). Nevertheless, this product is being improved all the time and in the latest versions, developers are increasingly endowing the application with various vector tools. Thanks to its rich features and user-friendly interface, Photoshop is very popular among both professionals and ordinary users.
For what purposes can this program be used? Highly professional processing of digital photos and images; creating images and designs for websites of varying complexity; work with 3D files; registration of postcards, calendars, multimedia disks and business cards; converting files to various graphic formats is just one part of what mighty Photoshop can do. To study all functionality this application can be spent many months or even years.
Despite all its many features, the main purpose of Adobe Photoshop is image editing. For many years of its existence, the program has evolved, acquired new features, acquired advanced functionality, but at the same time it has always remained and remains a graphic editor. In fact, the workflow in Photoshop can be summed up in just a few words: you take an image or take a photo, then edit the selected image, and finally save the finished result to a file or print it out.
Of course, in the "Photoshop for beginners" series of materials, we will not study the editor professionally, but only get acquainted with its basic features. But trust me, this will be enough for you to perform most of your daily tasks when working with images or photos. In the future, having taken your first steps and having understood the basic concepts, you can continue to improve and master more complex functions programs.
Before we begin to master Photoshop, I would like to say a few words about the distribution methods of this application. Probably no one will be surprised if I say that it is paid. But the price ... The cost of one license is over 25 thousand rubles, which of course is beyond the reach of most ordinary users. True, recently, Adobe has switched to new method distribution of their products - by subscription. Now for the use of its programs, including Photoshop, you will have to pay a monthly fee of 600 rubles. The only outlet for users may be a 30-day free usage period after the first installation of the application.
And the last. It is important to learn how to work in Photoshop by understanding your actions, and not doing them mechanically, just following the written instructions. To do this, the user must have at least basic concepts about the main types and characteristics of digital images. Therefore, if you still do not know what raster graphics, resolution and image format are, then before you start exploring the capabilities of a graphic editor, read the article.
Installation
Probably the first question that most users have is where to get or download Adobe Photoshop. At the moment, the latest version of this graphic editor is Photoshop CC, which is part of the Adobe Creative Cloud cloud package. Download free 30-day trial trial version this product is available from the official website of the developer. As for previous versions of the program - Photoshop CS6, CS5 or earlier, you can download their distributions using any search engine on request: "download photoshop".
If you download the application from the manufacturer's website, then to install it you will be prompted to download and run a special small utility that will help you install the program in a few simple steps. In order to successfully install the application, you will need to go through a short procedure at registration.
If you downloaded the disk distribution kit previous version program (CS5 or CS6), then find a folder called Adobe CS (5/6) in it and run the Set-up.exe file located inside it. Then just follow the installation wizard instructions.
During the first launch of the graphic editor, you will be prompted to either enter a license key or activate a 30-day trial period during which you can use Photoshop for free.
In some cases, the original copy of the program may be accompanied by tools for cracking it (key generators), which can be used only at your own peril and risk, since their distribution is illegal.
Program interface
After the first launch of Adobe Photoshop, you will see the main program window, which has several areas.
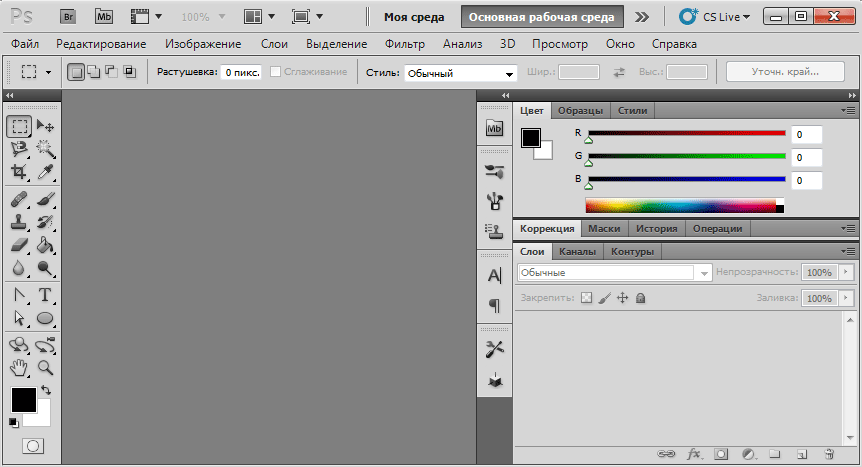
At the top of the window is main menu bar programs and control Panel(in CS5). At the same time, they can be located both in one line and one under the other. Everything will depend on the size of the application window.
The control panel is divided into three areas. The leftmost bottom includes the following elements:
- Menu icon for managing the active program window (PS).
- Launch icons for additional applications Bridge (Br, Mb).
- A button responsible for displaying auxiliary elements (grid, guide lines and rulers).
- The button for selecting the scale of an open document.
- Drop-down list with commands for organizing multiple documents.
- Button for switching screen modes.
In the middle part of the control panel there are buttons for selecting the working environment of the program. The working environment in Photoshop refers to a certain arrangement on the screen of the application control interface elements (windows, panels, palettes). By default, the editor is set to Main working environment, which is considered universal for all types of work. In addition to it, the developers offer us several specialized working environments designed to work in certain areas (3D, Drawing, Animation, Photography, and so on). To switch between them, you can use the arrow icon. And finally, each user can independently customize the interface to their own taste and create their own working environment. On the initial stage we will use the main working environment.
On the right side of the control panel is the CS Live button, by clicking on which a drop-down menu opens with access to Adobe thematic online services.
In Adobe Photoshop CS6, there is no longer a control panel as such. All that remained of it was the PS button and a modified switch between working environments.
Just below the menu bar and control panel is Properties panel current tool.
The next most important control in Photoshop is Toolbar, located by default along the left edge of the program window. It contains icons for working tools, as well as buttons for selecting foreground/background colors, enabling/disabling editing in the Quick Mask mode, and changing the screen display mode (in CS6).
By default, all icons on the control panel are located one below the other in one column. But you can also put them in two columns by clicking on the little arrow button at the top of the bar. You can also detach from the left edge and place the panel anywhere by dragging its header with the mouse pointer.
Along the right edge of the application window, there is a system for placing various panels or, as they are also called, palettes, which, like tools, are actively used when creating and processing documents. Palettes are rectangular windows that can have several tabs at once, in each of which you can scroll through the contents. In addition, just like regular windows, you can collapse and expand palettes, resize them, or move them anywhere on the screen. At the same time, to expand the working space of the document, all right panels can be collapsed into icons using the button with two arrows located above them. Pressing it again will open the panels back.
The set of panels that is displayed on the right side of the screen depends on which panel has been selected. workspace. As we have already noted, by default Photoshop has Main working environment, in which three main panels are displayed in the expanded state at the right edge of the window: Color with an additional tab Swatches, Correction with an additional tab Styles, and Layers with two additional tabs Channels and Paths. To the left of them, but already in the form of icons, the History, Properties, Symbol and Paragraph panels are placed. If, for example, you switch to the Drawing environment, then the panels will be displayed open on the right: Swatches, Navigator, Brush Sets, Layers, Channels and Paths, and in the form of icons: History, Brush, Clone Source and Toolbox. Thus, switching between environments, you can quickly change the current set of panels based on the direction of work.
Photoshop is a very versatile program containing many commands. Therefore, to facilitate the call of the most popular of them, you can use hotkey combinations. This will significantly speed up the work in the editor and save you from searching for the necessary actions in its voluminous menu.
Create and open a document
Working in Photoshop begins with creating or opening an existing document. To create a new document in Photoshop, select the item at the top File and then in the drop-down menu the command Create(Ctrl + N). Immediately after that, you will see a dialog box in which you can set a number of parameters for the newly created document.

First of all, you need to enter the values Widths and Heights created image. You can select Pixels, Inches, Centimeters (default), Millimeters, Points, Peaks, and Columns as units. Subsequently, you can always change these values, as well as all the others.
Permission document must be selected based on the purposes for which you plan to use the image in the future. The default resolution value is 72 ppi, which is suitable for most digital graphics tasks. Higher resolutions may be needed for images intended for printing by printers or printers.
Color mode You don't need to change for no particular reason. Suitable for most computer images ColorsRGB 8 bit, which is set by default. We will also not touch additional parameters, such as Color profile and Pixel aspect ratio.
The last main parameter you can set for a new image is its Background content. By default, the background is set to white. You can also choose any other color or make it transparent. Transparent background displayed as a checkerboard pattern and is the most versatile choice.
When all parameters are set, click on the OK button. After that, an empty document of a given height and width will open in front of you, which in Photoshop is called canvas.
And yet, most users use Photoshop at home to edit ready-made images. In order to open desired file in the program, use the command of the same name Open(Ctri + O) from the menu File.

Next, you will see a dialog box in which you need to find the necessary document on your computer, select it and click the button Open. After that, in the working Photoshop areas the selected image appears. You can also open the desired file by simply dragging its icon into the application window.
Document modes
There are three document modes in Adobe Photoshop. Switching between them is carried out using the main menu item View and options in it Screen modes. It can also be done using special button located at the very top of the program screen.

The first, most basic mode is called "Standard Window" and installed by default. In it, you can open and work simultaneously not only with one, but also with several documents at once. Each image will open in its own tab.
The bookmarks bar is located at the top, just above the workspace. The active tab containing the document you are working on is highlighted in light gray. At any time, you can detach the desired tab from the panel, after which it will be transformed into an independent window. To do this, just move the mouse cursor over it and drag it in any direction. You can also return a tab to its place by moving its header back into the panel area.
In the next mode "Full screen with main menu" the bookmarks bar, scrollbars and status bar are removed from the screen, which somewhat expands working space. But at the same time, work in this mode is possible only with one image.
Finally, you can select full screen mode, also called "Full Screen", where all panels will be initially hidden. To call the toolbar or panels on the right, just move the mouse cursor to the desired edge of the screen. You can also press the Tab key, after which the display will show all panels, the tool property bar and the main menu. As in the previous case, you can work in full screen mode with only one document. To return to standard mode, use the F or Esc key.
If you open several images at once in Photoshop, then by default they will be displayed on the screen exactly one each in its own tab. But sometimes, when working, it is required that several documents be displayed on the display at once. For example, this is useful when you want to move a fragment of one image to another window by simply dragging the mouse.

To control the display of all open windows the app has an option streamline located at point Window main menu. You can also display all documents in CS5 using the button Organize Documents located at the top of the program window in the Control Panel.

Using this command, you can arrange working images on the screen in any way convenient for you: in vertical or horizontal tabs, in a grid, mosaic, cascade, in groups, and others.
Saving an image and changing its format
As in many other applications, two commands are used to save the work done here: Save(Ctrl+S) and Save as(Shift + Ctrl + S). You can find them in the same drop-down menu. File. The first time you save a document, the effect of both commands will be the same. A dialog box will open in front of you, where you will be asked to select a name, location and file format. Later, the team Save is used to save all changes in the current document. Action same Save as is selected if you want to make another copy of the file by changing its name, type, or location.
Despite the fact that Photoshop is an advanced graphics editor, it can also be used for fairly simple, but at the same time very popular operations with images. In particular, this concerns the ability to quickly convert graphic files from one format to another, for example, in order to reduce their size.

Open any image in Photoshop and choose command File - Save As. In the dialog that opens, click on the arrow in the field File type. You will see a drop-down list containing more than four dozen different graphic formats. Choose the right one and click the button Save. Thus, if necessary, in a matter of seconds, you can change the image format, for example, from PNG to JPEG, TIFF, GIF, and many others.
Image resizing
Adobe Photoshop is a graphic editor, mainly designed for creating and processing the most common type of images - raster. Recall that raster images are a rectangular grid consisting of dots (pixels), each of which corresponds to a certain color value. Thus, the main qualitative characteristic of any raster image is the resolution, which shows how many pixels it consists of. It is clear that the higher the resolution, the higher the image quality.
True, for high quality, as a rule, you have to pay with an increased file size. Of course modern hard drives have large volumes and allow, without any inconvenience, to store photos and pictures in the best quality, without worrying about the lack of free space. But there are often situations when too high image resolution becomes a problem.
For example, suppose you want to publish your photos online or send them to friends via e-mail. In the first case, a large file size can cause serious difficulties for users when opening your images from the pages of the site. In the second, files may simply not be sent due to certain restrictions imposed by postal service for their size. Also, do not forget that processing large images imposes increased requirements on computer performance. Therefore, when working with digital images, you often have to change their resolutions in search of the optimal balance between image quality and file size.
It is important to understand that the resolution and quality of an image is formed when it is created and depends on the settings you choose in the editor, as well as during the scanning or photographing process. And although in the future you can increase the resolution of the picture, its quality will not improve from this. Therefore, initially it is better to create high-resolution photographs, and then, if necessary, lower it, but not vice versa.
So let's get down to business. First, let's open any image using the command we already know Open from the menu File.

As an example, we will use this image with a resolution of 2560 x 1600 pixels and a size of 3.26 MB. For obvious reasons, on this page you see its reduced copy. You can use any other photo for training.

After opening the document in the program window, select the option in the upper main menu Image, and then in it the item Alt +ctrl +I).

In the window that opens, there are two areas with the specified sizes at once. The upper area reflects in pixels or percentages the current resolution of the image with which it is displayed on the monitor screen. This is what we are primarily interested in, since here you can resize the picture if it is being prepared for further digital use, for example, publication on the web, viewing on a computer, or fitting to the size of a desktop picture.
To resize the document, enter any appropriate value in the width or height field. In this case, the other parameter will change proportionally, since initially in the lower part of the window in the paragraph keep proportions checkbox is checked, which can be unchecked if necessary. Immediately after changing the width and height values, in the upper part of the window you can see how the file size will change after this procedure.
Below the dimension of the digital image, one more size is displayed, which the picture will have, but not on the monitor screen, but after printing on the printer. They can be set in more familiar values for this - centimeters, millimeters, inches and others. In this case, the print resolution is set separately. If you do not plan to print the image you are working with, there is no need to change these settings.
By default, the print resolution is set to 72 ppi. As we have already noted, this resolution is standard when viewing an image on a computer monitor, but if we are talking about high-quality printing, then it is better to make its value equal to at least 200 pixels per inch. The standard resolution for photo labs is 300 dpi.

To achieve the desired resolution, you must either change the width or height of the print, or set its value manually (then the width and height will change automatically). In this case, if you do not want to resize a digital image, then uncheck the box Interpolation.
After entering the desired values for the width and height of the image, click the button OK in order for the accepted changes to take effect, and then save the picture in a new file.

In our example, lowering the initial image resolution to 1600 x1200 pixels resulted in a halving of the file size - from the original 3.26 MB to 1.57 MB. At the same time, visually, without strong scaling, no difference between the two pictures is visible on the monitor screen, as you can see for yourself.
In Photoshop, there is another way to resize an image - geometric. This is done using the option (Alt +ctrl +c), also located in the already familiar menu Image.

As in the previous case, we are again invited to choose the required width and height of the image ourselves. Let's do that and see what happens. Set the horizontal and vertical dimensions to 1600 x 1200 again, and click OK.

As you can see, the image was simply proportionally cropped along all edges to the size we specified. That is, in this case, we do not change the resolution in the picture, reducing the number of points of which it consists, while preserving all its contents, but directly the physical dimensions of the width and height of the canvas on which the picture is located. At the same time, the resolution remains unchanged, since along with a decrease in the number of pixels, the content of the image also decreases.
Now let's go back to the window and see what other interesting features this tool provides us with. First, you can enter the dimensions of the visible part of the image, both in absolute and relative terms. For example, if you need to increase the canvas by 10 cm in width, then check the box Relative and enter in the field Width the number "10", choosing centimeters as the unit of measurement. To reduce the size, you must enter negative values.
Secondly, you can specify the direction of resizing the canvas. The switch is responsible for this function. Location, made in the form of a square, divided into nine sectors. To see visually how it works, enter any arbitrary image size values that are different from the original ones. Next, click on any sector, and you will see how the arrows will show which sides of the picture and how will be changed.

By default, the center sector is active. This means that when the image is resized, each of its sides will be enlarged or reduced in equal proportions. For example, if you want to reduce a picture by 100 pixels wide and 50 pixels high, then it will be cut 50 pixels from the left, 50 from the right, 25 from the top, and 25 from the bottom. If you choose the option as in the left picture, then 100 pixels on the right will be cropped, 25 on top and 25 on the bottom. Well, in the right version, the image will be cropped by 100 points from the top and 50 points from the left.
Once the appropriate sizes and applications have been selected, press the button OK for the changes to take effect.
To achieve the desired image dimensions, often both of the tools we have considered are used in combination. For example, let's imagine that our task is to prepare an image of a tree for printing on 15x10 cm photo paper. We know that our digital image is 2560 dots wide and 1600 dots high, which means that we are dealing with an aspect ratio of 16 :10. We need a ratio of 15:10, so first we need to crop our image in width to 2400 pixels.
To do this, open the window, in the field Width we drive in the value 2400 and press OK. After that, our image will be cropped by 80 pixels on each side, without much damage to the overall composition. Next, choose a command. Since we are preparing a drawing for printing, check the box Interpolation can be removed so as not to change the digital resolution of the image. In the dimensions of the printed print, we set the width value to 15 and check that centimeters are set as the units of measurement. In this case, the height value will automatically change to the 10 cm we need, and the resolution will change to 406.4 pixels / inch, which is redundant even for very high-quality printing. Now, after pressing the OK button, our image will fully comply with the necessary requirements and is ready for printing.
Image Rotation and Reflection
Another simple, but at the same time often demanded operations with an image are its rotation and reflection. Therefore, in Photoshop, these functions did not go unnoticed by developers.
To rotate the canvas in any direction, use the option in the menu Images.

After hovering the mouse cursor over this item, drop-down menus with all available commands will open in front of you, including:
- Flip the image 180 0 .
- Rotate the image clockwise and counterclockwise by 90 0 .
- Arbitrary rotation to any angle.
- Flip the canvas horizontally and vertically.
As you can see, all the team names speak for themselves, so comments here will probably be redundant.
Conclusion
This concludes our first acquaintance with Adobe Photoshop, in which you learned what basic elements it consists of. user interface programs, as well as learned some basic operations with a graphic document (creation, opening, saving, changing the format and size, rotation and reflection).
In the next article, we will talk with you about how Photoshop works with image fragments, and consider methods for scaling them, as well as tools responsible for selecting different sections of a document.
Introduction
Today, almost every Internet user has his own personal web page, not to mention commercial firms. The development of Internet-representations has become one of the most rapidly developing and quite expensive services. Customers are interested in creating colorful, stylish, attractive pages and Web elements. Gone are the days when corporate websites were created on their own by self-taught employees of companies, now only web design specialists do this. Web design today is an established system of design principles and techniques that not only provides a professional result, but also allows you to constructively approach the process of creating an Internet resource. And be that as it may, but graphic design underlies this process. At the same time, web graphics is not only and not so much the creation of specific objects placed on web pages, but rather a methodology for organizing space. Those who are going to professionally engage in web design, the main thing is to know and use the methods and techniques for creating images.
The purpose of my project is to create a website layout in Adobe Photoshop.
To implement my project, I set myself the following tasks:
Determine the purpose of using graphics for Web design;
Study the theoretical part: purpose Adobe software Photoshop, toolbar;
Describe the main ways in which the graphical editor tools work;
Analyze the way of presenting demonstration material to protect your project (video clip).
Develop a site layout in a graphic editor.
Key features of Adobe Photoshop
Adobe Photoshop is a program for creating and processing raster graphics, in other words, a graphics editor. Raster graphics are any image that consists of individual pixels of different colors - photos in the camera, pictures on websites, sprites in games - in general, the bulk of all graphics are raster. All this Photoshop perfectly opens up and provides an incredible amount of tools for working with the image. By itself, Photoshop is just a collection of tools that come together. But everything is done so thoughtfully and accurately that a real working laboratory is created for an artist or designer. There are drawing tools - various brushes and fills, tools for inserting and working with text, for vector graphics ... The latest versions even allow you to upload 3D models in popular formats created in 3D graphics editors.
Photoshop is such a convenient and powerful program that today almost every person, one way or another related to graphics, has this program on his computer. Web designers develop all site graphics in it, programmers - all the beautiful icons and game characters that delight our eyes, photographers - correct unsuccessful photos, removing “red eyes” and correcting brightness, contrast or color balance Photoshop is often and almost everyone needs it.
In this regard, it is clear that knowing the basics of Photoshop for someone who uses a computer not only for games is just as important as being able to type text in Word. These two programs are one of the most necessary in the set of any more or less competent "user". And therefore it is required to master and this program. Fortunately, with its convenience, Photoshop has won such a love of users that thousands of sites dedicated to it have been created, hundreds of books have been written, both for beginners and professionals, and hundreds of hours of training videos have been shot. All this is easily accessible to everyone, moreover, with any level of training. Even someone who knows nothing about graphics at all can master it and learn a lot. You just need to try to get to know this program better and the world of computer graphics can captivate you for a long time.
Greetings to all readers and visitors of the blog!
As you know, in Photoshop you can both edit photos and create your own drawings with excellent graphics, making them unique and alive. In order to master this program, you need some knowledge and skills, thanks to which you can easily cope with any tasks in Photoshop.
Where are the tools in Photoshop?
First, you need to learn the basic tools of Photoshop and remember what functions they perform.

So let's get started!
Eyedropper Tool
The eyedropper tool is activated by hotkey "I"

We need a pipette to determine the color of an object, its shade. For example, you like the color of the sky in a photo. By clicking on it with an eyedropper, we will see this color. You can do this with any thing in the open space of a photograph or image.
"Text" (Type Tool)
The "Text" function is called by a hot key "T"

You probably already guessed what you need. It is needed to enter text anywhere in the image, with any font and language.
"Dimmer" (Burn Tool)
Dimmer activated by hot key "O"
An essential tool for working with photographs. Using it, you can create shadows and give relief to objects. The more you use it in one place, the darker the color.
"Clarifier" (Dodge Tool)
Called by hot key "O"
Clarifier, antonym of dimmer. It makes the color lighter and clearer. Plays great in contrast with photographs of a cloudy sky or a stormy sea. Before using it, select the brush size and color tone.
"Finger" (Smudge Tool)
A simple and intuitive tool in Photoshop. With it, we can smear the paint on the image itself or on its edges, like with our finger, and give the picture a blur effect.
"Blur" (Blur Tool)
This tool is designed to work in manual mode to refine your masterpieces. With it, you can blur the sharp edges of an object. The longer you act on the image, the more blurry it becomes.
"Fill" (Paint Bucket)
Called by hot key "G"
The tools of this group are used to fill the selected area with the main color or the selected pattern, as well as apply a gradient to the specified surface.
Move Tool
Activated by hot key "V"
![]()
This tool is needed in order to move layers, shapes, selected areas both on the surface of the canvas and for dragging from one object to another.
Rectangular marquee and oval marquee tools
Activated by pressing the "M" key

Tools of this group are necessary for any object or its part for further editing.
Tools of the Lasso group
Activated by pressing the "L" key
"Lasso", unlike the selection tools, the oval and rectangular areas allow you to select an arbitrary area by hand. Most often, this tool is used for manual selection and subsequent cutting of an object along the contour.
Magic wand tool
Called by pressing the hot key "W"
With the help, you can significantly speed up the work of selecting a specific area of an object. That is, this tool analyzes the entire image and single-color pixels are selected.
Consider the Frame tool
Activated with hot key C.

With this tool we also make pictures.
Simply put, we crop the image around the edges or cut out a fragment of a given size from a large image.
Consider the tool group "Brush"
The brush is activated with the "B" key.

I plan to write a separate article about this tool in more detail. And here I will only say that Photoshop is the most functional tool and has large quantity features and settings.
Clone Stamp Tool
Activated with the "S" key.
With the help, as with the help of a conventional clerical stamp, you can transfer the imprint of the image from one part of the picture to another. That is, we copy a certain part of the image or transfer the whole object and paste it into another part of the picture.
Using the "E" key, we activate the Eraser tool.
As well as the tools of the "brush" group, they are quite functional and have a lot of their settings. An eraser, by analogy with a regular stationery, is used to erase unnecessary parts of an image.
Pen Tool
Activated with the "P" key

Use the tool of this group to accurately select objects or shapes, as well as to create complex contours.
Hand tool
Called by the "H" key and is used to move large documents in the workspace of the Photoshop program. For example, to scroll through landing page layouts.
Scale tool
Activated with the "Z" key.
used this tool to zoom in or out on a document or part of it while editing.