How to install custom Recovery. How to install custom recovery Installation via Fastboot mode
CWM Recovery is a custom image that allows you to fully save the current state operating system your Android. The so-called backup is needed so that, if after installation it is not official firmware your system will fly, you could return it to its normal state, that is, roll back the changes. As practice shows, CWM Recovery is the best assistant in this, as the program is simple and easy to use. In our article, we will talk in detail about the operation of this utility.
Recovery CWM: installation and first steps
On almost all devices, the installation process is identical. To install ClockworkMod (CWM), you must first download Rom Manager from the Web. In the menu of this program (first item), you can choose to install a custom image, and this is exactly what we need. At the end of the process, you can run the program - for this you need to go to Rom Manager and select the "download recovery" item there. You can also enter the utility using a combination of hot keys. However, much depends on the model of the phone or tablet. For example, you can try to hold down the power off and volume down buttons, after which the device will automatically go to the CWM menu. But there is another method. Since you can also enter CWM Recovery through the ADB program, do not write off this path either. The method is considered the most convenient. You only need to set up the connection of your tablet or phone to your computer via this utility and enter the command: "adb reboot recovery".

Dealing with and basic menu commands
Let's take version 3.0 as an example, as it is recognized as the most popular and frequently used. As for other modifications, there may be slight differences, however, the developers did not change anything except the design, so the main points are identical. The movement is carried out using the volume buttons on the device, and with the power key you can select the appropriate item. "Reboot systems" - reboot the system (performed immediately). Apply update.zip - allows you to install unofficial firmware and topics with software. If you click on this item, you will be taken to the next menu, where you need to confirm your choice. Wipe Data / factory reset - this function will allow you to restore the initial state your device. All settings will be reset and the cache will be cleared. The next section called Install zip from sdcard allows you to install Zip permission files from the CWM Recovery menu.
Main functions of Backup and Restore
We figured out a little about the main functions of the main menu of the program. Now let's see how to create a backup or copy, which, in fact, is the main purpose of the utility. The section we are interested in is located in the main dialog box and is called Backup and restore. If you go further, you will be able to observe several sections. Backup - allows you to create a copy of absolutely all partitions of the device system. The result will be saved on your memory card, and the file will be called the time and date of creation. Restore is the restoration of a backup. There is nothing complicated here, you just need to select the required file, and everything else will be done automatically. Using the Advanced restore function, you can restore a specific partition and leave the rest in current state. In principle, this knowledge is enough for you to use CWM Recovery. You already know how to install the utility, so let's look at another important point.

What to be careful about
As noted above, the capabilities of this utility are not limited to creating backups. You can format any partition of your device. But pay attention to the fact that the Format system will irrevocably erase your operating system, that is, the Android or tablet firmware, and when you delete the Boot partition, you won’t be able to do anything with your device at all, and you will have to take it to a specialist. You can also delete all data from your memory card or format certain sections of the Sd Card. If at some point you notice that the battery indicator displays incorrect information, then this is also treated using this utility. You need to go to the Advanced section and select Wipe Dalvik Cache. This will allow you to completely reset the battery statistics and restore the normal operation of all indicators. Here you can also test the functionality of the device's keys by selecting the Key test section. As you can see, working with this program is quite simple, you just need to be at least a little familiar with English language, since there is no Russian version yet.

How to create and restore a backup: step by step instructions
The first step is to reboot the device and go directly to CWM. Next, open the Backup and Restore item. Select the "Backup" subsection and agree by clicking "Yes". The process will start automatically, and at the end we exit with a reboot. As noted above, the created file will be on the memory card at CWM/backup. If you wish, you can rename it, but it is forbidden to use symbols and letters of the Russian alphabet. As for recovery, you need to restart the tablet and go to the Restore item. A list will appear in which all available backups will be displayed, select the one you need (if there are several) and confirm your decision. The process will start automatically. Reboot when finished. After that, you can use your device.

Conclusion
Now you know what the utility is for and how CWM is installed via Recovery. If you plan to install unofficial kernels, firmware, themes, games or applications, then first of all pack them in zip format, then install them through the CWM menu. Another small detail is that the recovery must be performed when the battery charge is at a sufficient level. The fact is that if the device turns off in the middle of the operation, there is a high probability that it will no longer turn on, or backup copy will be created incorrectly. Basically, it's all helpful information, which you may need while working with this utility. It is strongly not recommended to remove system folders and files even if you do backup or recovery. Pay special attention to the integrity of the Root and System files, since the performance of the device directly depends on their safety. If you do something wrong, you will not be able to repair the device under warranty.
By default, all Android devices have a recovery mode called Recovery. With it, you can roll back the operating system to default settings, install official additions and fixes. If this is not enough for you and you want kernels and utilities on your device, then you need to replace it with a custom one.
Custom recovery: what to choose
The most popular custom recovery for Android are Clockworkmod Recovery (CMD) and TeamWin Recovery (TWRP). The main difference between one program and another is the presence of touch control in the latter. As for the functionality, the software offers approximately the same list of options:
- Installation of unofficial patches, firmware;
- in ADB mode and instead of a removable drive;
- Formatting, creating, merging partitions in the internal memory of the device;
- Clearing the software cache and battery summary;
- Creation of backup copies of the system.
After studying the methods below, you can easily install custom recovery on Android. You need to get Root-rights before carrying out work.
Ways to install TWRP
You can install TWRP recovery using special utility software developer ( TWRP Manager), third-party software, designed for flashing recovery, and Android Debug Bridge (ADB).
Installing TWRP using TWRP Manager
Your first step is to download TWRP Manager from the Play Store and install the application on your device. The utility must be opened to give rights to Root access. Then:
- in the menu that appears on the left, select "install twrp";
- a window will appear in front of you where you need to select the device and the version of the recovery that you want to install;
- after selecting all the settings, click “install recovery”;
- the program will automatically download the recovery and install it;
- if you want to install specific version recovery that you downloaded in advance, then you need to save recovery.img and select it through the “select img file” item.
ADB as a way to flash recovery
Such a solution with reinstalling the recovery is suitable for advanced PC users. To carry out the manipulations, you will need an Android device, a computer and a USB adapter. First you will need to install the Android SDK with all packages along with the Google USB Driver. After that:
- save the Recovery.img version of TWRP supported by your smartphone to your computer;
- rename the recovery file to twrp.img, save it to the root memory of your device.
Run command line PC operating system (cmd in Windows). Write the following lines in it:
- cd C:\android-sdk-windows\platform-tools\adb;
- su
dd if=/sdcard/twrp.img of=/dev/block/mmcblk0p34.
After that, reboot your device.
Ways to install CMD
You can install CMD using Rom Manager, or third-party utilities for firmware recovery.
Installing CMD using Rom Manager

- Download Rom Manager from the Play Store and install it on your device. Don't forget to give it Root access.
- After starting the program, a window will appear, including several sub-items. You will need to go to the "Recovery Setup" tab.
- A new window will appear. There select CMD. After that, you will need to select the model of the device on which the recovery will be installed.
- After that, another window will appear where you must confirm your actions.
Rom Manager will download the files to install the recovery, ask for Root rights if you did not provide them by default. After that, she will proceed to install the software. When everything is finished, you can check CMD installation by going from the main menu to the "Reboot into Recovery" tab.
CMD installations in FastBoot mode
To reflash an Android device in this way, you will again need to download the Android SDK, a USB driver for your smartphone / tablet. Save the recovery file from the CMD site, rename it to update.img, save it to the platform-tools folder located in the directory of the installed Android SDK. Then enable USB debugging on your Android device.
Launch Command Prompt and enter the following commands:

If everything goes well, a corresponding notification will appear on the command line.
Installing CMD and TWRP via Flashify
As we mentioned earlier, they install custom recovery for Android with third-party utilities. One of them is Flashify. A distinctive feature of the program is compatibility with many models of smartphones and tablets. You need to install the software on the device and allow it to use Root rights. 
Since the theme android firmware devices is very relevant, I decided to write about installing CWM Recovery on an Android smartphone or tablet. There are several ways to do this at once: for some, all actions are performed on the device itself, but this requires root rights, while for others, a computer is used when installing custom recovery. Whatever seems easier or more convenient to you, use it.
Method 1. Installing CWM Recovery via ROM Manager
First way Firmware Recovery is to use the ROM Manager program, which we already talked about in the article:. This application has a separate item that allows you to install ClockWorkMod Recovery in a couple of minutes.
I want to note right away that ROM Manager requires root rights. How to get them you can read and.
After that, go to the official page https://clockworkmod.com/rommanager and see if your device is on the list of supported ones.
1. Now open the ROM Manager and select the first item "Recovery Setup".

2. In the next window, in the "Install or update Recovery" section, select "ClockworkMod Recovery".


4. At the bottom, click on "Install ClockworkMod".

5. The download process will begin. At good internet connection, it lasts a couple of seconds.

6. At the end of the download, you will be prompted to grant root access to the application. Select Grant.

7. That's it! You will see the notification "Successfully flashed ClockworkMod recovery!". Just click OK.

That's how easy it is to flash the CWM Recovery through the ROM Manager. Now you can open it and find new items in it that were not in the standard one.
Method 2. Install custom Recovery on Android using the FastBoot utility
All the steps described below are similar to installing TWRP Recovery:.

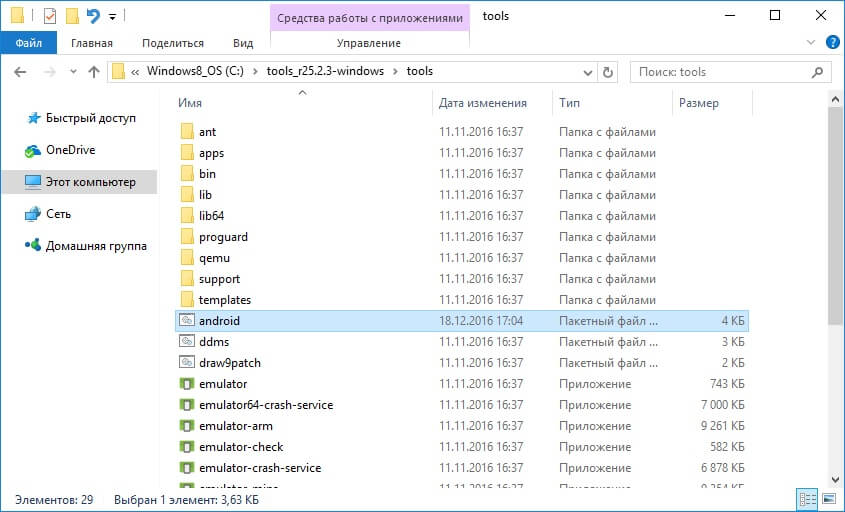
Unzip the folder to the "C:" drive - inside there will be "tools", and in it the "android" file. Run it.
Select "Android SDK Platform-tools" and click "Install package".

Check the box "Accept License" and then click "Install".

After the installation is completed, in the "tools_ version-windows" will show "platform-tools" and it has "fastboot" and "adb". They will come in handy for us.

UPD: The "platform-tools" folder on my computer is in a different directory than yours. The fact is that this article was written back when there was an installer for the Android SDK. Starting from the 25th version, installation is carried out only from a ZIP archive: because of this, part of the instructions had to be edited. Therefore, the path to ADB and Fastboot is different from mine, everything else remains unchanged.
If you have a Sony, HTC, Nexus, Huawei or LG device (some models), the Bootloader is blocked. How to unlock it is described on our website:
- For HTC: ,
Let's start the Recovery firmware:
1. First of all, go to this page and download the version of the "recovery-clockwork.img" file for your device. Note that most devices have both touch and classic versions. Download the one you like best.
2. Now place the CWM recovery file in the "platform-tools" folder. I also renamed it "recovery.img" (you'll see why later). I recommend that you do the same.

3. Connect your tablet or smartphone to your computer using USB.
In this case, the device must be loaded into fastboot mode. Usually, to do this, on the switched off device, you need to hold the key combination: Power + Volume down. But this combination may differ depending on the manufacturer of the device.

UPD: it is much easier to switch to fastboot mode as follows: turn it on on the device, go to the command line (point 4 below tells how to get into it) and enter the commands in sequence, while pressing “Enter” after each.
cd path to "platform-tools"
I got it like this:
Your path will look different. If you acted exactly according to the instructions, it will come out (in any case, see the path in the corresponding line of Explorer):
cd\tools_r25.2.3-windows\platform-tools
On the screenshot you can see how I entered the same commands. As a result, the device will boot into fastboot mode.
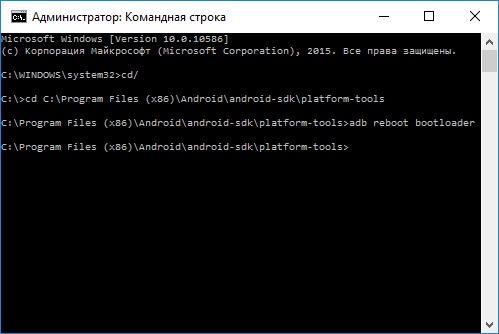
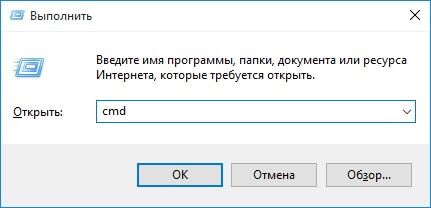
4. Now open the command line (or skip this item and continue to work with it if you just transferred Android to fastboot mode through it). The easiest way to get there is to press the key combination "Win" + "R" and enter:
After that, click "OK".
5. You will be taken to the command line.

6. Now you need to specify the path to the firmware folder. Enter the following command to navigate to the back folder.
Press "Enter".

7. My path to the recovery folder is: "C:\Program Files (x86)\Android\android-sdk\platform-tools". So I enter (you write your own):
cd Program Files (x86)\Android\android-sdk\platform-tools
And press "Enter" again.

8. It remains to enter:
recovery.img"recovery.img" is the name of the file being flashed. Remember I advised you to rename the file from the recovery? We did this for convenience, so as not to enter something like "recovery-clockwork-6.0.4.7-flo.img".
After entering this command, press "Enter" again.
9. As a result, we get the following message.

Congratulations! You have successfully installed custom recovery (CWM) using the Fastboot utility!
Method 3. We flash Recovery through the Rashr application
This method is also incredibly simple and convenient, but requires root rights. Their receipt is written at the beginning of the article in "Method 1".
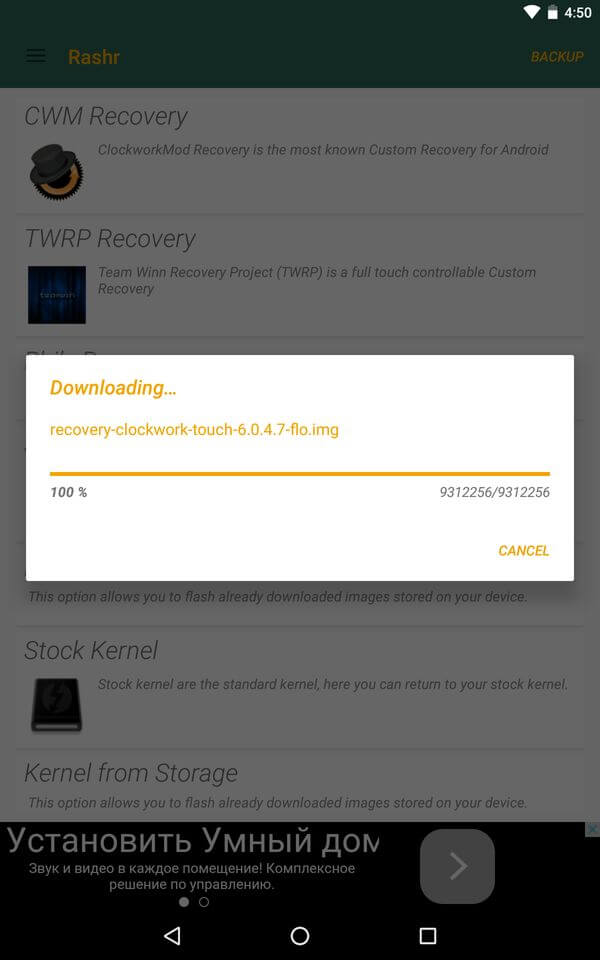
1. Install the Rashr - Flash Tool app from Google Play, open it and grant Root rights.

2. In the list of options, select "CWM Recovery".

3. Then the program will display a list of available Recovery for your device. In my case, Rashr showed 2 options: ClockworkMod with support for taps on the screen and the classic version (controlled by the volume and power buttons).

4. When you see the download prompt, click Yes.

5. Then the download of CWM Recovery for your Android smartphone or tablet.
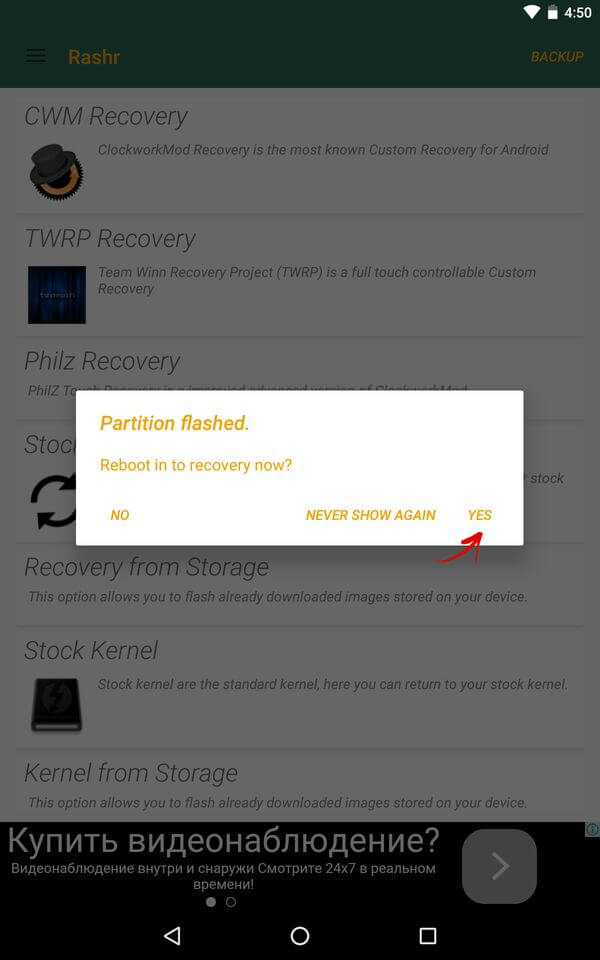
6. At the end, a notification will appear that the firmware was successful and now you have a modified recovery installed. You can reboot into it and try out its work. To do this, click "Yes".
Perhaps this installation method can be called the easiest. The only thing it needs is the presence of root rights.
Method 4. Install Recovery on Samsung in Odin
If you have Samsung device, you can install ClockWorkMod Recovery on Android using the proprietary Odin utility. Here I will briefly explain what to do. I recommend reading our article:. In her detailed information about using Odin.
Every smart device, be it Windows, Android, iOS or otherwise, has a special mode that turns on without using the main operating system. And if Windows has Bios and partially " Safe mode", then all Linux systems, which also include Android and mobile Apple devices, there is a special "Recovery Mode" or simply Recovery (recovery). Using this mode, you can install operating system updates and reset to factory settings. To enter the recovery, a special key combination is usually used, the standard is Power + Vol- / Vol +, which are clamped on the switched off smartphone.
For users who want to make the most of their device's resources, the pre-installed Recovery is not enough. Especially for them, modifications and redesigned recovery modes have been developed that fully open access to file system smartphone, which gives you the opportunity to:
- complete reinstallation of the firmware
- installations individual elements firmware;
- flexible cleaning system;
- creations;
- restore from Backup;
- creating or formatting partitions in flash memory;
- connecting to a PC via USB in ADB or "flash drive" mode
Despite the significant expansion of the basic functionality of the recovery mode, installation requires certain knowledge and skills.
Incorrect operation or omission of important details may cause the device to malfunction. You should also be aware that the instructions below can only serve as a general guide, and the necessary files and drivers must be selected for a specific device, for a specific version of Android and processor architecture.
Ways to install Custom Recovery
ROM manager
The simplest method that does not require much experience in non-standard work with the device. The only thing you need is , which will not be difficult to get if you follow our guide.The essence of the method is to install special application- . Then do everything in strictness with step-by-step instructions:
You can check the success of the operation by returning to the main menu of the utility and clicking " Download Recovery Mode". If everything went well, then the newly installed modified recovery mode will start. In case of failure, the phone simply will not turn on and you will have to restore it using the FastBoot mode, but this is in most cases, but if you are very unlucky, then going to the SC or for a new phone provided.
TWRP rom manager
Almost the same as ROM Manager with the only difference being that a recovery modification from another developer will be installed -.
The application has a narrow functionality, which consists in determining the device and downloading the desired setup file followed by installation. Understanding the utility will not be difficult even for a beginner.

In addition, there is useful feature to create in just a few clicks. True, such an opportunity will appear only after installing the TeamWin Recovery Project.
Firmware Custom Recovery via FastBoot
A universal way to install a modified recovery mode that is suitable for most devices. It differs from the first two methods in increased complexity in mastering, as well as the ability to install not only ClockworkMod and TWRP, but also other Recovery modifications, for example, PhilZTouch.
Before proceeding with the direct installation, you need to thoroughly prepare. The first step is to install the driver on the PC to connect mobile device to a computer via USB. Below are the links of drivers for major smartphone manufacturers:
- Sony Android USB; (https://developer.sony.com/develop/drivers/)
- HTC Android USB; (https://www.htc.com/us/support/)
- Samsung Android USB; (https://www.samsung.com/us/support/downloads/)
- LG Android USB; (https://www.lg.com/us/support/cell-phones)
- Motorola Android USB. (https://support.motorola.com/us/en/solution/MS88481)
In the case of a different brand of phone, you need to look for a USB driver on the official website of the vendor.
Next, you need to visit the official resource of the operating system developers for downloading and installing on a PC Android platforms SDK (Android SDK from Google). After launching the SDK, you need to download the Android SDK Platform tools, Android SDK Tools, and Google USB Driver packages. In its full form, the distribution takes up quite a lot of hard disk space, and it also takes a long time to install, and therefore you have to wait.

The last step is to download the recovery file, rename it to update.img and copy it to the platform-tools folder, which can be found in the Android SDK directory. Take the required recovery under specific device best in specialized forums, since incorrect choice the image of the recovery and its subsequent installation can lead to sad consequences.
When the preparation is over, you can proceed to the direct firmware: 
You can enter recovery mode using the key combination described above, or use the application, which is much easier and more convenient.
Finally, it is worth noting that this instruction Suitable for many devices, but not all. That's why this manual should be used with caution as the firmware Custom Recovery- a potentially dangerous procedure, after which the device may stop working.
Everyone who takes the first steps in learning the procedure for flashing Android devices initially pays attention to the most common way to carry out the process - flashing through recovery. Android Recovery- a recovery environment that almost all users of Android devices actually have access to, regardless of the type and model of the latter. Therefore, the method of flashing through recovery can be considered as the most easy way upgrade, change, restore or completely replace software device.
Almost every device running the Android OS is equipped with a special recovery environment by the manufacturer, which provides, to some extent, ordinary users, the possibility of manipulating internal memory device, or rather, its sections.
It should be noted that the list of operations that are available through the "native" recovery installed in the device by the manufacturer is very limited. As for the firmware, only official firmware and / or their updates can be installed.

In some cases, through factory recovery you can install a modified recovery environment (custom recovery), which in turn will expand the possibilities of working with firmware.
At the same time, it is quite possible to perform the main actions for restoring performance and updating software through factory recovery. To install the official firmware or update distributed in the format *.zip, perform the following steps.


How to flash a device through a modified recovery
Modified (custom) recovery environments have a much wider list of options for working with Android devices. One of the first to appear, and today a very common solution, is the recovery from the ClockworkMod team -.
Installing CWM Recovery
Since CWM recovery is an unofficial solution, you will need to install a custom recovery environment on your device before using it.


- For Samsung devices, in most cases, the application is used.
- For devices built on the MTK hardware platform, the application is used.
- Most universal way, but at the same time the most dangerous and difficult is flashing the recovery through. The steps to install the recovery in this way are described in detail at the link:
Firmware via CWM
With the help of a modified recovery environment, you can flash not only official updates, but also custom firmware, as well as various components of the system, represented by cracks, additions, improvements, kernels, radio, etc.
It is worth noting the presence a large number versions of CWM Recovery, so after logging in to various devices you can see a slightly different interface - background, design, touch control may be present, etc. In addition, some menu items may or may not be present.

The examples below use the most standard version of the modified CWM recovery.
At the same time, in other modifications of the environment, when flashing, items are selected that have the same names as in the instructions below, i.e. a slightly different design should not cause concern to the user.
In addition to the design, the management of CWM actions in various devices differs. Most devices use the following scheme:

- Hardware key "Volume+"— move one point up;
- Hardware key "Volume-"— move one point down;
- Hardware key "Nutrition" and/or Home- confirmation of the choice.
So firmware.


Firmware via TWRP Recovery
In addition to the solution from the developers of ClockworkMod, there are other modified recovery environments. One of the most functional solutions of this kind is. How to flash devices using TWRP is described in the article:
This is how Android devices are flashed through recovery environments. It is necessary to carefully approach the choice of recovery and the method of installing them, as well as flash only the appropriate packages received from reliable sources into the device. In this case, the process proceeds very quickly and does not cause any problems afterwards.