Mail mail setup. Yandex mail settings for email clients on computers and mobile devices
class="eliadunit">
E-mail has become so firmly established in our lives that it is unthinkable to imagine how we would communicate on forums, exchange information, photos and videos without this useful service. Increasingly, there is a need to have two or three, or even five or even ten postal addresses: for work colleagues, partners, friends, forums, mailing lists, etc. etc. Working with such an army of mailboxes through ordinary web interfaces on the sites of postal services is time consuming and significantly increases the cost of the Internet. This is where email programs come to the rescue.
What is a mail program? This is a program installed on your PC in which you can receive, write, send and store emails and their attachments directly on your computer without accessing the mail site through a browser.
An email program is also often referred to as an email client, a Email, e-mail client, mailer.
Today there are many email programs. We will consider the most common of them, working in the operating room. Microsoft system Windows:
Windows Mail (default set to Windows Vista)
- Microsoft Outlook Express (installed by default on Windows XP)
- Outlook Office 2007 (included in the software package Microsoft office 2007)
- Outlook Office 2003 (part of Microsoft Office 2003)
We will analyze all the main points using the example of the Windows Mail program that comes with all operating systems Windows Vista family. And then we will step by step analyze the process of setting up other mail programs.
As an example, we will use mailbox to mail.ru with the name and password.
So let's get started.
How to Set Up Windows Mail in Microsoft Vista
Record ID: 32 does not exist!
1. First of all, let's start the mail program.
From the Windows Vista Start menu, click All Programs and select Windows Mail from the list that appears.

2. Let's start creating a new email account. To do this, in the "Service" menu, select the item "Accounts ...".

3. In the window that opens, click the "Add" button.

4. Select the type of added account- "E-mail account" and click the "Next" button.

5. Enter the name that will be displayed in the "From" field of all letters sent by us. For example, Anna S. And press the "Next" button.

6. Enter our email address, for example This email address is being protected from spambots. You must have JavaScript enabled to view., and click the "Next" button.

7. Now the most difficult part of the work - setting up receiving and sending mail. To do this, you need to enter the names of the corresponding servers - POP3 and SMTP. Let's figure out what it is.
POP3- from the English "Post Office Protocol Version 3", translated as "post office protocol of the third version." It is used by the mail program to receive mail from the server. In our example, mail.ru is the server, because That's where the email is registered.
SMTP- from the English "Simple Mail Transfer Protocol", translated as "simple mail transfer protocol". It is designed to transfer mail to the server (in our example, to mail.ru) and from the server to the recipient.
For greater clarity, let's draw an analogy with the postman. The POP3 postman brings incoming mail for you from the post office, which is mail.ru. The SMTP postman takes your mail, takes it to the post office (mail.ru), and from there delivers your letters to the recipients.
Thus, if thanks to POP3 we receive mail, then thanks to SMTP we can send it. The operation of these protocols is invisible to our eyes. However, any mail program must specify which protocols to use.
In our example:
Incoming message server for receiving mail: pop3.mail.ru (where pop3 is the protocol for receiving mail, and mail.ru is the system where the mailbox is registered)
- outgoing server for sending mail: smtp.mail.ru (where smtp is the protocol for sending mail, and mail.ru is the system where the mailbox is registered)
Note: If you have a list.ru or bk.ru mailbox, then you need to write them instead of mail.ru. Then you get pop3.list.ru or pop3.bk.ru for receiving mail, and smtp.list.ru or smtp.bk.ru for sending mail. The same principle applies to any other mail systems: yandex.ru, rambler.ru, etc. Everywhere a period and the name of the mail system are added to pop3 and smtp. For example: to receive mail from pop3.yandex.ru or pop3.rambler.ru; to send smtp.yandex.ru or smtp.rambler.ru mail.
So, we entered the server names for receiving and sending mail: pop3.mail.ru and smtp.mail.ru. Each field should have only one name.

8. There is another interesting option in this window. Many mail systems, including mail.ru, for security reasons, ask for your mailbox name and password when sending and (or) receiving mail. In this case, be sure to check the box next to the item "Outgoing server requires authentication." Now you can click the "Next" button.

9. Now enter the mailbox name and password. In our example, this This email address is being protected from spambots. You must have JavaScript enabled to view. and password. When entering the password, black dots will be displayed - as it should be, 1 dot = 1 character. This is done for security purposes so that no one can spy on the password.
In this window, we will also check the box next to "Remember password" so that the mail program does not ask us to enter it every time we send or receive mail. We press the "Next" button.

10. The mail program setup is almost complete. In the next window, we need to make an important decision: whether or not we want all our incoming letters to mail.ru to be downloaded to the computer into the mail program.
If we don't want to, then check the box next to "Do not download email messages."
V otherwise don't check the box. However, remember that if you have a lot of messages in your inbox and they are large, you risk spending a lot of traffic and time downloading them.
Having decided on the checkbox, click the "Finish" button and complete the setup of our mail.

11. The email account you just created will appear in the list. Click the "Close" button at the bottom of the window.

The mail program setup is complete. Now you can write, send and receive emails directly from your computer.
How to set up Outlook Express in Windows XP
1. Open the program by clicking "Start" - "Programs" - "Outlook Express".

2. In the "Service" menu, select the "Accounts" item.

3. Click the "Add" button and select "Mail ..."

4. Enter the name that will be displayed in the "From" field of all letters sent by us. For example, Anna S. And press the "Next" button.

5. Enter our email address and click "Next".

6. Let's select and the list "Server of incoming messages" - POP3.
In the field "Server of incoming messages" enter pop3.mail.ru.
In the field "Server of outgoing messages" enter smtp.mail.ru.
Let's press the "Next" button.

7. We maintain an email address - This email address is being protected from spambots. You must have JavaScript enabled to view. and the password to access this e-mail box is password. Check the box next to "Remember password" and click the "Next" button.

8. To complete the account setup, click the "Finish" button.

9. Our mailbox appeared in the list. But on this postal setup Microsoft programs Outlook Express is not yet complete. Many mail systems, including mail.ru, ask for your mailbox name and password when sending and (or) receiving mail for security reasons.
To configure this option in Microsoft Outlook Express, select the newly created email account and click the "Properties" button.

10. In the window that appears, go to the "Servers" tab. Check the box next to "User Authentication"

and click the "Settings" button. Make sure that the item “As to the incoming mail server” is selected there and click “OK” in all the boxes.

11. In the Accounts window, click the "Close" button.
This completes the configuration of the Microsoft Outlook Express mail program.
About 10 years ago, when I was just starting to look for ways to make money online, I could not find a normal training. You are more fortunate, there are cool tutorials on earning opportunities in in social networks and not only. For those who are interested, you can see here.
We continue to consider the main question. Let's lay it all out clearly. As they say, "on the shelves." Ready? If there is no e-mail yet or you are planning to create another address, then just in case I give step by step instructions about how free.
IMAP and POP3 protocols
What it is? It's simple - these protocols are used for the correct operation of email programs on your device. Now let's see what is the difference between them and what specific settings can be used.
IMAP is used to synchronize with the main server. When using this protocol, letters will be stored both on the Internet and on the computer itself. This has a significant advantage - access to correspondence can be obtained from different devices, since it is available through the network. Of course, only for those who have a username and password from the account. If you forgot, then you can.
When tweaking an email client by working with the POP protocol, you need to know one of its features. The emails you send will be stored exclusively on your computer. Therefore, it will not be possible to view them from other devices. This feature work will be good for corporate mail where privacy is important.
Main settings
Let's show you how to set up your yandex mail in the screenshot to make it clearer. To get started, go to your mail and click on the "gear" in the upper right corner.
When clicked, a list will pop up. We do as in the screenshot.

Select the mail program settings as shown below.

Now you can select the protocol you wish to use.

You may need to enter the following information to set up your mail client:
- Addresses of servers through which letters will be transmitted and received;
- Port number for communication with the server;
- The type of connection over which the data will be encrypted.
Both protocols have the same server for sending your letters - smtp.yandex.ru. SSL is used to protect data. Other settings are slightly different.
In IMAP, you need to use port 993 for incoming messages, and 465 for outgoing messages. In POP3, 995 and 465, respectively. imap.yandex.ru, pop.yandex.ru are server addresses for incoming mail for IMAP and POP3, respectively.
Setting example

For clarity, I will show the setting on Microsoft example Outlook, which is quite easy to use. Is it already installed on your computer?
First, open Outlook and click "file".

Click on the "add account" button and look at the following screenshot.

Choose manual setting.

We choose to work with already familiar protocols.

At this stage, we enter the parameters that are described above. As you can see, Outlook is set up quickly and easily.
Setting up mobile devices
The owner of mobile devices is very lucky. Usually, you don't really need to do anything. On phones and tablets with Android system I often see pre-installed email applications that are almost ready to use. Unless you need to enter your credentials (login, password) so that the mail client can access your e-mail box with correspondence.
If you still want to go to detailed settings, then for IMAP all the same 993 and 465 ports that I mentioned earlier are used. Connection servers are the same. The only thing that can be displayed for a secure connection is SSL/TLS.
Do you have something to add or did not find necessary information? Report it in the comments. Perhaps your information will be useful to other users or I will add information of interest to you in the future.
Useful opportunities for business people
A huge number of people use mail programs on their computers and mobile devices. Do you know how they are used by people who make money on the Internet? I will not paint absolutely everything, I will only briefly talk about common features. For work purposes, mail applications can be useful for the following purposes:
- Simultaneous work with work and personal electronic mailboxes;
- Operational correspondence with customers;
- Usage shared files through the use of Ya.Disk capabilities in conjunction with mail.
Do you already know how to work and earn money online? To do this, it is not at all necessary to be a professional designer, programmer. Are you actively interested in, for example, the possibilities of social networks? If yes, then there might be a job for you. The main thing is to be able to do it. There are cool tutorials where you can find something interesting for yourself. You can look here.
This concludes the article. I hope that I have clearly explained how you can set up yandex mail for various devices. You may also be interested in how to mail clients. Subscribe to updates in the form below or follow them on social networks, I will be glad to see you.
Hello dear visitors of my blog. We continue to get acquainted with the Mail.ru service. In the previous article, we analyzed the topic of registering an account on Mail.ru, which you will find. And today, let's get acquainted with the settings of this mail, namely, we will try to answer the question "".
Many users are familiar with this service because it has been around for a long time. And many in this service have several mailboxes that were created for various purposes.
Let's go to the mail.ru page and go to the newly created mailbox. Now we click on the “Set up” link and get to the Mail.ru mail settings page.

So the first section "Working with Letters" in which, you are asked to adjust the size of the list of displayed letters on the page of your mailbox. Also, the ability to set up notification of new letters in Chrome browser, Emptying the trash, moving on to the next emails, and saving contacts to the address book. All this is done quite easily, so we will not focus on this.

In the second section " Themes", Everything is also very simple. We are offered to change the design of the mailbox by setting a specific theme. Let's choose one topic and see the result of the changes appearance mailbox. That's what I did:

The next section is "Folders", in which 5 folders are created by default (Inbox, Sent, Drafts, Spam, Trash). But, you are free to create the number of folders you need, for this you just need to click on the "Add folder" button, enter a name for the new folder.

Next section "Filters and forwarding". In this section, there is only one button "Add filter", click it. As a result, the filter creation wizard window will open.

We create conditions, such as the subject of the message, size or sender, and so on, upon fulfillment or non-fulfillment of which, some actions will need to be taken.
In chapter "Free SMS Notifications", you can set up free SMS notifications for new emails. Notifications can only be configured for one mobile phone. This phone is used for notifications on all Mail.Ru services. By default, this section of settings is disabled, but you can easily enable it, and by checking the boxes in certain lines, configure it.

Next section "Mail from other boxes" very important, because she is responsible for collecting correspondence from your other mailboxes in various popular mail services. And since most users use multiple mailboxes, this feature is indispensable. In order to set up the collection of correspondence from others mail services, you need to enter a username and password from your mail on another service.

It is possible to use hotkeys. For example, "Ctrl key" + "Arrow left or right" allows you to navigate between letters when viewing them. The "Delete" key deletes the viewed message to the Trash.
This concludes my general overview of Mail.ru mail settings. Good luck!
The epistolary method of communication over the years has turned from a paper form into an electronic one. There are 200 mail services on the Internet, with the help of which users communicate and send data via email. Each online mailer has its own structure and individual interface, but along with this, programs have been developed that work with mail without a browser. The question arises of how to correctly create an external electronic address in a computer program. An example of setting up Mail.ru - Outlook will help answer it.
Local mail client
Online developers computer programs offer users a choice of software that acts as an electronic client. Each local mailer has an individual interface and useful features. But is it worth loading the computer with programs if they are available for browser use? Yes! Proof of this is Microsoft Outlook 2013 and Outlook Express clients. Itself in Outlook usually does not take much time from users.
A person usually has two or three email addresses that he uses regularly, but these accounts are registered on separate online services. Of course, it is allowed to operate with one mailer, setting up personal boxes on it. But in this case, the external service does not guarantee that a letter with a foreign domain name will be sent correctly.
The Outlook interface was created for users regardless of the level of computer skills, so setting up an online resource is considered on it. An example of an external service will be the Mail.ru online mailer.
What you need to set up Mail.ru - Outlook
Before proceeding directly to work, it is worth checking:
- An account registered on the Mail.ru website.
- Installed Outlook.
If the MS Office package was previously present, the mailer will be found among the list of standard software. Outlook 2013 or Outlook Express can be downloaded as a separate component
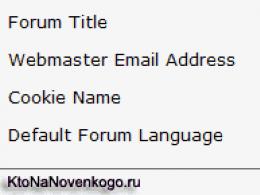
in Outlook 2013

3. Select the connection protocol.

4. Specify user parameters and information about the server.


It should be borne in mind that for IMAP the incoming mail server is imap.mail.ru; for POP3 - pop.mail.ru.


Instructions for Express - Mail.ru
1. In the "Service" tab, go to "Accounts".

2. "Add" button, then "Mail":

3. Data for outgoing and incoming servers are indicated:


5. When the Outlook - Mail.ru account setup is completed, you need to open the "Properties" of this account.


6. In the "Advanced" tab, enter the ports for receiving and sending letters.

7. Allow downloading folders from the specified servers.

8. The account is set up.
What are the nuances to pay attention to
During the setup of Mail.ru - Outlook, problems may arise that are easy to fix. The main thing is to follow some rules:
1. The account is indicated by the full name with the inclusion of the "dog" icon and the domain ([email protected]).
2. The username of the mail recipient in the "From:" line can be different, it is not necessarily the name and surname of the sender.
3. Carefully check the input ports of the incoming / outgoing server.
4. To copy the information received by the local mail client to an external resource, uncheck the "Delete copy from the server ..." checkbox.
By installing a local Outlook mailer and setting up Mail.ru - Outlook, the user will be able to receive and send messages, and a number of additional functions will also appear.
1. It will become easier to manage an account of an external mailer.
2. Message filtering is set by individual sender; on the topic of the letter; single word or subject line.
3. Archiving messages and further processing is much faster.
4. The contents of the folders are organized according to preferences.
6. A local mailer will help you organize and plan your working day thanks to the calendar. This feature allows the user to create a schedule and set reminders.
7. The Outlook address book can be synchronized with mobile operating systems by transferring contacts to or from the phone. In addition, business cards are created in the address book for each participant with information about the location, company, phone number, and more.
8. Outlook messaging system allows sending and receiving
The Bat is one of the most famous e-mail programs. It gained its popularity many years ago due to its wide functionality and ease of use. You can receive Email using it from almost any service that supports SMTP, IMAP or POP3 protocols.
Such is, for example, the popular mail.ru resource in Runet. Based on the data for connecting to it, we will consider creating a new account in the program. And let's take a closer look at how the setting is made mail.ru in the bat.
Setting up mail ru mail in the bat
And so let's start setting up mail.ru mail in the bat. To connect a mailbox, you need to run the program and select the "Box" section in the top menu. After clicking on it, a list should open, from which we will be interested in the “New mailbox” item.
Clicking on it will open a dialog box.
First of all, you need to come up with a name for the account (you can enter any one), but leave the Home directory by default. This is where your mail will be stored.

In the next window, you must enter the name, postal address and organization. Click "Next" and proceed to the next step, which will require you to specify the details of connecting to the service.

They must be entered correctly:
- specify the IMAP4 protocol (POP3 is also possible, but it has a number of drawbacks and requires other settings);
- "Server for receiving mail" - imap.mail.ru;
- "SMTP server address" - smtp.mail.ru;
- in the checkbox "My SMTP server requires authentication" put a tick.

Now, by clicking on “Next”, we proceed to the next step, where you will need to enter authorization data. In the appropriate paragraphs, enter the email address (including the "@" symbol and Domain name) and email password.

This completes the bat box setup. At the final step, the program will ask if the user wants to check other settings. We agree.

A window will open with general settings, where we will be interested in the item "Transport". There will be a couple of drop-down menus in which you need to select "Secure connection special. port (TSL)".


Next, in all the settings windows, click on "OK", after which the mail will be configured and ready to go. That's all, the bat mailbox setup is completed; now you don't need to constantly go to the mail.ru website and check your mail, you just need to run TheBat.
If something is not clear to you or you can’t set up a mail.ru mailbox in thebat, then here’s a link for you - https://help.mail.ru/mail-help/mailer/tb
Using "The Bat" you will receive mail almost instantly. In this case, the program will notify you of new letters, and you will not have to look at the mail client every time in order to find out about new correspondence, as is necessary in the case of the web version.