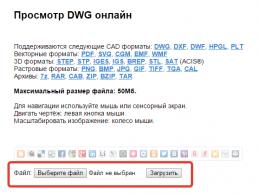
Setting up a feedback form contact form 7. What is there what
Want to display form fields feedback made with Contact Form 7 plugin in several columns? This simple guide will allow you to do it in a couple of minutes.
Paste this CSS code in any convenient way. Alternatively, this could be: your theme's style.css file, additional styles in the active theme customizer, or an additional plugin to insert CSS.
One-half, .one-third, .two-third, .one-fourth ( position: relative; margin-right: 4%; float: left; margin-bottom: 10px; ) .two-third ( margin-right: 2.5%; ) .one-half ( width: 48%; ) .one-third ( width: 30.66%; ) .two-third ( width: 66%; ) .one-fourth (width: 22%;) .last ( margin-right: 0 !important; clear: right; ) @media only screen and (max-width: 1024px) ( .one-fourth ( width: 100%; margin-right: 0; ) ) @media only screen and (max-width: 767px) ( .one-half, .one-third, .two-third ( width: 100%; margin-right: 0; ) ) .wpcf-wrap ( min-height: 90px; ) div. wpcf7-response-output ( width: 100%; clear: both; margin: 0; ) .wpcf-accept ( clear: both; ) .wpcf7-acceptance > .wpcf7-list-item ( margin: 0; ) .wpcf- accept > .wpcf7-form-control-wrap ( display: inline-block !important; )
Contact Form 7 fields in 2 columns
To make the form fields into 2 columns, you need to use a similar construction, which you need to insert into the main field for creating the Contact Form 7 form:
The name and email fields will line up in two columns, and the text area for the message will be below them.
Contact Form 7 fields in 3 columns with confirmation
If you want to make a horizontal form, where all the fields and the submit button will be in one line, and the field for confirming consent to data processing is below them, then use a similar design.
Contact Form 7 fields in 3 columns without confirmation
If you think that confirmation of consent to the processing of personal data is for wimps, then here is the option without it:
Contact Form 7 fields in 4 columns
Well, on the track, fields and the Contact Form7 button in 4 columns. With confirmation:
And without confirmation:
How to remove automatic insertion of P tag in Contact form 7
By default, Contact Form 7 inserts a tag
When it creates its markup. This often leads to unpleasant surprises and if you encounter one, then you need to do the following.
- Find the wp-config.php file in the root folder of your site;
- Scroll to the bottom of the file and look for the comment /* That's it, no further editing. Good luck! */ or /* That's all, stop editing! Happy blogging. */ ;
- Paste this code define("WPCF7_AUTOP", false); ABOVE the inscription from paragraph 2;
- Save the file.
This is how we can display the Contact Form 7 in 2, 3 or even 4 columns very easily. Of course, it is impossible to analyze 1000 and 1 situations in just one article. Write your situations in the comments! We will analyze and supplement the article together. Just indicate which version of the code you are using.
(Last update: 05/19/2019)
Greetings, dear reader! Today I will show you how to create a contact form with the author of a website / blog in WordPress using the popular Contact Form 7 plugin (over 5 million installations). Post included : correct setting Contact Form 7, spam protection, how to change and customize the appearance of the form. He also pointed out the main reasons - why the contact form does not work and does not send letters .
contact form is an important means of keeping in touch with your readers and vice versa. Strike a personal letter, make an offer to the author (which he cannot refuse), ask a question, send some and much more. All this will take over and will not disclose valuable information to outsiders, our contact form WordPress Contact Form 7. That's it, that's it. I wrote it like that, I liked it myself.
Oh, the letter has arrived! Contact form 7 well done
I will not bore you, dear reader, with any scribbling - let's get down to business. Installation and correct configuration of the module for WordPress - contact form 7.
WordPress Contact Form 7 Plugin
Plugin for WP Contact Form 7
Contact Form 7 can manage numerous contact forms where you can flexibly customize the content of the forms and mail with fairly simple markup. Forms have built-in support for Ajax submission, CAPTCHA, Akismet's spam filter, and more.
All manipulations are performed in the WordPress admin panel. In order to install the plugin, in the "Plugins" section, click "Add New". We enter in the "Search" window Contact Form 7. Naturally, it will be displayed first. Click the button "Install:
How to install the plugin
Contact form #1 by default
From the picture you can see that by default there is a standard version of the contact form and a ready-made shortcode for inserting into a new page, post or sidebar (via a text widget). Contact form 7 default appearance set to separate page site:
Appearance: Standard WordPress Contact Form
If you just want to view, check or change, that is, add additional fields to it, then click the "Edit" item. Screen above.
The Edit Contact Form page opens. The plugin is in Russian and therefore it will be very easy for you to figure out what's what. Form Template tab. You can modify the form template to suit your needs.
For example, to add a file upload field to a form template, you need to: Mark the place to insert the tag with the mouse (best after the message) and click the corresponding "file" tab. With this feature, you can allow users to upload their files through your form and then an email will be sent to you with file attachments:
Edit contact form. File tab
A window will open - Form Tag Generator: file:
To attach a file uploaded to the mail, you need to insert the tag ()
Contact Form 7 applies default limits for file type and file size. When you don't set your options, the default file extensions are: jpg, jpeg, png, gif, pdf, doc, docx, ppt, pptx, odt, avi, ogg, m4a, mov, mp3, mp4, mpg, wav, and wmv. A allowable size file is 1 MB (1048576 bytes). Click the "Insert Tag" button:
File tag inserted in form template
Where marked with the mouse cursor there and an additional tag will appear. If you pasted in the wrong place, then just copy it and place it in the right place. In the same way, add the necessary tags to your form. Be sure to click the blue "Save" button after adding additional tags. And this is how the button for attaching a file to a letter will look like, after the message field:
Select file button in contact form
If you do everything right, then you will not have problems with additional fields.
Also check the Mail, Form Submission Notifications and Additional settings. In my opinion there is no need to change anything. If only in Additional settings you can specify the parameter - only for subscribers - subscribers_only: true . For detailed information there will be a link to the advanced options settings page.
And now, friends, we need to place the prepared contact form on a separate, new page or sidebar of a web resource. This is done easily.
We place the contact form on a separate page of the site / blog
After all the settings and saving the form, copy the shortcode on the Contact Forms or Edit Contact Form page. After that, create a new page - section Pages - Add New. Enter the name of the page, for example "Contacts". Switch the post editor to "Text" mode and paste the shortcode into the post field:
New page with contact form
If you have a new page automatically added to the menu, then set "Order" 1, 2 or 3 (whatever the account in the menu, the Contact page will be displayed). Click the "Publish" button. Everything. Ready. You can also add a page to the menu manually. Now you have a form for contacting the author of the blog / site.
In the same way, a contact form is added to the sidebar, footer or in the text of the article. Copy the shortcode and paste it into your posts or text widget content. Know that at any time you can edit the form or create a new one with different tags/fields.
Are you receiving spam through Contact Form 7?
There is protection. Spammers affect everything, your contact forms are no exception. Before you get spammed, protect your contact forms with Contact Form 7's powerful anti-spam features.
Contact Form 7 supports spam filtering with Akismet. Intelligent reCAPTCHA blocks annoying spam bots. Using the blacklist of comments, you can also block messages containing certain keywords or sent from specific IP addresses.
Click "Integration". Google reCAPTCHA protects you from spam and other automated abuse. With the reCAPTCHA Contact Form 7 integration module, you can block the form submission by spam bots.
Google reCAPTCHA v3 integration: spam protection
Plugin integration with other recaptcha services
Trample Setup Integration, and then follow the link to get ReCaptcha API keys:
reCAPTCHA is Google service
To start using reCAPTCHA, you first need to register your WordPress site. reCAPTCHA is a Google service, so to use it you need Google account. Sign in to Google using account and follow the link https://www.google.com/recaptcha/admin. You will see a simple registration form like this:
Register a WordPress site. Goodle reCAPTCHA
Specify a title. Select reCAPTCHA v3 (reCAPTCHA v3 does not require the CAPTCHA widget ("I'm not a robot" checkbox used in reCAPTCHA v2)) and enter the site's domain in the Domains field. After registering a site, you will receive a site key and a secret key. Enter them (screenshot above) and save the settings. That's all. Your contact form is now using the reCAPTCHA score to check if the message was sent from a human or a spam bot.
If you decide to install Contact Form 7, then I advise you to install the Contact Form 7 Style addon in addition to it. It will allow you to edit the appearance of your form. You can not only choose one of the ready-made templates, but also create your own unique design. Want to change your look? Then the continuation is especially for you, connoisseurs of beauty.
Contact Form Appearance - Contact Form 7 Style
Styles for contact forms 7
The Contact Form 7 Style Plugin is an addon for Contact Form 7 that needs to be installed on your WordPress site. Supports custom styles that can be easily managed through the admin panel. There are also predefined templates that can be activated in the contact form settings 7. In the settings of the main plugin will appear new inset- Contact Form 7 Style Template. Setting appearance:
Ready-made templates for the form
Example, I changed the standard external to this pretty one:
Appearance of the contact form
Don't forget that you can set your own custom style options:
The plugin supports custom styles that can be managed through the admin panel
In conclusion:
Sending emails from Contact Form 7 works seamlessly for most people. But it turns out not for everyone. Even though the plugin successfully sends millions of emails every day, there are many issues that can delay or stop emails, both on the sending and receiving side of a typical Email.
Why is Contact Form 7 not working (not sending emails)?
- Your hosting issues It is important to note that sending and receiving emails is highly dependent on the server hosting your WordPress site;
- Make sure you are using the correct return email address;
- Your email may be considered spam;
- Plugins or theme conflict with Contact Form 7;
- Javascript conflicts.
If you can't send emails from this plugin, it's likely that you can't send emails from WordPress in general. In which case, gentlemen, you can get to frequently asked questions about the operation of the plugin on the page https://contactform7.com/faq/.
Or on the support forumhttps://wordpress.org/support/plugin/contact-form-7/. English language it doesn't matter, everything will be clear with the translation of your favorite browser.
That's all for me. Looks like he didn't forget anything. All the best. Good luck friends.
P.S. It turns out that editing old posts (information for readers should always be up to date) takes as much time as writing new instruction. Horror!
(function(w, d, n, s, t) ( w[n] = w[n] || ; w[n].push(function() ( Ya.Context.AdvManager.render(( blockId: "RA -292864-4", renderTo: "yandex_rtb_R-A-292864-4", async: true )); )); t = d.getElementsByTagName("script"); s = d.createElement("script"); s .type = "text/javascript"; s.src = "//an.yandex.ru/system/context.js"; s.async = true; t.parentNode.insertBefore(s, t); ))(this , this.document, "yandexContextAsyncCallbacks");Almost every blog created on the WordPress platform uses Contact Form 7. It is very popular in its field, especially since developers are constantly developing it. It has a number of advantages over other sub-modules, in particular, ease of settings, localization, adding and managing all possible form elements.
Let's take a look at the plugin today. Contact Form 7 Style, which is designed to visually create styles for Contact Form 7. Initially, in addition to its design, the plugin has ready styles template forms. Where you simply select a template option and check the box for which form you created earlier to apply this design. Let's take a look at this.
Configuring the Contact Form 7 Style Plugin
We skip the part of the explanation and the creation of forms, since the topic of the review is aimed specifically at styling the form. For this, as mentioned above, we will use a special plugin. After installing it, the section " Contact Styles» with five subsections.
In the first section " All styles» is already ready-made templates form styles, and the styles you created will be saved immediately. When you hover over one of the templates, additional control buttons appear: Edit, Properties, Delete. When you click on the "Properties" button, all available contact forms available on your site will be displayed. Where you just need to check the box opposite desired shape and save changes.
In chapter " Add New» You can make a template for the form yourself with your own styles, as shown in the video above. Switching between form elements and visually style all fields both in the normal state and in the hover effect.
In this article, we will take a closer look at the ContactForm 7 configuration. This is a plugin for the popular WordPress settings, which is used to create and promote websites on the Internet. The software allows you to create and configure a feedback form.
A little about WordPress
WordPress is one of the most widely used content and development tools today. information resources. This software product was originally focused only on creating fairly simple blogs. Then professionals supplemented the functionality of this system. This made it possible to create other Internet resources using WordPress.
WordPress: Disadvantages and Advantages
The advantages of this platform are as follows:
- simplicity and openness of source codes;
— a large number of background information;
– the possibility of developing a thematic resource of any degree of complexity in the shortest possible time;
- high performance without the need for additional software settings.
This system also has its drawbacks:
- sites created with WordPress will not be able to cope with such a load;
- when installing additional mini-programs, there is a decrease in the speed of the Internet resource;
What are WordPress plugins
The WordPress content management system has very modest basic functionality. It is only enough to develop the most simple sites and blogs. In order to slightly improve the situation related to the functionality of this software platform and to add some flexibility to it, developers have to add various mini-programs, which are called plug-ins in professional jargon. Just one of these plugins is ContactForm7. Setting up this plugin allows you to create a feedback form with an extended level of functionality on a specific page of the content management system.
Contact Form 7 Specialization
As noted earlier, the main task of Contact Form 7 is to create feedback between the administrator of the Internet resource and the site visitor. Editing a template, setting up mail, sending various files - this is not all the possibilities that this mini-program provides. The load on the hardware resources of the site in this case will be relatively small. The presence of this program can lead to a significant decrease in the performance of a blog or website.
Contact Form 7 Plugin Installation Order
There are three ways to install plugins on WordPress. The first method involves downloading ZIP archive from the global web and uploading it to the corresponding directory of the Internet resource. You can also use FTP clients of various kinds for this purpose. Another option is to upload the firmware using the blog, site, or portal admin panel. Of the three options for installing plugins, the last one is the most secure. Program code in this case, it is downloaded from the official site. In this case, the file will definitely not contain dangerous fragments and malicious objects. The procedure for installing the plugin in this case will be as follows. First of all, you need to go to the WordPress admin panel. Then you need to move to the "Plugins" section. In the window that opens, select "Add New". In the search bar, you must enter the name of the Contact Form 7 plugin. After that, you need to hover your mouse over the "Search" button and make a single click with the mouse. After that, the software search operation should start. When it is completed, a list of found plugins will be displayed on the screen. In this list, you need to find the plugin that you need and click on the "Install" inscription located opposite it. The content management system will then automatically download and install this plugin. The next step is to activate the installed software. To do this, go to the "Plugins" tab and find Contact Form 7 in the list. Next to it should be the inscription "Activate". You need to click on it with the mouse once. Now we update the administrative panel of the content management system and find Contact Form 7 among the items. That's the whole secret of installing the popular Contact Form 7 plugin.
Contact Form 7: Setup Algorithm
The Contact Form 7 setup consists of the following items:
- creating a new platform or editing the old one created when installing the plugin. Experience shows that in this case it is better to use the option to create new form.
— choice of language of the form and name.
- change the configuration of the form template.
— save the changes made.
- creating a new page with the previously received code. You need to publish a new page.
At the final stage, you need to go to the site and check the correct operation of the created interface element of the Internet resource.
Create a new form
This plugin immediately after activation by default creates a form for asking questions from visitors to the blog or site. Of course, it can simply be customized and edited properly. However, it will be much easier to delete it and create a new one with full set all necessary functions. To do this, you must perform the following sequence of actions. You need to go to the menu of this plugin and select the "Forms" item. In the window that opens, check the box next to the “Contact Form” item. Above it, in the "Actions" drop-down list, select the "Delete" item. As a result, you should be prompted to confirm the operation being performed. Confirm the deletion of the form and click on the "Yes" button. At the next stage, you need to select the "Create New" menu item in the WordPress administration panel, click ContactForm 7. As a result, a window will open in which you need to select the interface language of the future platform - "Russian" in the drop-down list. Then you need to click on the "Create" button. As a result, the initial code of the new feedback form will be generated. Then you should perform an operation such as setting up Contact Form 7.
Set the name of the form
After performing all the previously described actions, a window for entering the name of the form will appear. Setting up this interface element begins with this simple operation. It is best to name the form based on search engine optimization. In this case, the best options would be “Ask a question to the site administrator” or “Feedback form”. After you decide on the name of this interface element, you will need to type it in the corresponding field of the query window.
Contact Form 7: Editing a Template
There are four more tabs in the window with the name of the created form. The first one is the Template tab. Here, by default, only five elements are formed.
- place of typing the name of the visitor of the resource;
- address set field e-mail box user;
- a field for setting the topic of the question;
- a field for writing the message itself;
- a button labeled "Submit".
If necessary, the text in the field can be edited, and other interface elements can be added to it. To do this, it will be enough just to select the code of the text element and copy it using context menu to another field. On the right side there is a drop-down list of options. Here you need to select the item you are interested in. After that, the required code should appear next to the drop-down list. You need to copy and paste it in place of the theme code. You can choose the name of the element at your discretion.
Customizing Contact Form 7
In the same place, you can change the length of the ContactForm 7 input field. You can adjust the width of any text field as follows. Suppose you need to increase the number of characters in the visitor's name to 55. There are only 40 by default. To do this, add the numbers 60/55 at the end of the code. The result should be a code. After all the changes made are saved, the length of this field will be 60, and maximum amount characters will be 55. You can also change the size of the message text field in the same way. In this case, you need to change the code of this element as follows - . 40 in this case is the number of letters in a line, 30 is the total number of lines in this element of the ContactForm 7 interface. To customize the appearance of the form itself, you need to select the values of the parameters of each individual element. For this reason, in the skin of each element, it is recommended to specify specific values for each parameter given in this section.
Other form tabs
As noted earlier, the first tab is called Form Template. It is followed by the "Letter" tab. It specifies the parameters of the place to which mail will be sent from this Internet resource. The text of the message issued by the system in case of successful sending of the letter is generated on the "Notification" tab. There is also the possibility of preparing a message in case you can not contact the site administrator. Last tab in ContactForm 7 is "Advanced Settings". This tab contains parameters that are rarely used in practice. So, for example, with its help, you can set up tracking of text entered by the user using Yandex tools - metrics.
Fields that can be added using the Contact Form 7 Plugin
Customizing ContactForm 7 makes it possible to add the following interface elements to the feedback form:
— text field is a universal element. Any set of characters can be entered into it.
- E-Mail - used to enter e-mail;
- URL - a field for typing the address of a web page;
- phone number - allows you to enter a phone number in international format;
- "Number (spinbox)" - allows you to create an input field of any integer value;
- "Number (slider)" - adds a slider to the form, with which you can select a numeric value from a certain range;
- "Date" - creates a special input field in which you can specify the required date. If this interface element is activated, a calendar will be displayed below, where you can immediately select a date;
- "Text field" - is intended for typing the text part of the message;
- "Drop-down menu" - allows you to select the desired parameter from a fixed set;
- "Check Boxes" - designed to select one or more values from the list;
Radio Buttons - almost identical to the previous element, the only difference is that in this case only one correct option can be selected. There can be more than one valid value in the "Check Boxes" element;
- "Acceptance" - makes it possible to add only one checkbox to the created form. This element is usually used to get acquainted with some conditions. Without their acceptance, further sending of the letter will be impossible;
- "Menu" - allows you to create in the interface special section which provides protection mailbox from spam. Before sending in this case, you just need to give the correct answer to the question;
- "CAPTCHA" is another protection option. When this element is selected, a special section will be added to the form, in which a picture with symbols and an additional field will be displayed;
- "Sending a file" - this item allows you to add a file with comments to the text of the letter;
- "Send button" - allows you to add the corresponding element.
After you set all the required values, you need to save the form. To do this, in the plugin editing window, go up to its upper part. Here is the "Save" button.
Due to the fact that the Contact Form 7 plugin is very widely used by WordPress users, it became necessary to write detailed guide by him. This article covers Contact Form 7 settings, implementation methods, and answers to frequently asked questions about using the plugin.
In order to add the Contact Form 7 to the right place, you need to copy the embed code to the section of the page or post. This is done very simply: 
Each contact form has its own short tag, such as [ contact-form-7 id="71" title="(!LANG:Contact Form 1"] . Чтобы вставить контактную форму в свой пост, скопируйте шорткод и вставьте его в содержание поста.!}
If your form doesn't render and throws a contact-form-7 404 "Not Found" error
The code is an indication that the contact form given by the shortcode cannot be found. Make sure you are using the correct embed code. Try to paste again by copying desired code again.
How do I add or edit a field to change the appearance of a Contact Form 7?
To add a field, add a tag to form text field, completely change or edit the form, you need to go to the settings and set the parameters you need.

Each tag has a strict syntax, supporting multiple variants. Learning the syntax can be difficult, but you can easily make a custom tag with a tag generator instead. Click the tag button and after formatting, click " Create Tag. You can also read about it in a separate article.
Internal settings of the Contact Form 7.
Each form has the following settings:
- Form template customization;
- Letter;
- Notifications when submitting a form.
In these settings, you can perform the necessary manipulations with the input form tags, customize the form of the letter that the user will receive, notification settings when sending letters.
Having produced everything Contact Form 7 internal settings you will receive an edited embed code that will be embedded by you in desired area on the site.
How do I specify or change the subject of a message?
Just change the "Subject" field in the "Letter" section. To do this, go to the desired settings menu and change the standard tag to your name.

How to install autoresponder for Contact Form 7?
In order to set an autoresponder that will work after the first letter has been successfully sent, you need to go to the "Letter" section, go down the settings and check the box next to "Letter 2". After the form appears, customize according to the criteria you need, by analogy with "Letter 1".

Mail that comes through the Contact Form 7 plugin's contact form shows "WordPress" as the sender's name. How to change it?
The sender address consists of the sender's email address and the sender's alias. WordPress assigns "WordPress" as the sender name if the setting is not formatted. If you want to use a different name so that "WordPress" no longer appears as the sender's name, you must explicitly specify the sender's name in the "From:" field in the "mail" section:

Is it possible to place a contact form outside of a post?
Yes. You can place a contact form in a text widget. we have already considered. All you need is to create a widget and put the shortcode of the form you need into it.
How to embed a contact form in a template file?
You can embed a shortcode directly into the template theme by using the do_shortcode() function. This can be done with this line:
Error message "Could not send message." Contact Form is not sending emails. What's wrong?
There are usually several reasons for such a message:
- The first actual reason may be the mail server, with a ban on sending the mail form. In this case, the error message will be surrounded by a red line. Contact the server administrator for a solution.
- Second possible cause is that the submit form is under suspicion of spam. In this case, the error message will be surrounded by an orange line.
The response message is "Your message was sent successfully", but the email does not reach.
If a message is shown in a green border, this means that PHP function to send mail is definitely completed successfully. So if you can't get mail, it's very possible that the mail has been stolen or deleted.
If you can check your log mail server, this may give you some clues. A spam filter often causes this kind of problem.
The contact form redirects to a 404 error page upon submission.
This issue is caused by a combination of two configuration errors. First, AJAX JavaScript doesn't work on your contact form. Because of this issue, your contact form is forced to redirect after submitting. Secondly, your contact form uses unavailable words in the names of the input fields. This question confuses WordPress, resulting in 404s (" not found") errors.
The contact form behaves strangely in some browsers.
This can be caused due to invalid HTML, CSS, Javascript. Please test your form page with validators or debugging tools.
Useful tools:
- firebug- Firefox extension. Good for JavaScript debugging.
- W3C Markup Validation Service - HTML validation service.
- W3C CSS Validation Service - CSS Validation Service.
How to use the contact form in the desired language and not in English.
Contact Form 7 has been translated into many languages. See if there is a language configuration file for your site then and contact form 7 plugin will use this language.
Contact Form 7 set parameter WordPress language. After you change the WordPress language settings, Contact Form 7 also changes.
CAPTCHA doesn't work, image doesn't appear.
To use CAPTCHA, you need to have the GD and FreeType libraries installed on your server. Also, make sure the temporary folder for CAPTCHA is set to writable.
The CAPTCHA text input field works on Internet Explorer, but not Firefox. Unable to enter code.
This is good known issue caused by tag abuse
Enter the code:
[captchac your - captcha] < strong >< label>< / strong >Enter the code : [ captchar your - captcha ]< strong >< /label>< / strong > |
This will not work correctly:
Enter the code: